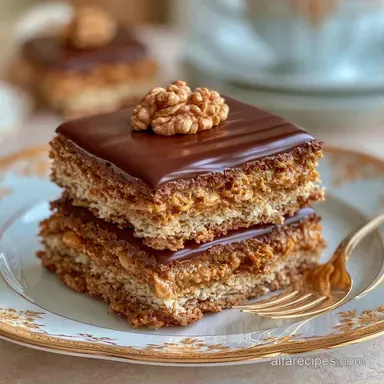
No Bake Chocolate Peanut Butter Bars
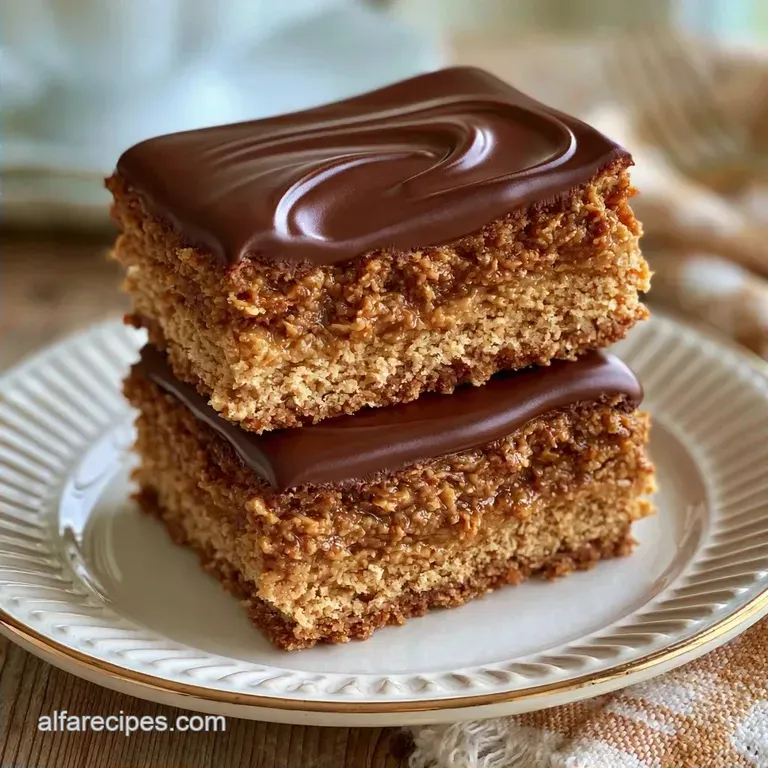
- Time: 15 min active + 1 hr chilling
- Flavor/Texture Hook: Salty, dense base with a snapping chocolate top
- Perfect for: Quick dessert prep or potlucks
No Bake Chocolate Peanut Butter Bars
Forget the idea that you need corn syrup or a stovetop candy thermometer to get a fudge like consistency. Most people think these bars need a long simmer to set, but that often leads to a grainy texture when the sugar recrystallizes.
The real trick is the fat to sugar ratio. By using powdered sugar and melted butter, we create a stable bind that holds the graham cracker crumbs together. It's about precision, not heat.
You can expect a dense, rich treat that tastes like a giant peanut butter cup. These No Bake Chocolate Peanut Butter Bars don't require an oven, meaning no waiting for the kitchen to cool down before you can eat.
Why This Recipe Works
- The Sugar Bind: Powdered sugar is milled much finer than granulated sugar. This allows it to dissolve instantly into the fats, creating a smooth paste instead of a gritty base.
- Fat Stability: Combining butter and peanut butter ensures the base stays firm at room temperature. Without the butter, the peanut butter can feel too oily or soft.
- The Chocolate Buffer: Adding a small amount of peanut butter to the melted chocolate prevents the top layer from becoming too brittle. This means the chocolate bends slightly rather than cracking into shards when you bite in.
| Method | Time | Texture | Best For |
|---|---|---|---|
| No Bake | 15 min active | Fudgy and dense | Quick prep, rich flavor |
| Baked Cookie | 30 min active | Chewy and airy | Classic snacks, lunchboxes |
If you enjoy this kind of nut heavy profile, you might also like the savory side of things with a Thai peanut sauce for appetizers.
Ingredient Deep Dive
The success of this recipe depends on the interaction between the lipids in the butter and the starches in the crumbs. According to King Arthur Baking, the fine particles in graham cracker crumbs act as a structural scaffold, absorbing excess moisture.
| Ingredient | What It Does | Best Swap |
|---|---|---|
| Graham Cracker Crumbs | Provides structure and grit | Crushed digestive biscuits |
| Powdered Sugar | Binds ingredients without graininess | Finely ground caster sugar |
| Creamy Peanut Butter | Adds fat and primary flavor | Almond butter (adds nuttiness) |
| Semi Sweet Chips | Creates the firm top layer | Dark chocolate (more bitter) |
The Base Ingredients
- 1/2 cup (115g) unsalted butter, melted Why this? Provides the necessary fat for a clean set
- 1 1/2 cups (180g) graham cracker crumbs Why this? Adds a toasted, malty backbone
- 2 cups (240g) powdered sugar Why this? Ensures a smooth, non gritty texture
- 1 cup (250g) creamy peanut butter Why this? The main flavor and binder
- 1 tsp (5ml) vanilla extract Why this? Cuts through the heavy fat
The Topping Ingredients
- 1 1/2 cups (255g) semi sweet chocolate chips Why this? Balances the salt of the peanut butter
- 2 tbsp (32g) creamy peanut butter Why this? Keeps the chocolate from cracking
Essential Tools for Precision
While you don't need professional equipment, having the right tools simplifies the process. Stick to an 8x8 inch baking pan; using a larger one will result in layers that are too thin, throwing off the balance of chocolate and peanut butter.
For the topping, a microwave safe glass bowl is essential. Because glass distributes heat more consistently than plastic, you're less likely to burn the chocolate. I also suggest using a sharp chef's knife for the final cuts. A dull blade will cause the chocolate layer to crack rather than producing neat squares.
Parchment paper is your most critical asset here. Be sure to use the "sling" technique by letting the paper hang over two sides of the pan. This allows you to lift the whole block out easily, which is much more dependable than attempting to scoop the bars with a spatula.
The Cooking Process
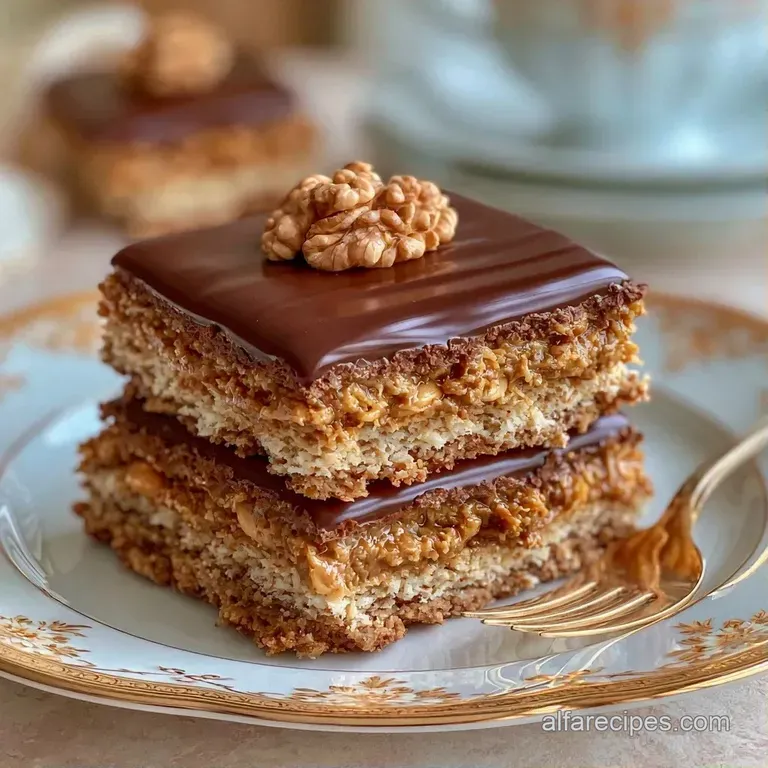
Preparing the Pan
Line your 8x8 inch baking pan with parchment paper. Make sure the paper hangs over two opposite sides by at least two inches. This creates a handle to lift the bars out later.
Mixing the Fudgy Base
In a large bowl, stir together the melted butter, 1 cup of peanut butter, powdered sugar, and vanilla extract. Mix until the ingredients form a uniform paste.
Gradually fold in the graham cracker crumbs. Stir until the mixture forms a thick dough that no longer sticks to the sides of the bowl.
Press the peanut butter mixture firmly into the bottom of the pan. Use the back of a spoon or your palms to push it down until the surface is completely flat. This prevents air pockets in the chocolate layer.
Melting the Chocolate Topping
Combine semi sweet chocolate chips and 2 tablespoons of peanut butter in your glass bowl. Heat in 30 second bursts in the microwave. Stir vigorously between every burst.
Continue this process until the chocolate is smooth and glossy. Avoid overheating, as this can cause the chocolate to separate and become oily.
Pour the melted chocolate over the peanut butter base. Use a spatula to spread it evenly to the edges.
Setting and Slicing
Place the pan in the refrigerator. Chill for at least 1 hour until the chocolate is firm and snaps when touched.
Lift the block out of the pan using the parchment sling. Slice into 16 equal squares using a sharp knife.
How to Fix Common Problems
Troubleshooting a Dry Base
If the crust feels too dry or crumbles when pressed, your peanut butter might be overly thick, which often happens with natural brands that separate. Stir in 1 tablespoon of melted butter to improve the moisture level.
Avoiding Oil Separation in Chocolate
Chocolate can separate if it overheats, resulting in a layer of oil on the surface. To resolve this, quickly whisk in a teaspoon of peanut butter or a small splash of vegetable oil to re-emulsify the fats.
How to Prevent Cracked Toppings
If the chocolate layer shatters when sliced, it is usually due to a lack of fat or being chilled for too long. For your next batch, ensure those 2 tablespoons of peanut butter are included in the topping. To fix the bars you have now, leave them at room temperature for 10 minutes before cutting.
| Problem | Root Cause | Solution |
|---|---|---|
| Base is too oily | Excess butter or low-quality PB | Add 2 tbsp more graham crumbs |
| Chocolate is grainy | Overheated in microwave | Stir in 1 tsp peanut butter |
| Bars won't set | Not chilled long enough | Refrigerate for an extra 30 mins |
Chef's Note: To achieve the cleanest edges, warm your knife under hot water and dry it between each cut. The heat helps the blade glide through the chocolate without causing cracks.
Flavor Variations to Try
For a more sophisticated taste, replace the semi sweet chips with 70% dark chocolate. This reduces the sugar level and lets the saltiness of the peanut butter stand out.
To make a nut-free version, substitute sunflower seed butter. It has a comparable fat content and pairs well with graham crackers, though the flavor is slightly more earthy.
For a vegan alternative, use dairy-free chocolate chips and a plant based butter substitute. These No Bake Chocolate Peanut Butter Bars stay just as firm with vegan swaps since the structure comes from the powdered sugar and peanut butter instead of dairy proteins.
If you want another no-bake option, my no bake cheesecake cups are a fantastic choice for party platters.
Storage & Reheating
Keep your bars in an airtight container inside the refrigerator, where they will remain fresh and firm for 7 days. Avoid leaving them on the counter in a warm room, as the peanut butter base could soften too much.
For longer storage, these bars freeze beautifully. Wrap each piece individually in parchment paper and transfer to a freezer bag; they will stay good for 3 months. When ready to eat, let them thaw in the fridge for an hour or enjoy them straight from the freezer for a denser, fudgy consistency.
To minimize waste, save the peanut butter residue remaining in your mixing bowl. Simply scrape it out and stir it into your morning oatmeal or use it as a dip for apple slices.
What to Serve This With
Since these bars are quite indulgent, they are best paired with drinks that provide a touch of bitterness or acidity to refresh the palate. A bold black coffee or a chilled glass of skim milk are excellent options.
If you're arranging a dessert platter, incorporate some sliced strawberries or fresh raspberries. The tartness of the fruit helps balance the richness of the peanut butter and chocolate.
Precision Checkpoints
- Butter weight: Use exactly 115g to prevent the base from leaking oil.
- Microwave timing: Stick to 30 second intervals to ensure the chocolate doesn't scorch.
- Minimum chill: 60 minutes is the absolute minimum for the chocolate to achieve a proper snap.
Decision Shortcut
- For a firmer set: Refrigerate for 2 hours instead of 1.
- For a saltier kick: Top the chocolate with flaky sea salt before chilling.
- For a nut free version: Substitute sunflower butter for peanut butter throughout.
Recipe FAQs
Are these bars a good choice for beginner bakers?
Yes, they are perfect. There is no oven involved and the steps are simple mixing and chilling. If you enjoy these simple assembly steps, you can apply similar layering logic to a graduation sheet cake.
Would these bars work for Valentine's Day?
Yes, they make a great treat. The combination of chocolate and peanut butter is a classic crowd pleaser. They look professional when sliced into neat squares and can be made a day in advance.
How to get clean slices?
Use a sharp knife and wipe it between cuts. This prevents the chocolate layer from dragging into the peanut butter base. Slicing them while chilled ensures the edges stay crisp.
Is it true you must use a double boiler for the chocolate?
No, and here's why. A microwave safe glass bowl works just as well. Heat the chocolate and peanut butter in 30-second bursts, stirring in between to ensure a smooth, glossy finish.
Where should these be stored to stay firm?
Keep them chilled. A cold environment prevents the peanut butter base from softening. For longer storage, wrap them individually and freeze them for up to 3 months.
No Bake Chocolate Peanut Butter Bars