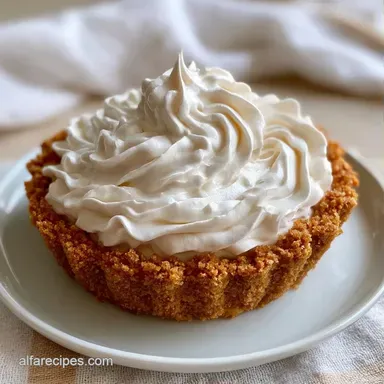
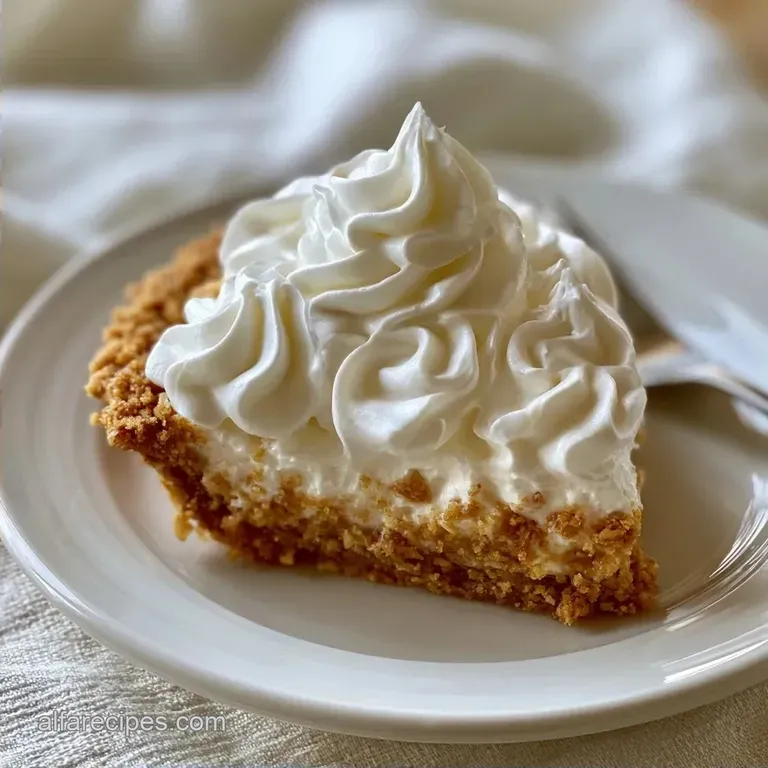
Cloud-Like Homemade Whipped Cream Pie
- Time: 15 min active + 2 hours 10 mins chilling/baking
- Flavor/Texture Hook: Toasted, buttery crust with a cloud like filling
- Perfect for: Summer potlucks or a quick, impressive dessert
The smell of buttery graham crackers browning in the oven is the best part of this process. It's a warm, sugary aroma that fills the kitchen and tells you the base is ready. I remember the first time I tried a cream pie without a stabilizer, and it turned into a puddle on the plate within ten minutes.
You don't need a professional kitchen to get this right. This Homemade Whipped Cream Pie relies on a few precise temperature controls and a bit of patience. It's a high reward dessert that feels fancy but doesn't require hours of labor.
We're focusing on a stabilized filling today. This means your slices will hold their shape and stay fluffy from the first cut to the last bite. It's the difference between a dessert that looks like a cloud and one that looks like a melted milkshake.
Homemade Whipped Cream Pie Success
The trick to a stable pie is the cream cheese. Plain whipped cream is just air bubbles trapped in fat, which eventually collapse. By beating softened cream cheese into the mix, we create a structural scaffold. This keeps the filling firm without making it taste like a cheesecake.
Cold Ingredients: Using ice cold heavy cream ensures the fat globules stay solid. This allows them to trap air more efficiently, resulting in a fluffier homemade whipped cream pie.
Room Temp Cheese: Softened cream cheese prevents lumps. If it's too cold, you'll have tiny white beads in your filling instead of a smooth, glossy texture.
Depending on your preference, you can choose between a baked or no bake crust. While no bake is faster, the oven version adds a toasted depth that cuts through the richness of the cream.
| Crust Method | Prep Time | Texture | Best For |
|---|---|---|---|
| Baked (This Recipe) | 10 mins | Toasted and crisp | Long term stability |
| No Bake | 5 mins | Dense and buttery | Last minute desserts |
Quick Recipe Specifications
To get this right, you need to follow a few numeric checkpoints. First, ensure your oven is exactly 350°F (175°C) for the crust. Second, bake the crust for exactly 8-10 minutes. Third, let the pie chill for a full 2 hours before adding the final topping.
This Homemade Whipped Cream Pie takes about 15 minutes of active work. The rest of the time is spent letting the crust cool and the filling set. If you rush the chilling process, the filling might soften too much when you slice it.
Essential Building Blocks
Every ingredient here has a specific job. The salt isn't just for flavor, it actually helps balance the heavy sugar in the powdered sugar and cream.
| Ingredient | What It Does | Best Swap |
|---|---|---|
| Heavy Whipping Cream | Provides the air and structure | Full fat coconut cream (thickened) |
| Cream Cheese | Stabilizes the air bubbles | Mascarpone (richer, slightly sweeter) |
| Graham Cracker Crumbs | Creates a sturdy, toasted base | Digestive biscuits or Biscoff crumbs |
| Vanilla Bean Paste | Adds deep, floral flavor | Pure vanilla extract |
Using vanilla bean paste gives you those tiny black specks and a more concentrated taste than liquid extract. It makes the vanilla whipped cream pie crust and filling feel more authentic.
Necessary Kitchen Tools
You don't need much, but a few tools make a difference. A stand mixer such as a KitchenAid is helpful for the heavy whipping, but a hand mixer works just as well.
- 9 inch pie dish (glass or ceramic)
- Electric mixer with whisk attachment
- Medium mixing bowl (chilled if possible)
- Rubber spatula for smoothing the top
- Measuring cups and spoons
Step-by-step Assembly

Phase 1: Constructing the Shattering Crust
- Mix 1.5 cups graham cracker crumbs, 1/3 cup melted unsalted butter, 2 tbsp granulated sugar, and 1 tsp vanilla extract. Mix until it resembles wet sand.
- Press the mixture firmly into the bottom and sides of your 9 inch dish. Note: Use the bottom of a measuring cup to get a flat base.
- Bake at 350°F (175°C) for 8-10 mins until toasted and fragrant. Let it cool completely.
Phase 2: Whipping the Stable Filling
- Beat 4 oz softened cream cheese and 1/2 cup powdered sugar. Mix until smooth and silky.
- Pour in 2 cups ice cold heavy cream and 1 tsp vanilla bean paste on low speed. Note: Low speed prevents splashing.
- Increase to medium high and whip until stiff peaks form. Stop immediately once the peaks stand straight up.
- Spread the stabilized whipped cream pie filling into the cooled crust and smooth with a spatula.
- Chill in the refrigerator for 2 hours.
Phase 3: Finishing with the Cloud Topping
- Whip 1 cup ice cold heavy cream, 3 tbsp powdered sugar, and 1/2 tsp vanilla extract until stiff peaks form.
- Pipe or spread the homemade whipped cream pie topping over the chilled pie.
Avoiding Texture Disasters
The most common issue with this Homemade Whipped Cream Pie is over whipping. If you go too far, the fat separates from the liquid, and you've essentially made cinnamon flavored butter.
Troubleshooting Common Issues
| Issue | Solution |
|---|---|
| Why Your Filling is Grainy | This usually happens if the cream cheese wasn't soft enough when you started. The mixer can't fully incorporate the cold clumps, leaving a gritty texture. |
| Why Your Pie is Sagging | If the pie doesn't hold its shape, it's usually because the cream wasn't cold enough. Cold fat holds air better, creating a stronger structure. |
| Why the Crust is Soggy | Adding filling to a hot crust melts the butter and ruins the crunch. Always wait until the crust is room temperature. |
Flavor Variations
If you want to change the profile, start with the filling. For a chocolate version, fold in 1/2 cup of mini chocolate chips after the stiff peaks form.
Decision Shortcut:
- If you want a tart contrast: Add a layer of fresh raspberries to the bottom.
- If you want it richer: Swap the graham crackers for Oreo crumbs.
- If you want it lighter: Use a 1:1 sugar substitute for the powdered sugar.
For those who love citrus, this pairs well with a Classic Key Lime Pie if you're serving a dessert platter. If you prefer something with a denser, Southern feel, try a Chess Pie alongside this one.
2 Diet Swaps
- gluten-free: Use GF certified graham crackers. The texture remains identical.
- dairy-free: Use chilled coconut cream and vegan cream cheese. Note: This will be slightly softer and may need an extra hour to chill.
Storage and Preservation
Store your Homemade Whipped Cream Pie in the refrigerator, covered with plastic wrap or a pie dome. It stays fresh for up to 3 days. After that, the crust starts to absorb moisture from the filling and loses its snap.
For freezing, I recommend freezing the baked crust separately. Wrap it tightly in foil and keep it for 3 months. Don't freeze the finished pie, as the whipped cream structure breaks down during thawing, leaving you with a watery mess.
To reduce waste, save any leftover graham cracker crumbs. You can mix them with a bit of melted butter and sugar to make a quick crumble topping for apples or pears.
The Best Pairings
Because this pie is rich and creamy, it needs something to cut through the fat. Fresh berries are the obvious choice, but a tart coulis or a drizzle of salted caramel also works.
If you're looking for a savory balance before the dessert, a Cream Cheese Chicken dinner provides a nice thematic link to the cream cheese in the pie.
Debunking Cream Pie Myths
Myth: Adding more sugar makes the cream more stable. Truth: Too much sugar actually weighs down the air bubbles. The stability comes from the fat and the cream cheese, not the sugar.
Myth: You must use a stand mixer for a fluffy result. Truth: A hand mixer or even a whisk (if you have strong arms) works. The key is the temperature of the cream, not the brand of the mixer.
Recipe FAQs
How to make a whipped cream pie?
Combine crumbs, butter, and sugar, then bake the crust at 350°F for 8-10 minutes. Once cooled, whip softened cream cheese with powdered sugar and ice-cold heavy cream until stiff peaks form, fill the crust, and chill for 2 hours before adding the final whipped cream topping.
How to make 3 ingredient whipped cream?
Beat ice-cold heavy cream, powdered sugar, and vanilla extract until stiff peaks form. If you enjoyed mastering this aeration technique here, see how the same principle works in our graduation cake.
How long will whipped cream stay on a pie?
Up to 3 days in the refrigerator. Keep the pie covered with plastic wrap or a pie dome to prevent it from absorbing fridge odors and to slow down the crust from absorbing moisture.
How to make quick homemade whipped cream?
Whip ice-cold heavy cream, powdered sugar, and vanilla extract on medium high speed. Monitor the peaks closely and stop immediately once they are stiff to prevent the cream from over mixing and turning into butter.
Why is my whipped cream pie filling grainy?
The cream cheese was likely not softened enough. When cream cheese is too cold, the mixer cannot fully incorporate it, which leaves small, gritty clumps in the final filling.
Can I freeze the finished pie?
No, the whipped cream structure will break down. Thawing the pie results in a watery mess, though you can freeze the baked crust separately for up to 3 months if wrapped tightly in foil.
Why is my pie filling sagging or not holding its shape?
The heavy cream used was not cold enough. Cold fat is essential for holding air bubbles, which creates the necessary structural integrity to keep the filling from collapsing.
Homemade Whipped Cream Pie