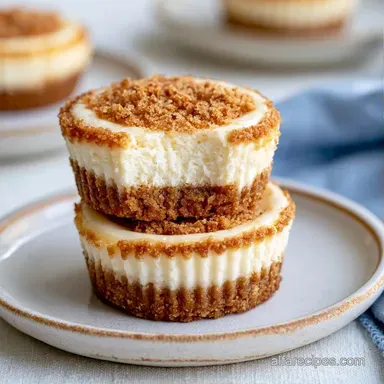
Classic No Bake Cheesecake Cups: Creamy and Tangy
- Time: 20 min active + 2 hours chilling
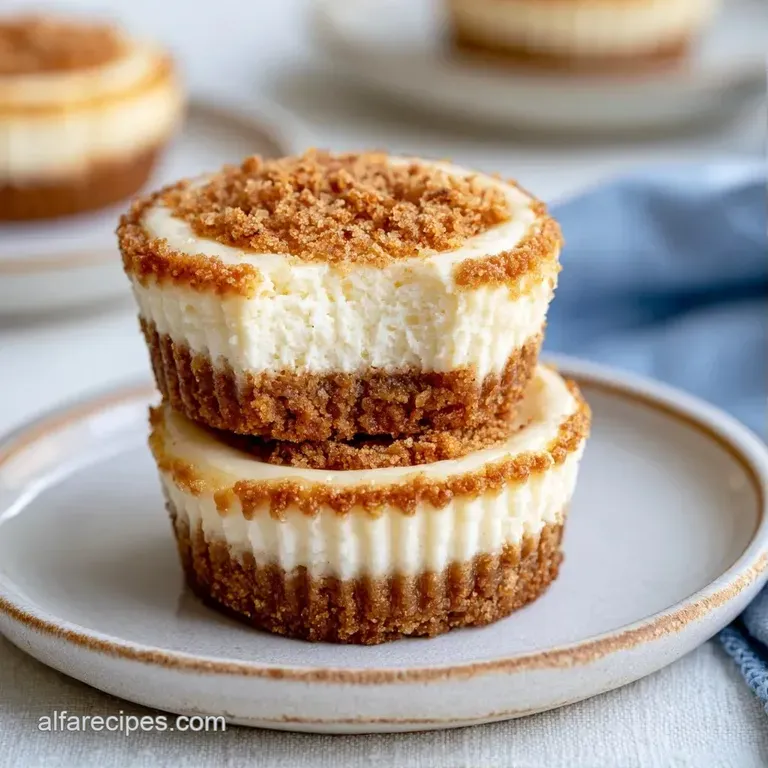
- Flavor/Texture Hook: Tangy cream cheese with a buttery, sandy crunch
- Perfect for: Graduation parties or beginner friendly dessert tables
Classic No Bake Cheesecake Cups
The sound of a hand mixer hitting high speed usually means things are about to get messy, but these, it's the sound of victory. I remember the first time I tried to skip the room temperature rule for the cream cheese. I ended up with a filling full of tiny, stubborn lumps that no amount of beating could fix.
It felt like trying to mix cement and frosting at the same time.
The real hero here is the cream cheese. It provides the structural fat and the signature tang that defines a cheesecake. If you try to swap it for ricotta or mascarpone, you lose that specific acidic bite and the stability needed for a no bake version.
The fat in the cream cheese creates a dense matrix that holds everything together once it hits the fridge.
You can expect a dessert that feels light but tastes rich. These Classic No Bake Cheesecake Cups are a breeze to assemble and look far more impressive than the effort suggests. Since we aren't baking, there's no risk of the top cracking or the edges overcooking.
Why These Cups Set
- Fat Stability: The saturated fats in cream cheese harden at cold temperatures, turning a soft cream into a firm mousse.
- Air Incorporation: Whipping the heavy cream creates tiny bubbles that act as a scaffold, keeping the filling from feeling like a heavy block of cheese.
- Sugar Absorption: Powdered sugar dissolves faster than granulated, ensuring a smooth texture without any gritty crystals.
| Method | Time | Texture | Best For |
|---|---|---|---|
| No Bake | 20 min active | Light and mousse like | Quick parties, hot weather |
| Baked | 1 hour active | Dense and custard like | Traditional holidays, rich feasts |
What Each Ingredient Does
| Ingredient | What It Does | Best Swap |
|---|---|---|
| Cream Cheese | Provides structure and tang | Full fat Neufchatel (slight tang difference) |
| Heavy Cream | Adds lift and airiness | Mascarpone (richer, denser result) |
| Graham Crumbs | Creates a crunchy base | Biscoff crumbs (caramel flavor) |
| Powdered Sugar | Sweetens without grit | Finely blended granulated sugar |
Gathering Your Essentials
For the base, you'll need 1.5 cups (180g) of graham cracker crumbs, 4 tbsp (57g) of melted unsalted butter, and 2 tbsp (25g) of granulated sugar. The butter acts as the glue here.
The filling requires 16 oz (450g) of cream cheese, softened to room temperature. Why this? Prevents lumps during mixing. You'll also need 0.5 cup (60g) of powdered sugar and 1 tsp (5ml) of pure vanilla extract.
Finally, get 1 cup (240ml) of cold heavy whipping cream. Why this? Cold fat traps air more efficiently. For the garnish, have some fresh berries and mint leaves ready to go.
Tools You'll Need
A hand mixer or stand mixer is essential for getting the air into the cream. You'll also need a medium mixing bowl for the cheese and a separate chilled bowl for the cream.
Use a rubber spatula for the folding process. A small flat bottomed glass or a spoon works best for pressing the crust into the 8 dessert cups. If you want a cleaner look, a piping bag is a great addition.
Step-by-step Assembly
Phase 1: Building the Foundation
- Combine graham cracker crumbs, melted butter, and sugar in a small bowl. Stir until the mixture resembles wet sand.
- Spoon roughly 2 tablespoons of the crust mixture into the bottom of each of the 8 dessert cups.
- Press the crumbs down firmly using the back of a spoon or a small flat bottomed glass. Note: This prevents the crust from falling apart when scooped.
Phase 2: Crafting the Creamy Filling
- Beat the softened cream cheese and powdered sugar on medium high speed until the mixture is smooth and completely lump free.
- Stir in the vanilla extract until incorporated.
- In a separate chilled bowl, whip the cold heavy cream on high speed until stiff peaks form. Note: Stiff peaks mean the cream stands straight up when you lift the whisk.
Phase 3: Assembly and Setting
- Gently fold the whipped cream into the cream cheese mixture using a cut and fold motion until no white streaks remain.
- Spoon or pipe the filling evenly over the graham cracker crusts and smooth the tops.
- Refrigerate for at least 2 to 4 hours until the filling feels firm to a light touch.
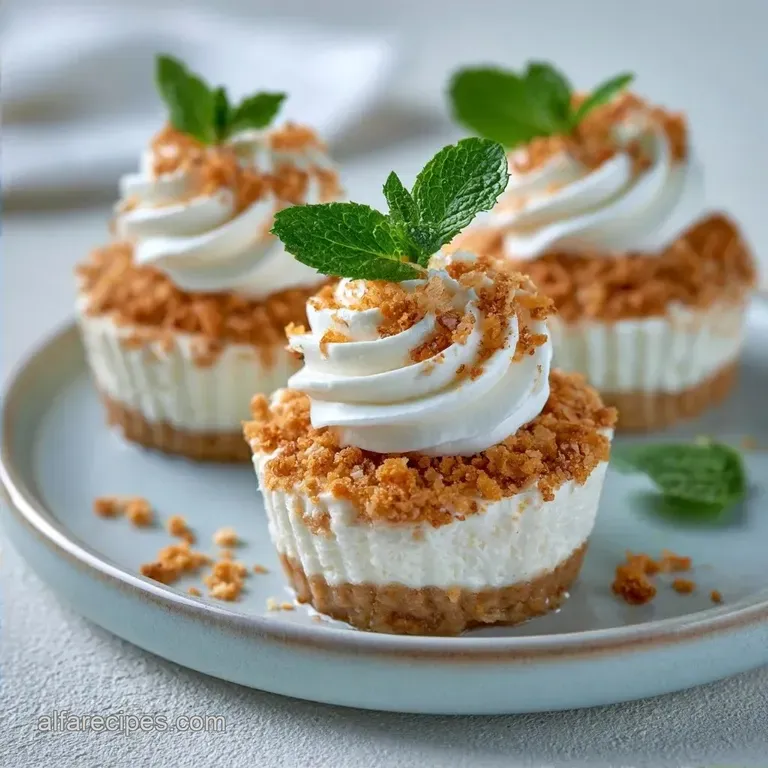
- Just before serving, top each cup with fresh berries and optional mint leaves.
Fixing Common Issues
The most frequent problem is a filling that refuses to set. This usually happens if the heavy cream wasn't whipped enough or if the cream cheese was too warm when the cream was folded in. If it's too soft, an extra hour in the fridge usually does the trick.
Another issue is the "lumpy cheese" syndrome. This happens when the cream cheese is cold. If you find yourself with lumps, you can't really "beat" them out without over mixing the air. The only real fix is starting over with truly softened cheese.
Why Your Filling Is Runny
| Problem | Root Cause | Solution |
|---|---|---|
| Soft Filling | Under whipped cream | Whip cream until stiff peaks form |
| Filling Collapses | Over mixing during fold | Use a gentle cut and fold motion |
| Liquid Layer | Berries added too early | Top with fruit only right before serving |
Creative Flavor Twists
If you're using these for a larger event, you can vary the toppings. Mango and lime zest work great for a summer vibe. For something more decadent, a drizzle of salted caramel or a sprinkle of crushed pistachios adds a nice touch.
For those planning a celebration, these individual no bake cheesecake cups pair perfectly with a graduation sheet cake to give guests a variety of dessert options. You could also try using a Philadelphia no bake cheesecake cups style by adding a hint of lemon juice to the cream cheese for extra brightness.
If you want to change the base, try using crushed Oreos or Biscoff cookies. Just keep the butter ratio the same to ensure the crust stays compact. For a version using condensed milk, replace the powdered sugar and a portion of the cream cheese, though the texture will be denser and sweeter.
Scaling Your Batch
Scaling Down (1/2 Batch): Use 4 cups instead of 8. When reducing the recipe, beat one egg if any were required (not applicable here), but for this version, simply halve the weights. Reduce the chilling time by about 30 minutes since smaller volumes cool faster.
Scaling Up (2x-4x Batch): When doubling, don't double the vanilla exactly use 1.5x the amount to avoid an artificial taste. Work in batches when whipping the cream, as most home mixers can't handle 4 cups of heavy cream without splashing.
Chef's Note: If you're making 24+ cups, pipe the filling using a large plastic bag with the corner cut off. It's significantly faster than spooning and looks much cleaner.
Dessert Myths
Myth: You must use a springform pan for cheesecake. Truth: Not for this version. Individual cups remove the need for a pan entirely and eliminate the stress of "unmolding" a cake that might stick.
Myth: No bake cheesecakes are just "cheesecake flavored pudding." Truth: As long as you use real cream cheese and heavy cream, the fat structure is fundamentally different from pudding. The stability comes from the chilled lipids, not cornstarch.
Storage and Leftovers
Keep these cups in the fridge for up to 5 days. Make sure they are covered with plastic wrap or stored in an airtight container to prevent them from picking up "fridge smells."
You can freeze these for up to 2 months. However, let them thaw in the fridge for 4 hours before eating. Avoid thawing them on the counter, or the cream may separate.
For zero waste, don't toss the leftover graham cracker crumbs. Mix them into your morning oatmeal or use them as a coating for fried chicken for a salty sweet crust. If you have leftover whipped cream, fold it into fresh strawberries for a quick snack.
The Best Pairings
Since these are quite rich, a crisp drink helps cut through the fat. A cold glass of Prosecco or a tart iced hibiscus tea balances the creaminess.
If you're serving a dessert spread, these contrast well with something warm. They work great alongside a Southern chess pie for a mix of textures and flavors.
For a simple touch, serve them with a side of fresh raspberries and a sprig of mint. The acidity of the berries cleanses the palate between bites, making the cheesecake taste lighter.
Recipe FAQs
What are common mistakes when making no bake cheesecake cups?
Overmixing the whipped cream or using cold cream cheese. Both cause texture issues or lumps. Ensure your cream cheese is fully softened to room temperature before beating.
How to prevent the cheesecake filling from being lumpy?
Beat the softened cream cheese and powdered sugar on medium high speed. Continue until the mixture is completely smooth and lump free before folding in the whipped cream.
How long should the cheesecake cups refrigerate before serving?
Wait at least 2 to 4 hours. This chilling time is essential for the filling to stabilize and firm up sufficiently.
Is it true that you can serve these immediately after assembling?
No, this is a common misconception. Without proper refrigeration, the filling will be too soft and likely to collapse.
Can I freeze these cheesecake cups?
Yes, for up to 2 months. Be sure to thaw them in the fridge for 4 hours before eating to prevent the cream from separating.
How to keep the crust from crumbling?
Press the crumbs down firmly using the back of a spoon or a small flat bottomed glass. This creates a compact base that stays intact when served.
What can I serve alongside these treats?
Fresh fruit or savory appetizers. These sweet cups provide a great balance after serving garlic pull apart rolls at a party.
Classic No Bake Cheesecake Cups