White Chocolate Mousse Cups: Fluffy Results
- Time: 10 min active + 2 hours 5 min chilling
- Flavor/Texture Hook: Rich, airy, and creamy
- Perfect for: Dinner party desserts or a fancy date night
- White Chocolate Mousse Cup Recipe Guide
- Why the Texture Stays Stable
- What Each Ingredient Does
- Ingredients and Better Swaps
- Tools for the Job
- Step by Step Assembly
- Fixing Texture and Stability Issues
- Adjusting Your Batch Size
- Flavor Twists and Swaps
- Storage and Waste Tips
- Plating for the Best Look
- Recipe FAQs
- 📝 Recipe Card
White Chocolate Mousse Cup Recipe Guide
The smell of melting white chocolate fills the kitchen, but there's a tension in the air. If the heat is too high, the chocolate seizes into a grainy, clumped mess that ruins the whole batch.
I remember the first time I tried a simplified version; I rushed the melting process and ended up with something that felt like wet sand.
The trick is patience and temperature control. By warming the cream first and using short microwave bursts, the fats integrate without breaking. This ensures the final result is a cloud like dessert rather than a dense paste.
You'll get a dessert that feels weightless on the tongue but tastes deeply rich. This White Chocolate Mousse Cup doesn't rely on heavy stabilizers, just the physics of whipped cream and cocoa butter.
Why the Texture Stays Stable
- Cocoa Butter: The natural fats in white chocolate harden as they cool, creating a structural grid that holds the air bubbles.
- Fat Emulsion: Combining warm cream with chocolate creates a stable emulsion that prevents the mousse from weeping.
- Air Incorporation: Whipping the cream to medium stiff peaks adds the necessary volume to lighten the dense chocolate.
| Method | Time | Texture | Best For |
|---|---|---|---|
| Microwave | 5 min | Smooth, consistent | Fast prep, precision |
| Stovetop | 12 min | Richer, denser | Large batches |
What Each Ingredient Does
| Ingredient | What It Does | Best Swap |
|---|---|---|
| White Chocolate | Provides structure and sweetness | high-quality cocoa butter chips |
| Heavy Cream | Adds air and fat for stability | Mascarpone (adds tang) |
| Vanilla Extract | Balances the sugar profile | Almond extract |
| Sea Salt | Cuts through the richness | Fine table salt |
Ingredients and Better Swaps
- 4 oz white chocolate, finely chopped Why this? Finely chopping ensures even melting without overheating.
- 1/2 cup heavy whipping cream, warmed Why this? Warmth helps the chocolate melt faster.
- 1 tsp vanilla extract Why this? Pure extract provides a cleaner floral note.
- 1 pinch fine sea salt Why this? Salt suppresses bitterness and enhances sweetness.
- 1 cup heavy whipping cream, chilled Why this? Cold fat traps air more effectively.
Substitution options:
- White Chocolate: Use a high cocoa butter brand. Low grade chips often contain fillers that cause graininess.
- Heavy Cream: For a thicker base, replace 1/4 cup of the chilled cream with softened mascarpone.
- Vanilla: Use vanilla bean paste for those tiny black seeds that look professional.
Tools for the Job
- Microwave safe glass bowl (essential for heat distribution)
- Hand mixer or stand mixer (like a KitchenAid)
- Silicone spatula (for folding)
- Piping bag with a round tip
- 4 dessert cups (glass or acrylic)
Step by step Assembly
- Place the chopped white chocolate into a microwave safe glass bowl.
- Pour the warmed heavy cream over the chocolate and let it sit for 2 minutes to soften. Note: This prevents the chocolate from seizing.
- Microwave in 15 second intervals, stirring in between, until the mixture is completely smooth and ivory colored.
- Stir in the vanilla extract and salt; set aside to cool to room temperature.
- Pour the chilled heavy cream into a cold mixing bowl and beat on medium high speed until medium stiff peaks form.
- Gently scoop 1/3 of the whipped cream into the cooled chocolate mixture and stir briskly to lighten the base.
- Carefully fold the remaining whipped cream into the chocolate using a spatula in a figure eight motion until no white streaks remain.
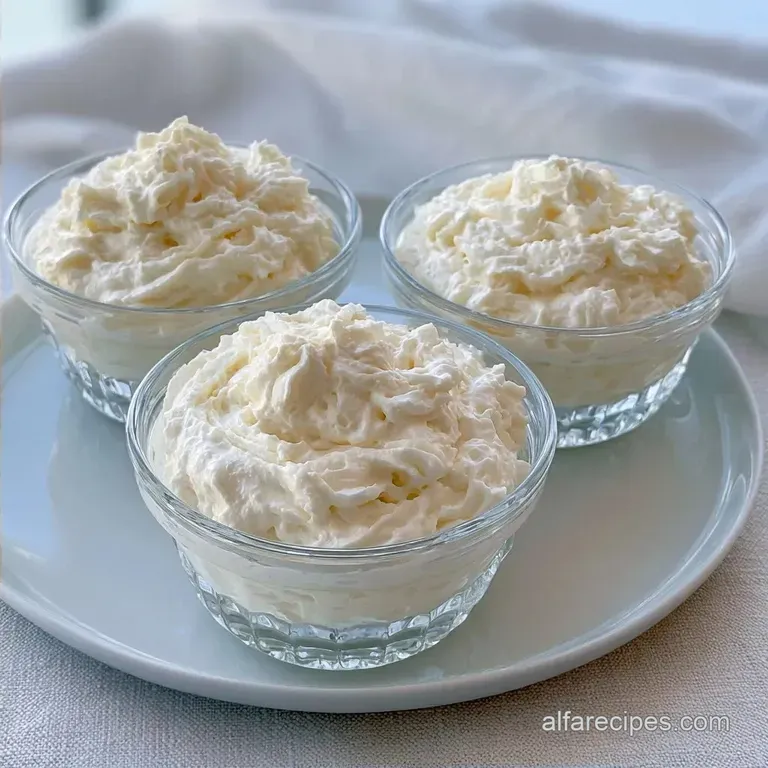
- Transfer the mixture to a piping bag and pipe into 4 dessert cups in a spiral motion from the bottom up.
- Refrigerate for at least 2 hours to set the structure.
Chef Note: If you don't have a piping bag, use a Ziploc bag with the corner snipped off. It's just as effective for these cups.
Fixing Texture and Stability Issues
If your mousse feels too heavy, you likely under whipped your cream or the chocolate was too hot when you folded it in. This collapses the air bubbles. On the other hand, over whipping the cream leads to a grainy texture that looks like butter.
Why Your Mousse Is Grainy
This usually happens if the chocolate "seizes" due to a drop of water getting in or overheating. The fats separate from the solids.
Why Your Mousse Is Flat
This occurs when the chocolate base is still warm, which melts the air bubbles in the whipped cream instantly.
| Problem | Root Cause | Solution |
|---|---|---|
| Grainy Base | Overheated chocolate | Stir in 1 tbsp of warm cream briskly |
| Flat Mousse | Chocolate too warm | Chill base for 10 mins, then refold |
| Over whipped | Beaten into butter | Gently fold in 2 tbsp of liquid cream |
Adjusting Your Batch Size
When doubling this White Chocolate Mousse Cup recipe, don't just double the microwave time. Heat the chocolate in two separate batches to avoid burning the center. For the cream, use a larger bowl to ensure the beaters can reach all the liquid for maximum aeration.
If you're cutting the recipe in half, beat one egg white or use a very small bowl for the cream. Otherwise, the beaters won't incorporate enough air. For a more substantial dessert, you could use the folding technique found in my Homemade Whipped Cream Pie to get a similar lift.
Flavor Twists and Swaps
You can easily change the profile of these cups. For White Chocolate Raspberry Mousse Cups, drop a fresh raspberry in the bottom of each glass and drizzle a teaspoon of raspberry coulis over the finished mousse.
For Strawberry White Chocolate Mousse Cups, fold in 1/4 cup of freeze dried strawberry powder. This adds a punchy tartness without adding extra liquid that would destabilize the mousse. If you want something even more indulgent, this pairs well with the richness of a Chocolate Peanut Butter Pie.
Storage and Waste Tips
Store these in the fridge for up to 3 days. Keep them covered with plastic wrap to prevent the mousse from absorbing fridge odors. They don't freeze well because the air bubbles collapse, leaving you with a dense, frozen block.
If you have leftover whipped cream, don't toss it. Use it to top a morning coffee or fold it into oatmeal. If you have a bit of chocolate ganache left in the bowl, stir in a splash of milk and use it as a dip for fresh strawberries.
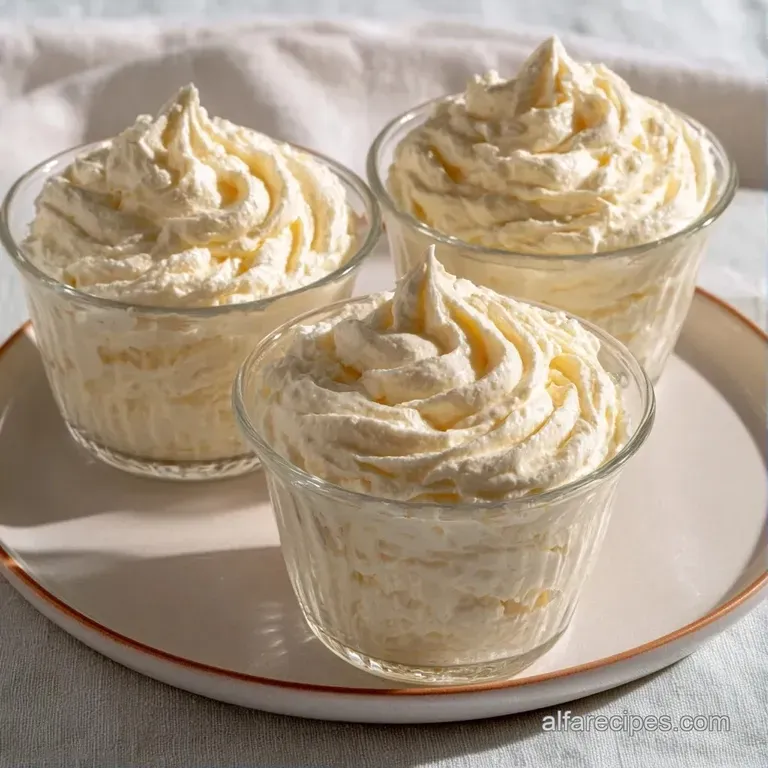
Plating for the Best Look
To get that professional look, wipe the rims of your cups with a damp paper towel after piping. This removes any stray smudges. Top each cup with a single fresh mint leaf and one raspberry for a color contrast.
For a more modern look, use a star tip for the piping bag. This creates ridges that catch the light and make the mousse look more volumetric. A light dusting of cocoa powder or white chocolate shavings adds a final touch of texture.
Recipe FAQs
Is this a good dessert for Valentine's Day?
Yes, it is a romantic choice. The elegant presentation in cups and the creamy white chocolate make it a sophisticated, light treat for a special occasion.
How to prevent white chocolate from seizing?
Pour warmed heavy cream over the chopped chocolate and let it sit for 2 minutes before microwaving. This softening period ensures the chocolate melts smoothly without clumping.
Is it true that white chocolate must be melted in a double boiler?
No, this is a common misconception. Using a microwave safe glass bowl in 15-second intervals works perfectly to achieve a smooth, ivory colored mixture.
How to achieve the right whipped cream consistency?
Beat chilled heavy cream on medium high speed until medium stiff peaks form. Avoid over beating, as the cream can quickly turn into butter.
Can I freeze these mousse cups for later?
No, do not freeze them. Freezing causes the air bubbles to collapse, which turns the light, airy mousse into a dense, frozen block.
What's the best way to prepare these for a party?
Pipe the mixture in a spiral motion from the bottom up into individual dessert cups. If you enjoyed the precision of piping here, the same attention to detail applies to our graduation cake.
How to ensure the mousse sets properly?
Refrigerate for at least 2 hours. This chilling time is essential for the structure to set, ensuring the mousse maintains its volume when served.
White Chocolate Mousse Cup

