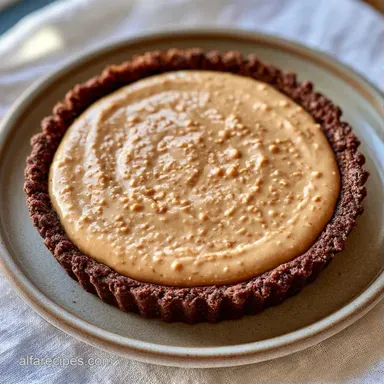
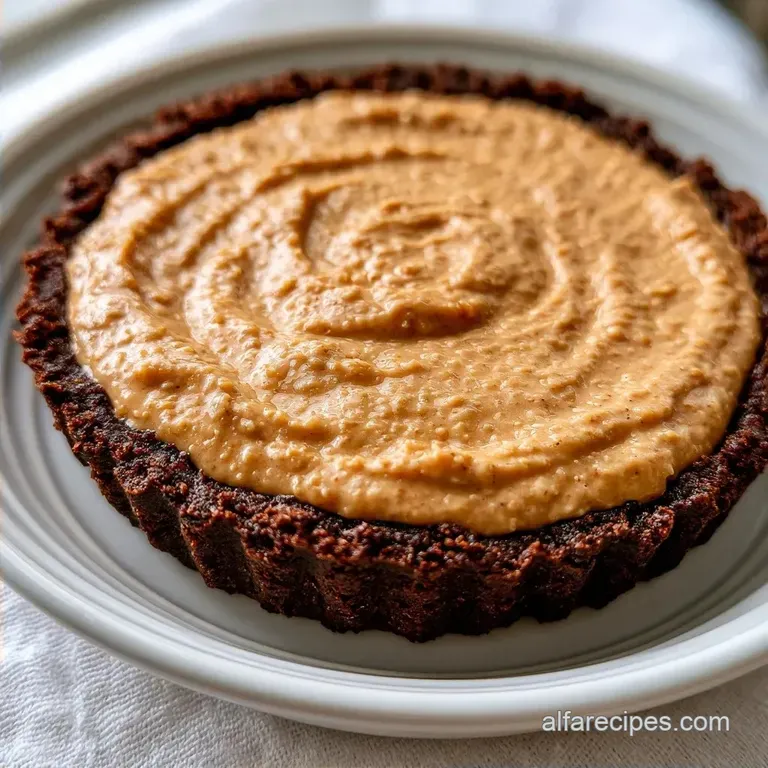
Chocolate Peanut Butter Pie: No-Bake
- Time: 20 min active + 4 hours 20 mins chilling
- Flavor/Texture Hook: Crunchy cookie base with a rich, whipped center
- Perfect for: Potlucks or a high impact dessert for peanut butter lovers
- Making Your Chocolate Peanut Butter Pie
- Essential Recipe Details
- What Each Ingredient Does
- Tools For The Job
- Putting It All Together
- Tips And Common Pitfalls
- Swapping Ingredients For Diets
- Scaling For Different Groups
- Truths About No Bake Pies
- Storage And Zero Waste
- Things That Pair Well
- Recipe FAQs
- 📝 Recipe Card
The scent of melted chocolate and toasted cocoa fills the kitchen before you even take your first bite. There is something about the contrast between a salty peanut butter center and a sharp chocolate snap that hits the brain just right.
It is a combination that feels classic but often fails when the texture is too heavy or the crust gets soggy.
I used to struggle with no bake pies that turned into puddles the moment they hit the table. After testing different fat ratios, I found that the stability comes from the temperature of the dairy and the specific way you fold the air into the mixture. This version is designed to stay firm and clean cut.
You can expect a Chocolate Peanut Butter Pie that manages to be rich without feeling greasy. We are focusing on a specific sequence of chilling and whipping to ensure every layer stays distinct.
Making Your Chocolate Peanut Butter Pie
The trick to a stable pie is the temperature of your ingredients. When your cream cheese is truly softened, it integrates with the peanut butter without leaving those tiny white lumps that ruin the mouthfeel. If it is too cold, you get a grainy filling. If it is too warm, the mousse loses its lift.
The base needs a precise amount of pressure. If you pack the crumbs too tightly, the crust becomes a brick. If they are too loose, the pie falls apart. You want the texture of wet sand, pressed firmly enough to hold but still possessing a slight crumble.
This Chocolate Peanut butter Pie relies on a two stage chill. The crust sets first in the freezer to create a moisture barrier, and the final product rests in the fridge to allow the fats in the ganache and mousse to crystallize.
The Magic Of Stabilization
The cream cheese acts as a stabilizer. It prevents the peanut butter and whipped topping from separating, creating a firm structure that doesn't collapse.
| No Bake Method | Baked Method | Best For |
|---|---|---|
| 0 min cook time | 30-45 min bake | Speed and freshness |
| Sets in fridge | Sets via starch | Creamy, mousse like feel |
| No oven required | Oven required | Denser, cheesecake like feel |
Essential Recipe Details
For this recipe, precision is key. I recommend using a digital scale for the dry ingredients to ensure the crust to filling ratio is balanced. The 9 inch pie dish should be a standard size, as using a larger pan will result in a thinner layer that might not set as firmly.
The total time of 4 hours 20 minutes is non negotiable. The fats in the peanut butter and cream cheese need this window to reach a stable temperature. If you cut into it too early, the center will be soft, and the ganache will slide off the top.
What Each Ingredient Does
Understanding why we use these specific items helps in making a foolproof dessert. For example, sifted powdered sugar is used instead of granulated to avoid a gritty texture in the mousse.
| Ingredient | What It Does | Best Swap |
|---|---|---|
| Cream Cheese | Provides structure and tang | Mascarpone (richer, less tang) |
| Peanut Butter | Core flavor and fat | Almond butter (milder flavor) |
| Whipped Topping | Adds air and lift | Stiffly beaten heavy cream |
| Chocolate Chips | Creates the firm glaze | Chopped dark chocolate bar |
Tools For The Job
You will need a 9 inch pie dish and a hand mixer or stand mixer such as a KitchenAid for the filling. A rubber spatula is required for the folding process, as a whisk would deflate the air we just beat into the mixture.
For the ganache, a microwave safe bowl works best. Using a bowl with a rounded bottom makes it easier to stir the chocolate and cream into a smooth, glossy state without leaving un melted clumps.
Putting It All Together
Follow these steps precisely to ensure the layers bond correctly.
- Combine the 2 cups (200g) chocolate cookie crumbs and 5 tbsp (70g) melted unsalted butter in a bowl. Mix until it resembles wet sand.
- Press the mixture firmly into the bottom and up the sides of a 9 inch pie dish. Place in the freezer for 10 minutes to set. Note: This prevents the crust from absorbing moisture from the filling.
- Beat 8 oz (225g) softened cream cheese and 1 cup (255g) creamy peanut butter on medium high speed until completely smooth.
- Gradually add 1 cup (120g) sifted powdered sugar and 1 tsp (5ml) vanilla extract, beating until the mixture is fluffy.
- Gently fold in 3 cups (710ml) thawed whipped topping using a rubber spatula until combined but not deflated.
- Spread the filling evenly into the chilled crust.
- Heat 1/3 cup (80ml) heavy cream in the microwave in 30 second intervals until it begins to simmer.
- Pour the hot cream over 1/2 cup (90g) semi sweet chocolate chips and let sit for 2 minutes. Stir until a glossy glaze forms.
- Pour the ganache over the peanut butter layer, tilting the pan to coat the surface.
- Chill in the refrigerator for 4 hours before slicing.
Tips And Common Pitfalls

When making a Chocolate Peanut Butter Pie, the most frequent issue is a filling that feels too soft. This usually happens if the cream cheese wasn't fully integrated or if the whipped topping was over mixed. Be gentle during the folding stage.
Another common error is seizing the chocolate in the ganache. If the cream is too hot or you stir too aggressively before it has melted, the fats can separate. According to Serious Eats, the key to a smooth emulsion is letting the chocolate sit in the hot liquid before stirring.
Why Your Filling Is Soft
If the pie doesn't hold a clean edge, it usually means the fat didn't set or the air was knocked out. Ensure the pie spends the full 4 hours in the fridge.
| Problem | Root Cause | Solution |
|---|---|---|
| Soft Filling | Under chilled or over mixed | Chill longer or fold more gently |
| Grainy Ganache | Overheated chocolate | Stir slowly and avoid boiling cream |
| Crust Crumbles | Not enough butter | Add 1 tbsp more melted butter |
Chef's Note: If you want a deeper flavor, add a pinch of flaky sea salt to the peanut butter mixture. It cuts through the sweetness of the powdered sugar.
Swapping Ingredients For Diets
You can adapt this recipe for different needs without losing the core appeal. For a gluten-free version, simply use gluten-free chocolate sandwich cookies. Most major brands now offer a version that tastes identical to the original.
If you are looking for a lighter texture, you can swap the whipped topping for a homemade version. This makes it similar to a whipped cream pie, though the stability will be slightly lower.
| Original Ingredient | Substitute | Why It Works |
|---|---|---|
| Cookie Crumbs | Almond Flour + Cocoa | Low carb, but more fragile crust |
| Powdered Sugar | Maple Syrup | Natural sweetener, but makes filling softer |
| Semi Sweet Chips | Dark Chocolate (70%) | Less sugar, more bitter contrast |
Using Instant Pudding
Some people add a small amount of instant vanilla pudding mix to the filling. This increases the thickness and provides a more "commercial" set, though it alters the natural peanut butter taste.
A Reese's Twist
For a more intense experience, chop up a few peanut butter cups and fold them into the mousse before spreading it into the crust.
Scaling For Different Groups
If you are making a smaller version, use a 6 inch pan and halve all ingredients. Reduce the chilling time to 3 hours, as the smaller mass reaches temperature faster. For the egg free filling, this is easy, but if you use a recipe requiring eggs, beat one egg and use half by weight.
When doubling the recipe for two pies, do not double the salt or vanilla exactly. Use 1.5x the amount of salt and vanilla to avoid an overpowering taste. Work in batches when whipping the filling to ensure you don't overflow your mixer bowl.
Truths About No Bake Pies
There is a common belief that no bake pies don't need a freezer start for the crust. In reality, skipping the 10 minute freeze allows the butter to stay soft, which means the filling can seep into the base and make it soggy.
Another myth is that adding more powdered sugar makes the pie set faster. Sugar actually interferes with the protein structures in the cream cheese. Too much sugar can actually make the filling softer and more prone to sagging.
Storage And Zero Waste
Store this Chocolate Peanut Butter Pie in the refrigerator in an airtight container for up to 5 days. It does not freeze well once the ganache is added, as the chocolate can bloom and the mousse may lose its aeration.
To avoid waste, save any leftover cookie crumbs and mix them into your morning yogurt or oatmeal. If you have a small amount of leftover ganache, drizzle it over sliced bananas or apples for a quick snack.
Things That Pair Well
Since this dessert is quite rich, pair it with something acidic or bitter to cleanse the palate. A fresh raspberry coulis or a side of sliced Granny Smith apples works well.
For those who love this flavor profile, a peanut butter cake makes a great companion for a larger celebration. Serving a slice of pie alongside a strong, unsweetened black coffee helps balance the density of the peanut butter and chocolate.
Recipe FAQs
Is this a good dessert for Valentine's Day?
Yes, it is an ideal choice. The rich combination of chocolate and peanut butter creates a decadent, romantic treat that feels special but is simple to prepare.
Can beginners easily make this dessert at home?
Yes, absolutely. Because it requires zero baking, beginners can focus on basic mixing and chilling without worrying about oven temperatures.
How to prevent the peanut butter filling from being too soft?
Fold the whipped topping gently using a rubber spatula. Over mixing the topping or failing to fully integrate the cream cheese can cause the mousse to lose its structure.
Is it true that I can freeze this pie for long term storage?
No, this is a common misconception. Freezing the pie after the ganache is added causes the chocolate to bloom and the mousse to lose its aeration.
How to make the chocolate ganache layer smooth?
Heat heavy cream in 30-second intervals until it simmers, then let it sit over the chocolate chips for 2 minutes before stirring into a glossy glaze.
Which are the best chocolate flavored desserts for parties?
This pie is a top contender due to its crowd pleasing flavors. If you enjoy the layering process used here, the same principle of building distinct textures works well in a traditional graduation cake.
How long does the pie need to set in the refrigerator?
Chill for at least 4 hours. This ensures the peanut butter layer and the chocolate ganache are fully firm enough for clean slicing.
Chocolate Peanut Butter Pie