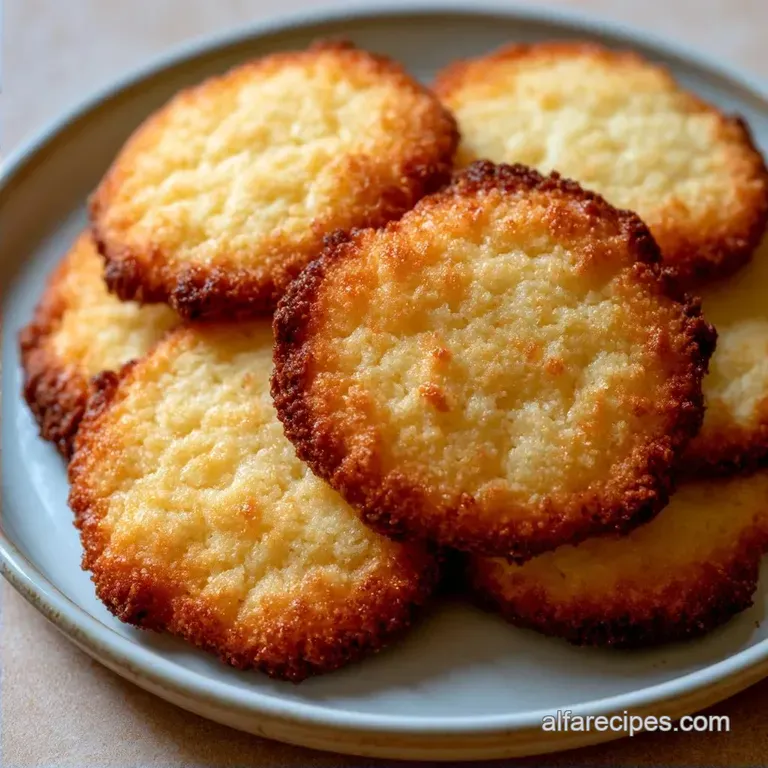
Senior Class Sugar Cookies: Crisp and Soft
- Time: 20 min active + 2 hrs chilling
- Flavor/Texture Hook: Crisp edges with a soft center
- Perfect for: High school graduation parties
The whir of the mixer stops, and you're left with a pale, fluffy cream that smells faintly of vanilla. It's the moment every baker knows, but this specific dough, the real work happens in the fridge.
I remember the first time I tried to rush this process for a party, and the cookies spread into flat, amorphous blobs that looked nothing like the graduation caps I wanted.
The real hero here is the butter. I chose unsalted butter specifically because it lets us control the sodium levels, which prevents the icing from tasting slightly salty. If you use a lower fat substitute or margarine, you lose the structural integrity that keeps the cookie from collapsing in the oven.
You can expect a cookie that stays flat and holds a sharp edge, which is the only way to get those clean lines for your Senior Class Sugar Cookies. We're going for a precise, clean finish that looks professional but tastes like home.
Senior Class Sugar Cookies Guide
Right then, let's look at why this recipe doesn't fail. Most sugar cookies puff up or spread because the fat melts too quickly or there is too much air in the dough. We avoid this by controlling the temperature and the mixing time.
Why This Dough Works
The Butter Chill: Cooling the dough for 2 hours solidifies the fat, so it melts slower in the oven and prevents spreading.
Controlled Aeration: We beat the butter and sugar until pale, but we don't over mix, which keeps the cookies from puffing up.
Meringue Stability: Adding meringue powder to the icing creates a protein structure that dries hard and prevents colors from bleeding.
When deciding how to bake, you might wonder if a different heat source changes the outcome. While the oven is the standard, some people experiment with air fryers for smaller batches.
| Heat Method | Time | Texture | Best For |
|---|---|---|---|
| Conventional Oven | 10 mins | Evenly golden, classic | Large batches (24+) |
| Air Fryer | 7 mins | Slightly crispier edges | 2-4 cookies |
Understanding the role of each component helps you troubleshoot on the fly. If you change one thing, it affects the rest of the chemistry.
Ingredient Deep Dive
| Ingredient | What It Does | Best Swap |
|---|---|---|
| Unsalted Butter | Provides structure and flavor | Vegan butter sticks |
| All Purpose Flour | Creates the bulk and shape | 1:1 gluten-free blend |
| Meringue Powder | Hardens the royal icing | Egg whites (requires heating) |
| Gel Food Color | Provides intense color without liquid | Concentrated paste |
The Essential Specs
For the best results, you need a few precision checkpoints. First, your butter should be around 65°F (18°C), meaning it's soft enough to indent but not greasy. Second, the dough must be rolled to exactly 1/4 inch (6mm) thickness to ensure consistent baking times.
Finally, pull the cookies out at exactly 8-10 minutes; any longer and you lose that soft center.
If you're looking for a different kind of dough experience, you might enjoy the process of making a no knead pizza dough, which focuses more on long term fermentation than fat stability. But for these cookies, the focus is purely on temperature control.
Shopping List Breakdown
Get your ingredients ready. Using a scale is the most precise way to ensure these cookies don't spread.
- 1 cup (225g) unsalted butter, softened Why this? Stable fat for shape
- 1 cup (200g) granulated sugar Why this? Standard sweetness and crisp
- 1 large (50g) egg Why this? Binds the dough
- 2 tsp (10ml) vanilla extract Why this? Classic aroma
- 3 cups (375g) all purpose flour Why this? Balanced gluten levels
- 1 tsp (5g) baking powder Why this? Minimal lift
- 1/2 tsp (3g) salt Why this? Enhances flavors
- 4 cups (480g) powdered sugar Why this? Smooth icing base
- 3 tbsp (45ml) meringue powder Why this? Icing durability
- 6 tbsp (90ml) warm water Why this? Dissolves sugar
- Gel food coloring Why this? No thinning of icing
| Original Ingredient | Substitute | Why It Works |
|---|---|---|
| All Purpose Flour | Almond Flour | Nutty flavor. Note: Makes cookie denser and more fragile |
| Granulated Sugar | Coconut Sugar | Earthy taste. Note: Changes cookie color to brown |
| Unsalted Butter | Coconut Oil (Solid) | Plant based fat. Note: Lower melting point, might spread more |
Essential Baking Gear
You don't need a professional kitchen, but a few tools make this much easier. A stand mixer such as a KitchenAid helps get the butter and sugar pale and fluffy without tiring out your arm. You'll also need a rolling pin and graduation themed cutters.
Parchment paper is non negotiable. Greasing the pan with butter or oil can cause the cookies to slide and lose their shape during the first few minutes of baking. A wire cooling rack is also essential to stop the bottoms from steaming and becoming soggy.
Step-by-step Baking Guide
Follow these steps precisely. The sequence is just as important as the ingredients.
- Beat the softened butter and sugar. Mix until the mixture is pale and fluffy.
- Mix in the egg and vanilla extract. Stir until fully incorporated.
- Sift together the flour, baking powder, and salt. Gradually add to the wet ingredients until a soft dough forms.
- Wrap the dough in plastic wrap. Refrigerate for at least 2 hours. Note: This prevents the butter from melting instantly in the oven.
- Preheat oven to 350°F (175°C). On a floured surface, roll the chilled dough to 1/4 inch (6mm) thickness.
- Press graduation cutters firmly into the dough. Transfer to a parchment lined sheet.
- Bake for 8-10 minutes until edges are barely golden.
- Let cookies cool on the pan for 5 minutes. Transfer to a wire rack to cool completely.
- Prepare royal icing by mixing powdered sugar, meringue powder, and warm water. Add gel food coloring as desired.
Fixing Common Cookie Errors
Most problems with Senior Class Sugar Cookies come down to temperature. If your kitchen is too hot, the dough softens before it even hits the oven, leading to the dreaded "spread."
Troubleshooting Common Issues
| Issue | Solution |
|---|---|
| Why Your Cookies Puffed Up | If the cookies look like domes rather than flats, you likely over beaten the butter and sugar. This incorporates too much air, which expands in the heat. |
| Why Your Icing Is Runny | Runny icing is usually caused by adding too much water or using liquid food coloring instead of gel. Liquid colors add moisture that breaks the protein bonds of the meringue powder. |
| Why Cookies Stick to Pan | Sticking happens when the pan is too hot or you didn't use parchment. Always let the pan cool completely before placing the next batch of dough on it. |
Variations and Flavor Twists
You can change the flavor without ruining the structure. If you want a citrus note, add the zest of one lemon to the sugar before creaming. For a richer taste, swap the vanilla for almond extract.
If you like playing with different types of dough, you might enjoy the chewiness of a homemade bagel, though that requires a totally different approach to gluten. For these cookies, keep the flour additions minimal.
Decision Shortcut: If you want sharper edges, chill the dough for 4 hours. If you want a softer bite, bake for only 8 minutes. If you want glossy icing, use slightly warmer water.
Storage and Waste Tips
Store your decorated cookies in an airtight container once the icing is completely hard. They stay fresh at room temperature for 5 days. If you need them to last longer, you can freeze the baked, un iced cookies for up to 3 months. Just thaw them at room temperature before icing.
Don't throw away the dough scraps. Gather the leftover bits, re roll them, and cut out small stars or circles. These make great "taster" cookies for you while the main batch is cooling. If you're baking for a big event, you can also make banana nut bread as a complementary treat for the dessert table.
Serving Your Cookies
Arrange your Senior Class Sugar Cookies on a platter with heights. Use cake stands or tiered trays to create a visual impact. Because the royal icing dries hard, these are the best cookies for stacking or bagging as party favors.
For a professional look, match the icing colors exactly to the school colors. Use a small piping bag with a round tip for the lettering. If the icing feels too stiff, add water one drop at a time. A single drop can be the difference between a clean line and a clog.
Trust me on this: let the icing dry for at least 12 hours before stacking. If you stack them too soon, you'll get those annoying "smush" marks on the top of the decorations. These cookies are a great way to celebrate the hard work of the graduating class with a bit of precision and a lot of flavor.
Recipe FAQs
How to make graduation cookies from scratch?
Cream softened butter and sugar until fluffy. Mix in the egg and vanilla, stir in sifted flour, baking powder, and salt, then chill the dough for 2 hours before baking at 350°F for 8 10 minutes.
How many cookies should I make for a graduation party?
Plan for 3 to 5 cookies per guest. This ensures plenty of variety and accounts for guests who want seconds. These sweets pair perfectly with a savory side like our Classic Chili.
What are common mistakes when making sugar cookies?
Over beating the butter and sugar is the most frequent error. This adds too much air to the batter, causing the cookies to puff up and lose their shape in the oven.
Why did my cookies puff up into domes instead of staying flat?
You likely incorporated too much air during the creaming process. When the butter and sugar are over beaten, they expand too much under heat, ruining the flat surface needed for decorating.
Why is my royal icing too runny?
Too much water was added or liquid food coloring was used. Liquid colors introduce extra moisture that breaks the protein bonds of the meringue powder, preventing the icing from setting.
Is it true that I can skip refrigerating the dough to save time?
No, this is a common misconception. Refrigerating the dough for at least 2 hours is essential to keep the butter from melting instantly, which maintains the crisp edges of the graduation cutters.
How long do decorated sugar cookies stay fresh?
They stay fresh for 5 days at room temperature. Store them in an airtight container only after the royal icing has completely hardened to avoid smudging the designs.
Senior Class Sugar Cookies

