High Protein Honey Garlic Chicken Meal Prep

- Time: 15 min active + 20 min cooking
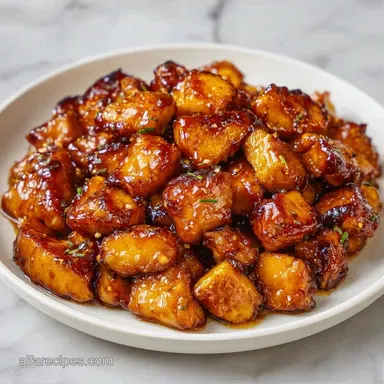
- Flavor/Texture Hook: Savory honey soy glaze with charred, tender crisp vegetables
- Perfect for: Busy work weeks, high protein lunches, and beginner cooks
- Easy Healthy Chicken Meal Prep Tips
- Why This Method Works
- Component Analysis
- Ingredients and Substitutes
- Essential Kitchen Tools
- Step-by-Step Instructions
- Avoiding Kitchen Disasters
- Troubleshooting Common Issues
- Ways to Mix It Up
- Scaling the Batch
- Truths About Searing
- Storage and Leftovers
- Best Serving Suggestions
- High in Sodium
- Recipe FAQs
- 📝 Recipe Card
Easy Healthy Chicken Meal Prep Tips
The smell of garlic and ginger hitting a hot pan is usually where my Monday starts. I used to be the person who spent my entire Sunday afternoon hovering over a stove, only to find that by Wednesday, my chicken tasted like a wet sponge. I tried the slow cooker, I tried the instant pot, but nothing felt right.
Everything was either too mushy or too dry.
Then I started combining a quick stovetop sear with a sheet pan roast. It's a weird hybrid method, but it works. You get the brown, savory crust from the pan and the tender, juicy center from the oven.
This Healthy Chicken Meal Prep approach actually lets me spend my Sunday doing things I enjoy instead of scrubbing five different pans.
Expect a meal that stays vibrant and zesty throughout the week. We aren't doing boring steamed chicken here. We're using a honey soy glaze that thickens up and clings to the meat, paired with vegetables that still have a bit of a snap to them.
It's Budget Friendly, filling, and honestly, it tastes better on Tuesday than it does on Sunday.
Why This Method Works
I spent a lot of time wondering why my meal prep always failed. It turns out, it's all about how you handle the heat. Here is the breakdown of why this specific process keeps everything tasty.
- The Initial Sear: Browning the meat in avocado oil creates a savory crust. This doesn't lock in juices, but it builds a deep, salty flavor that oven roasting alone can't touch.
- The Glaze Timing: Adding the honey and soy sauce at the very end of the pan sear prevents the sugars from burning. It creates a sticky coating that protects the meat during the final roast.
- Zoned Roasting: Putting the vegetables and chicken on the same sheet but in different areas allows the veggies to roast and the chicken to finish cooking without steaming each other.
- Carryover Heat: Taking the pan out just before the chicken looks "done" allows the internal temperature to rise naturally. This stops the meat from becoming rubbery.
| Method | Prep Time | Texture | Best For |
|---|---|---|---|
| Stovetop Only | Fast | Can be dry | Immediate eating |
| Oven Only | Slow | Pale, soft | Large batches |
| Sear + Roast | Medium | Charred & Juicy | Healthy Chicken Meal Prep |
Component Analysis
Before we get into the shopping list, let's look at what these ingredients are actually doing in the pan. It's not just about taste; it's about how they react to the heat.
| Ingredient | Science Role | Pro Secret |
|---|---|---|
| Avocado Oil | over High heat conductor | Doesn't smoke at 400°F, keeping flavor clean |
| Honey | Thickening agent | Creates a lacquer that holds the sauce to the meat |
| Rice Vinegar | Acid balance | Cuts through the salt of the soy sauce for a zesty finish |
| Garlic Powder | Dry seasoning | Sticks to vegetables better than fresh garlic during roasting |
Ingredients and Substitutes
I keep these staples in my pantry because they're Budget Friendly and versatile. For this Healthy Chicken Meal Prep, you'll need the following.
- 1.5 lbs boneless, skinless chicken breasts, cut into 1 inch cubes Why this? Uniform size ensures every piece cooks at the same rate
- 1 tsp kosher salt
- 1/2 tsp cracked black pepper
- 1 tbsp avocado oil Why this? High smoke point prevents burnt oil taste
- 2 tbsp honey Why this? Adds natural sweetness and thickness
- 3 tbsp low sodium soy sauce Why this? Deep umami flavor without excessive salt
- 3 cloves garlic, minced
- 1 tsp fresh ginger, grated
- 1 tsp rice vinegar
- 4 cups broccoli florets Why this? High fiber and holds shape well
- 2 cups red bell pepper, chopped
- 2 cups cauliflower florets
- 1 tbsp olive oil
- 1/2 tsp garlic powder
Budget Friendly Swaps:
| Original Ingredient | Substitute | Why It Works |
|---|---|---|
| Avocado Oil | Grapeseed Oil | Similar high smoke point. Note: Slightly more neutral flavor |
| Honey | Maple Syrup | Similar viscosity and sweetness. Note: Adds a hint of woodiness |
| Soy Sauce | Tamari | Same salty profile. Note: gluten-free version |
| Fresh Ginger | Ground Ginger (1/2 tsp) | Similar pungent notes. Note: Less "zingy" than fresh |
Essential Kitchen Tools
You don't need a professional kitchen for this, but a few specific tools make the process smoother. I use a heavy bottomed stainless steel skillet for the sear. If you use a thin pan, the heat distributes unevenly and you'll get gray chicken instead of brown chicken.
A large rimmed baking sheet is the real hero here. The rim is important because that honey glaze can get runny, and you don't want sticky sauce dripping all over the bottom of your oven. I also recommend using parchment paper.
It makes the cleanup take about 30 seconds, which is the whole point of doing Healthy Chicken Meal Prep in the first place.
Finally,, a sharp chef's knife is a must. When you're cutting 1.5 lbs of chicken into 1 inch cubes, a dull knife makes the meat slide around, resulting in uneven pieces. Uneven pieces mean some cubes will be dry while others are undercooked.
Step-by-step Instructions
Right then, let's get into the cooking. Follow these steps closely to get that specific charred yet-juicy result.
- Toss the broccoli, cauliflower, and peppers in olive oil and garlic powder. Spread them across one half of a large rimmed baking sheet Note: Keep them in a single layer to avoid steaming.
- In a small bowl, whisk together the honey, soy sauce, minced garlic, ginger, and rice vinegar until the glaze is smooth.
- Season the chicken cubes with salt and pepper. Heat avocado oil in a skillet over medium high heat.
- Add the chicken in a single layer. Sear for 3-4 minutes until a golden brown crust forms without moving the pieces.
- Flip the chicken and sear for another 2 minutes until the edges are browned.
- Pour the glaze over the seared chicken in the skillet. Toss for 60 seconds until the sauce thickens and coats the meat.
- Transfer the glazed chicken to the empty half of the baking sheet.
- Roast the chicken and vegetables at 400°F (200°C) for 12-15 minutes until the vegetables are tender crisp and the chicken is cooked through.
Chef's Note: If you have a meat thermometer, pull the chicken at 160°F (71°C). The carryover heat will bring it to 165°F while it rests, keeping it from drying out.
Avoiding Kitchen Disasters

The biggest issue people have with this recipe is "rubber chicken." This usually happens because they crowd the pan. If you put too much chicken in the skillet at once, the temperature drops and the meat releases water. Instead of searing, you're boiling your chicken in its own juices.
Troubleshooting Common Issues
| Issue | Solution |
|---|---|
| Why Your Chicken is Dry | Overcooking is the primary culprit. Chicken breast has very little fat, so it goes from "juicy" to "cardboard" in about three minutes. |
| Why the Glaze is Burnt | Honey is mostly sugar. If you pour the glaze in too early or roast the chicken for too long, the sugar carbonizes. This creates a bitter, blackened crust rather than a glossy lacquer. |
| Why Veggies are Mushy | This happens when the baking sheet is overcrowded. When vegetables are piled on top of each other, they release steam. |
Common Mistakes Checklist:
- ✓ Did you pat the chicken dry with paper towels before seasoning?
- ✓ Is the oil shimmering before the chicken hits the pan?
- ✓ Are the vegetables spread out in a single layer?
- ✓ Did you whisk the glaze until the honey was fully integrated?
- ✓ Did you let the meat rest for 5 minutes before boxing it?
Ways to Mix It Up
Once you've got the hang of this Healthy Chicken Meal Prep, you can start swapping things out. I love changing the vegetable base depending on what's on sale at the market. For example, swapping broccoli for snap peas or carrots works beautifully. If you're looking for something different, you can try a Cream Cheese Chicken for a richer, more velvety vibe.
For those tracking their macros, you can easily make this a low carb chicken meal prep. Simply remove the honey and use a touch of stevia or a monk fruit syrup. The soy sauce and rice vinegar still provide plenty of punch. You can also add a pinch of red pepper flakes to the glaze if you like a bit of a kick.
According to the Centers for Disease Control and Prevention, incorporating a variety of colorful vegetables is key to a balanced diet. I usually rotate through red peppers, zucchini, and Brussels sprouts to keep things interesting. If you want a more filling meal, serve this over a bed of quinoa or brown rice.
High Protein Base
To bump up the protein even more, you can add edamame to the roasting sheet during the last 5 minutes. It adds a nice pop of color and extra plant based protein.
Low Sugar Glaze
Use coconut aminos instead of soy sauce and a splash of maple syrup instead of honey. It's a bit milder but still hits those savory notes.
Vegan Protein Swap
Replace the chicken with extra firm tofu. Press the tofu for 20 minutes first to remove excess water, then follow the same sear and roast method.
Scaling the Batch
If you're cooking for a family or prepping for two weeks, you'll need to scale this up. But don't just double everything blindly.
Scaling Up (2x-4x): When doubling the recipe, do not double the salt and spices. Start with 1.5x the seasonings and taste as you go. The most important part is the searing. You MUST work in batches. If you put 3 lbs of chicken in one skillet, it will steam and you'll lose that crust.
Use two baking sheets instead of one to keep the vegetables from overcrowding.
Scaling Down (½ or ¼): If you're just prepping for yourself for a couple of days, a smaller skillet is fine. Reduce the roasting time by about 20% because a smaller mass of food heats up faster in the oven.
If the recipe calls for an egg in a variation (though not this one), beat one egg and use half.
Truths About Searing
There are a few things people tell you about cooking meat that just aren't true. Let's clear some of those up so you can cook with confidence.
The "Sealing" Myth: You've probably heard that searing meat "seals in the juices." It doesn't. In fact, searing can actually cause more moisture loss than not searing. However, we still do it because the browning process creates hundreds of new flavor compounds. It's about taste, not moisture.
The "Room Temp" Myth: Some people say you must let chicken sit on the counter for 30 minutes before cooking. For a thin cube of chicken breast, this doesn't make a measurable difference in cook time. It's more important to have the pan hot than the meat warm.
The "Oil Type" Myth: You don't need expensive oils for everything. While avocado oil is great for high heat, any oil with a high smoke point works. Just avoid extra virgin olive oil for the initial sear, as it can smoke and turn bitter at high temperatures.
Storage and Leftovers
Proper storage is what separates a good meal prep from a disappointing one. I use airtight glass containers. Glass keeps the food fresher than plastic and doesn't hold onto the smell of garlic and soy.
Fridge Storage: Keep your Healthy Chicken Meal Prep in the fridge for up to 4 days. I recommend storing the chicken and vegetables together, but if you're using a grain like rice, keep that in a separate compartment or container to prevent the rice from absorbing all the sauce and becoming mushy.
Freezing: This recipe freezes surprisingly well. Store in freezer safe bags and squeeze out as much air as possible. It will last for 2-3 months. When you're ready to eat, thaw it in the fridge overnight.
Reheating: To avoid the "rubber chicken" effect, don't microwave on high for 3 minutes. Use medium power in 60 second bursts, or splash a tablespoon of water over the meat before heating. This creates a bit of steam that re hydrates the chicken.
Zero Waste Tips: Don't throw away the ginger peel or the garlic ends. I throw mine into a freezer bag. Once the bag is full, I simmer them in water with some onion scraps to make a quick, savory vegetable broth. Also, if you have leftover bell pepper strips, toss them into a morning omelet.
Best Serving Suggestions
This Healthy Chicken Meal Prep is versatile. While it's great on its own, a few additions can make it feel like a fresh meal every time. I love serving this with Steamed Asparagus for an extra dose of greens.
- - Quinoa
- High protein and absorbs the extra glaze perfectly.
- - Cauliflower Rice
- Keeps it low carb and adds a different texture.
- - Brown Rice
- The classic pairing for a honey soy profile.
- - Soba Noodles
- Buckwheat noodles add a nutty flavor that complements the ginger.
For a final touch, sprinkle some toasted sesame seeds or sliced green onions over the top just before serving. It adds a fresh, sharp contrast to the sweet and salty glaze. If you're feeling adventurous, a drizzle of Sriracha or a squeeze of fresh lime juice can wake up the flavors after a few days in the fridge.
High in Sodium
980 mg 980 mg of sodium per serving (43% 43% of daily value)
The American Heart Association recommends a daily sodium limit of no more than 2,300 mg for most adults to maintain heart health.
Tips to Reduce Sodium
-
Eliminate Added Salt-25%
Remove the kosher salt entirely. The soy sauce already provides significant saltiness, making the extra teaspoon unnecessary for flavor.
-
Swap Soy for Coconut Aminos-20%
Replace the low-sodium soy sauce with coconut aminos, which provides a similar savory sweet profile with significantly less sodium.
-
Balance with Acidity-15%
Reduce the soy sauce by half and increase the rice vinegar or add a squeeze of fresh lime juice to brighten the dish without adding salt.
-
Enhance with Fresh Aromatics
Add freshly chopped cilantro, toasted sesame seeds, or red pepper flakes to add layers of flavor and visual appeal without increasing sodium.
Recipe FAQs
How long does chicken meal prep last in the fridge?
Keep it for up to 4 days. Store your meals in airtight containers to maintain freshness and prevent garlic and soy aromas from affecting other foods.
Is it true that meal prepped chicken is safe to eat for 5 days?
No, this is a common misconception. To ensure maximum food safety and quality, you should consume your prepared chicken within 4 days.
What are the best containers for chicken meal prep?
Use airtight glass containers. Glass preserves the flavor better than plastic and does not absorb smells from the sauce.
Can you freeze chicken meal prep recipes?
Yes, these meals freeze well. Use freezer safe bags or containers to preserve the texture of the glazed chicken.
How do you keep chicken juicy for meal prep?
Avoid overcooking the meat. Because breast meat has very little fat, it dries out quickly; roast at 400°F only until the meat is just cooked through.
Is chicken meal prep healthy for weight loss?
Yes, it is a great option. The high protein content combined with fiber rich broccoli and cauliflower helps you feel full longer.
What is the best chicken for meal prep?
Chicken thighs are often preferred because their higher fat content prevents them from drying out during reheating. If you prefer that extra juiciness, see how we prepare a boneless roast.
Healthy Chicken Meal Prep