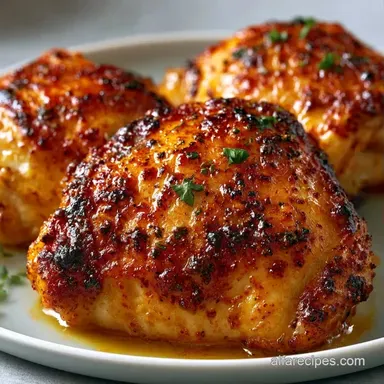
Air Fryer Chicken Thighs: Crispy and Juicy
- Time: 5 min active + 25 min cook + 5 min resting = Total 35 mins
- Flavor/Texture Hook: Smoky, savory rub with skin that actually shatters when you bite it
- Perfect for: Hearty family weeknight dinners or low carb meal prep
That specific, loud sizzle the second the skin hits the hot air fryer basket is my favorite sound in the kitchen. It's the sound of a dinner that isn't going to take two hours of hovering over an oven.
I remember one particular rainy Tuesday when the kids were starving, the house was a mess, and I just wanted something that felt like a Sunday roast but didn't require the effort. I threw these in, set the timer, and actually had time to breathe for twenty minutes.
The result was a piece of chicken with skin so crisp it sounded like a cracker, but the inside stayed juicy and tender. This is why I'm obsessed with this method. You don't need fancy gear or a professional kitchen, just a few basic spices and a bit of patience while the meat rests. These Air Fryer Chicken Thighs are the ultimate no fuss win for anyone who wants a hearty meal without the cleanup of a roasting pan.
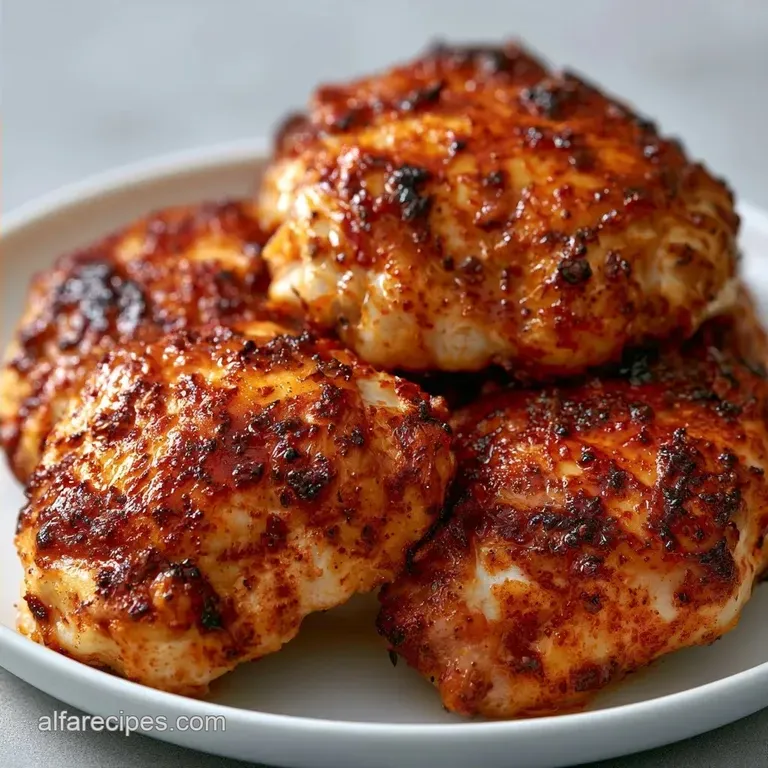
Crispy Air Fryer Chicken Thighs
Right then, let's get into it. When you're cooking for a family, you want reliability. You can't be guessing if the middle is raw or if the skin is still rubbery. That's where this approach comes in. We're using bone in, skin on thighs because they are far more forgiving than breasts.
They have enough fat to stay velvety on the inside, even at the high temperatures needed to get that golden brown exterior.
But what about the prep? Honestly, don't even bother with expensive pre made rubs. A few pantry staples and a bit of elbow grease massaging the oil into the skin is all you need. If you've ever struggled with "soggy" air fryer chicken, it's usually because of one of two things: too much moisture or overcrowding the basket.
We'll fix both of those today so you get that crackling texture every single time.
Why These Thighs Work
I spent way too much time wondering why my oven chicken never matched the air fryer version. It turns out it's all about how the heat moves.
- Air Velocity: The fan pushes hot air at high speeds, stripping moisture away from the skin instantly. This creates a crisp barrier much faster than a stagnant oven.
- Fat Rendering: The 200°C heat melts the subcutaneous fat quickly, which essentially "fries" the skin in its own juices.
- Thermal Mass: Bone in meat acts as a heat conductor, ensuring the center cooks through without the outer edges burning.
- Surface Tension: Patting the meat dry removes the water layer that would otherwise turn into steam, which is the enemy of a crunch.
Since we are focusing on a minimal tool approach, it's worth seeing how this stacks up against the traditional way.
| Feature | Oven Roasting | Air Fryer Method | The Trade off |
|---|---|---|---|
| Cook Time | 45-60 minutes | 25 minutes | Air fryer is much faster |
| Texture | Soft/Crisp | Shatter Crisp | Air fryer gives a more "fried" feel |
| Effort | Medium (Tray/Rack) | Low (Basket) | Air fryer requires flipping |
| Capacity | Whole Batch | Small Batches | Oven wins for huge crowds |
Essential Recipe Specs
Before we dive into the ingredients, let's look at what actually happens inside the basket. To get the best results, you need to hit three precision checkpoints: the temperature must be exactly 200°C, the internal meat temperature must reach 74°C, and the meat must rest for exactly 5 minutes.
If you skip the rest, all those juices will run out on the plate, leaving the meat dry.
For those who like a bit more variety in their protein, you might enjoy my Cream Cheese Chicken for a silkier, sauce based alternative. But for tonight, we're all about that crunch.
Ingredient Breakdown
I don't use a lot of fancy stuff here. The goal is a hearty, family friendly flavor that doesn't mask the taste of the chicken.
| Ingredient | Science Role | Pro Secret |
|---|---|---|
| Olive Oil | Heat Conductor | Helps the rub stick and prevents sticking to the basket |
| Smoked Paprika | Color & Depth | Gives that "grilled" look without an actual grill |
| Bone in Thighs | Moisture Reservoir | Bone keeps the meat from overcooking and drying out |
| Kosher Salt | Moisture Draw | Pulls a tiny bit of water out to help the skin crisp |
Gear For The Job

You don't need a professional kitchen for this. Just a standard air fryer and a few basics.
- Air Fryer: Any brand works, but make sure the basket is clean.
- Meat Thermometer: This is non negotiable if you want to avoid rubbery meat.
- Paper Towels: For the most important step drying the chicken.
- Tongs: For flipping without burning your fingers.
- Small Bowl: For mixing your dry rub.
Step-by-step Cooking
Let's crack on with the process. Remember, the drier the chicken, the better the crunch.
- Dry the meat. Rinse the chicken thighs and pat each thigh completely dry with paper towels. Note: Any leftover water will steam the skin, making it rubbery.
- Trim the fat. Trim any excess hanging fat or skin flaps using kitchen shears.
- Oil the thighs. Place thighs in a bowl and drizzle with 1 tablespoon of olive oil, tossing to coat evenly.
- Mix the rub. In a small ramekin, mix smoked paprika, garlic powder, onion powder, dried oregano, salt, and pepper.
- Season firmly. Sprinkle the rub over the chicken, massaging it firmly into the skin and under the edges.
- Preheat. Preheat the air fryer to 200°C (400°F).
- First blast. Arrange the thighs in the air fryer basket in a single layer, skin side down. Air fry for 12 minutes.
- The flip. Using tongs, flip the thighs to skin side up and air fry for another 12-13 minutes until the skin is golden and crackling.
- Temperature check. Verify the internal temperature reaches 74°C (165°F) at the thickest part of the thigh.
- The rest. Let the meat rest for 5 minutes to allow juices to redistribute.
Solving Common Problems
Even with a simple recipe, things can go sideways. Usually, it's a temperature or spacing issue.
Rubbery Skin Issues
If your skin isn't shattering, it's likely because the chicken was too wet or the basket was too crowded. When thighs touch, the air can't circulate, creating "steam pockets" that soften the skin.
Sticking to the Basket
This usually happens if the basket wasn't preheated or if you didn't use enough oil. A light coating of oil on the basket itself can also help if you're using an older model.
| Problem | Root Cause | Solution |
|---|---|---|
| Skin is pale | Temp too low | Ensure preheat is finished before adding meat |
| Dry center | Overcooked | Use a thermometer; pull at 74°C |
| Rub burnt | Too much sugar | Ensure you're using paprika, not a sugar based BBQ rub |
Mistakes to avoid:
- ✓ Don't stack the chicken; leave gaps for air.
- ✓ Don't skip the preheat; it's the difference between fried and steamed.
- ✓ Don't flip too early; let the first side set.
- ✓ Don't cut into the meat immediately; wait 5 minutes.
Swaps and Variations
I love this base recipe, but you can easily pivot the flavor. If you want an Asian style twist, swap the oregano and paprika for ginger powder and a splash of soy sauce. If you're looking for a leaner meal, you can use Air fryer chicken thighs boneless skinless, but reduce the total cook time by about 5-7 minutes since there's no bone to heat through.
For a different kind of comfort, you might try a Tuna Noodle Casserole for your next family meal.
| Original Ingredient | Substitute | Why It Works |
|---|---|---|
| Olive Oil (1 tbsp) | Avocado Oil (1 tbsp) | Higher smoke point. Note: Neutral flavor |
| Smoked Paprika (1 tsp) | Cumin (1 tsp) | Adds an earthy, taco like vibe |
| Dried Oregano (1/2 tsp) | Dried Thyme (1/2 tsp) | More floral, classic French profile |
| Bone in Thighs (2 lbs) | Boneless Thighs (2 lbs) | Faster cook. Note: Less flavor, less crisp |
If you're cooking for a crowd and need to scale up, don't just double the time. Work in batches. If you crowd the basket, you'll end up with pale, soggy chicken. For a 2x batch, I recommend cooking two separate rounds.
If you must do it in one go in a massive air fryer, increase the cook time by about 20% and flip more frequently.
Preservation Secrets
Leftovers are actually great, but reheating them is where most people fail. If you put them in the microwave, that beautiful skin becomes a wet sponge.
Storage Guidelines: Store cooked thighs in an airtight container in the fridge for up to 4 days. For the freezer, wrap them individually in foil and then place them in a freezer bag for up to 3 months.
The Reheating Trick: To bring back the crunch, pop them back in the air fryer at 180°C for 3-4 minutes. It's the only way to restore the shatter crisp texture.
Zero Waste Tips: Don't throw away the bones! Collect the bones from your Air Fryer Chicken Thighs in a freezer bag. Once you have a few, simmer them with an onion, carrot, and celery for a quick, homemade bone broth. It's a hearty way to make sure nothing goes to waste.
The Best Pairings
Since this is a rich, savory main, you need something bright and fresh to cut through the fat. I usually go for something quick and green. My Steamed Asparagus is a great choice because it takes almost no time and keeps the meal feeling balanced.
If you're feeling extra hungry, a side of garlic mashed potatoes or a simple quinoa salad works wonders. The key is to avoid other "heavy" fried sides let the chicken be the star of the show.
Decision Shortcut:
- If you want a light meal → Pair with steamed greens and a squeeze of lemon.
- If you want comfort food → Pair with buttery mash and corn on the cob.
- If you're meal prepping → Pair with roasted sweet potatoes and broccoli.
Recipe FAQs
How long do you cook chicken thighs in the air fryer?
Cook for 24-25 minutes total. Air fry for 25 minutes skin side down, then flip and cook for another 12-13 minutes.
What temperature and how long do you put chicken thighs in the air fryer?
Set the air fryer to 400°F (200°C) for 24-25 minutes. Start with 12 minutes skin side down and finish with 12-13 minutes skin side up.
Are air fryers ok for diabetics?
Yes, air fryers are generally a great tool for diabetics. They allow you to achieve a crispy texture using significantly less oil than deep frying, which helps with weight and blood sugar management.
Is air fried chicken good for cholesterol?
Yes, it is a healthier alternative to deep frying. Reducing the amount of saturated fats used in the cooking process helps lower the overall fat content of the meal.
What ideas for chicken thighs do you have?
Serve them as a main protein alongside roasted vegetables or in a grain bowl. If you enjoyed the savory, salty balance here, see how the same flavor logic works in our homemade chili.
Why is my air fryer chicken skin rubbery instead of crispy?
Pat the chicken completely dry with paper towels before oiling. Any leftover water on the skin will create steam, which prevents the skin from crisping up at 400°F.
What are some great chicken thigh recipes?
Focus on high heat methods with bone-in, skin-on thighs for the best results. This 400°F air fryer method ensures a juicy interior and crispy exterior without needing complex marinades.
Air Fryer Chicken Thighs