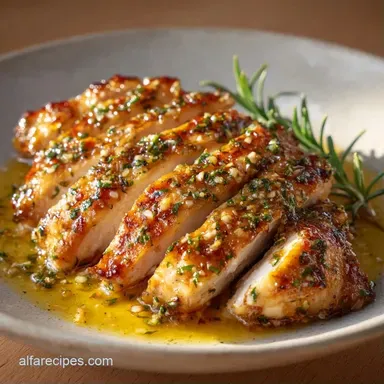
Pan Seared Chicken: Juicy and Golden
- Time: 5 min active + 12 min cook
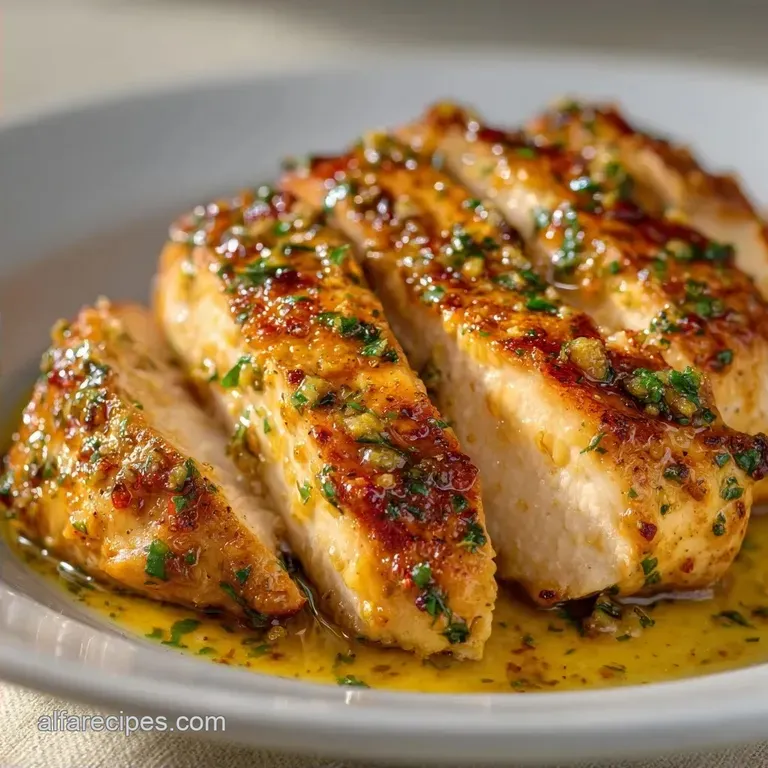
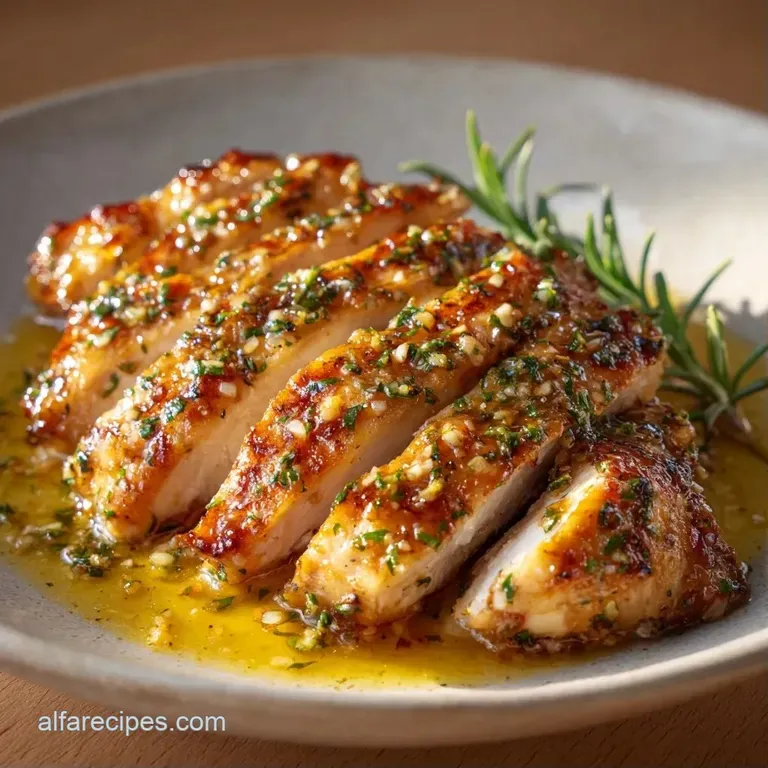
- Flavor/Texture Hook: Mahogany crust with a velvety lemon garlic finish
- Perfect for: Hearty weeknight dinners for the whole family
Pan Seared Chicken
Sizzle. That's the only sound you should hear the second that meat hits the pan. If it's silent, you've already lost. I remember one specific Tuesday night a few years back when I tried to rush dinner for the kids.
I threw the breasts into a lukewarm skillet, and instead of that beautiful brown crust, I got something that looked like wet cardboard. It was grey, rubbery, and honestly, a bit depressing. I spent ten minutes poking it, hoping it would suddenly decide to brown, but it just steamed in its own juices.
The real hero of this recipe, and the thing that changed everything for me, is the avocado oil. I used to use extra virgin olive oil for everything, but the moment the heat climbed, my kitchen looked like a smoke signal for help.
Avocado oil has a massive smoke point, meaning we can actually get the pan hot enough to create a real crust without burning the oil or setting off the alarm. When you combine that high heat with chicken that's been pounded to a uniform thickness, you get a result that feels like a fancy restaurant meal but takes almost no effort.
This Pan Seared Chicken isn't about being a professional chef; it's about using a few practical tricks to make a hearty, no fuss meal. We're focusing on minimal tools - just one good skillet - so you aren't scrubbing a mountain of pots after the family has finished eating. You can expect a tender, juicy interior and a savory exterior that holds up beautifully under a quick pan sauce.
The Secret To The Crust
What actually makes this work isn't magic, it's just a bit of home cook logic. I've spent a lot of time wondering why some breasts are juicy while others feel like erasers, and it usually comes down to two things: surface moisture and heat distribution.
- Uniform Thickness: Pounding the meat to 3/4 inch ensures the thin end doesn't turn into leather while the thick part is still raw.
- The Dry Surface: Moisture is the enemy of a sear. If the meat is damp, it steams instead of searing, which is how you get that dreaded grey color.
- over High heat Fat: Using avocado oil allows the pan to reach a temperature where the proteins brown quickly without the oil breaking down.
- Carryover Heat: Pulling the meat at 160°F allows the internal temp to rise to 165°F while resting, preventing overcooking.
- Deglazing the Fond: Those brown bits stuck to the pan are concentrated flavor. Adding broth and lemon juice lifts them back into the sauce.
| Method | Time | Texture | Best For |
|---|---|---|---|
| Pan Seared | 12 mins | Mahogany crust, juicy | Quick weeknight meals |
| Poached | 20 mins | Soft, pale, moist | Salads or shredding |
| Oven Baked | 30 mins | Evenly cooked, less crust | Large batches/Meal prep |
Ingredient Component Analysis
I like to think of ingredients as tools. Every single item in this pan has a specific job to do, and if you swap one out without knowing why, the whole vibe changes.
| Ingredient | Science Role | Pro Secret |
|---|---|---|
| Avocado Oil | over High heat Medium | Prevents smoking at high temps |
| Unsalted Butter | Flavor & Gloss | Adds a velvety finish to the sauce |
| Lemon Juice | Acidity | Cuts through the fat of the butter |
| Chicken Broth | Deglazing Agent | Rehydrates the fond for deep flavor |
Ingredients
Here is everything you'll need for this Pan Seared Chicken. I've kept it simple so you can probably find most of this in your pantry right now.
- 4 boneless skinless chicken breasts, pounded to even thickness (1.5 lbs / 680g) Why this? Uniform thickness prevents overcooking the edges
- 1 tsp (6g) kosher salt
- ½ tsp (3g) cracked black pepper
- 2 tbsp (30ml) avocado oil Why this? Extremely high smoke point for a better sear
- 3 tbsp (42g) unsalted butter
- 3 cloves (9g) garlic, minced
- ½ cup (120ml) low sodium chicken broth
- 1 tbsp (15ml) fresh lemon juice Why this? Fresh citrus provides a brighter, sharper contrast
- 1 tbsp (4g) fresh parsley, chopped
| Original Ingredient | Substitute | Why It Works |
|---|---|---|
| Avocado Oil | Grapeseed Oil | Similar high smoke point. Note: Neutral flavor profile |
| Chicken Broth | White Wine | Adds acidity and depth. Note: Use a dry white like Sauvignon Blanc |
| Lemon Juice | Apple Cider Vinegar | Provides necessary acidity. Note: Tastes slightly more fermented/sweet |
| Unsalted Butter | Ghee | Higher smoke point. Note: Lacks the milky sweetness of butter |
Right then, before we get into the pan, let's talk tools. You don't need a fancy kitchen, but a 12 inch cast iron or stainless steel skillet is non negotiable here. Non stick pans are great for eggs, but they can't handle the heat needed for a proper sear, and they don't create that wonderful fond we need for the sauce.
Essential Tools for Success
Keep it simple. You only need a few things to make this work, which means less time cleaning and more time at the crowded table with your family.
- 12 inch cast iron or stainless steel skillet (The gold standard for searing)
- Meat mallet or a heavy rolling pin (For evening out the chicken)
- Instant read meat thermometer (The only way to guarantee juiciness)
- Tongs (To avoid flipping with a fork and piercing the meat)
- Paper towels (To get that meat bone dry)
The Cooking Process
Now, let's get into it. Trust me on this: don't move the chicken once it hits the pan. The temptation to peek is real, but if you move it, you break the contact and lose that mahogany crust.
- Pound the thickest part of the chicken breasts until they are a uniform thickness of about ¾ inch. Pat the meat completely dry with paper towels and season generously with salt and pepper on both sides. Note: Dry meat = better crust
- Place a 12 inch cast iron or stainless steel skillet over medium high heat and add the avocado oil. Heat until the oil shimmers.
- Carefully lay the chicken in the pan without crowding. Sear without moving for 5–6 minutes until a mahogany colored crust forms and the meat releases easily from the pan.
- Flip the chicken and sear for another 5 minutes, or until the internal temperature reaches 160°F (71°C). Remove chicken to a plate and let it rest for 5 minutes.
- Reduce heat to medium. In the same pan, melt the butter. Add minced garlic and sauté for 30 seconds until fragrant.
- Pour in the chicken broth and lemon juice, scraping the bottom of the pan to release the brown bits (fond). Simmer for 3 minutes until slightly reduced.
- Stir in the chopped parsley and pour the sauce over the rested chicken breasts.
Chef's Note: If you find the garlic is browning too quickly in the butter, pull the pan off the heat for ten seconds. Burnt garlic tastes bitter and will ruin your velvety sauce.
Troubleshooting Guide
Even with a simple recipe, things can go sideways. Most of the time, it's just a matter of temperature or timing. If your Pan Seared Chicken isn't behaving, don't panic.
Why Your Chicken Sticks
If the meat is glued to the pan, you likely didn't wait long enough for the oil to shimmer, or you tried to flip it too early. The meat will naturally release itself once the sear is fully formed. Just leave it alone for another minute.
Preventing Rubbery Meat
Rubbery chicken is almost always a result of overcooking. When the proteins tighten too much, they squeeze out all the moisture. Using a thermometer and pulling the meat at 160°F is the only real way to stop this.
Handling Sauce Separation
If your sauce looks oily rather than silky, the heat was likely too high, causing the butter to break. Whisk in a teaspoon of cold water or a tiny pinch of cornstarch slurry to bring it back together.
| Problem | Root Cause | Solution |
|---|---|---|
| Grey Meat | Pan wasn't hot enough | Wait for oil to shimmer before adding meat |
| Dry Interior | Overcooked/No resting | Pull at 160°F and rest for 5 mins |
| Bitter Sauce | Burnt garlic | Sauté garlic for 30 seconds max |
Quick Success Checklist:
- ✓ Pounded to ¾ inch thickness
- ✓ Patted completely dry with paper towels
- ✓ Oil shimmering before meat hits the pan
- ✓ Internal temp reached 160°F
- ✓ Meat rested for at least 5 minutes
Adjusting the Portion Size
Whether you're cooking for just yourself or a whole crowd, you can scale this Pan Seared Chicken without losing the quality. The main thing to remember is that the pan's surface area is your limiting factor.
Scaling Down (1-2 servings): Use a smaller skillet if you have one, but keep the heat consistent. Reduce the cooking time by about 20% because smaller amounts of meat don't drop the pan temperature as much.
If you need to use half an egg for a different version of this, just beat one and measure out a tablespoon.
Scaling Up (8+ servings): Do not try to crowd all the chicken into one pan. You'll end up steaming the meat instead of searing it. Work in batches, removing the first set of breasts to a platter while you do the second.
Only increase salt and spices to 1.5x - don't double them, or it can become overly salty. Reduce the liquid in the sauce by about 10% since you'll have more natural juices in the pan.
If you're in the mood for something even richer for a big family gathering, you might want to try my Chicken with Silky Sauce recipe. It uses a similar searing technique but moves into a much creamier territory.
| If you want... | Do this... |
|---|---|
| A deeper crust | Use a cast iron skillet |
| Faster cleanup | Use stainless steel |
| Maximum juiciness | Never skip the 5 min rest |
Common Kitchen Myths
There are a few things people say about searing meat that are just plain wrong. Let's set the record straight so you can cook with confidence.
The "Seal in Juices" Myth: You'll often hear that searing meat "locks in the juices." It doesn't. Moisture loss happens regardless of how you cook it. What searing actually does is create flavor through the browning of proteins, which makes the meat taste better even if some moisture is lost.
The "Room Temp" Myth: Some people insist you must let chicken sit on the counter for 30 minutes before cooking. In real life, this is a food safety risk and doesn't actually make a noticeable difference in the final internal temperature compared to the time it spends in a hot pan.
Storage Guidelines
Leftovers are a goldmine for the next day's lunch. Just make sure you handle them correctly so the meat doesn't turn into rubber.
Fridge and Freezer: Store your Pan Seared Chicken in an airtight container in the fridge for up to 3-4 days. If you're prepping for the month, it can stay in the freezer for 2 months. To freeze, let the chicken cool completely and freeze it with the sauce poured over it to prevent freezer burn.
Zero Waste Tips: Don't toss those leftover pan drippings if you didn't make the sauce. You can save the browned butter and oil to sauté spinach or kale for a side dish. If you have leftover chicken, shred it into a wrap or a salad.
According to USDA data, keeping meat refrigerated at 40°F or below is key to preventing spoilage.
Serving Suggestions
This dish is versatile and fits right in at any family meal. Because the sauce is bright and savory, you want sides that can soak up that extra lemon garlic goodness.
Pair this with some steamed asparagus for a light, fresh meal that doesn't feel too heavy. If you need something heartier for the kids, a pile of garlic mashed potatoes or some buttered noodles works perfectly.
For a low carb option, serve the chicken over a bed of cauliflower rice or sautéed zucchini ribbons. The key is to pour that extra velvety sauce over everything on the plate. It's a no fuss way to make a simple meal feel like a real occasion.
Right then, you've got the tools and the tricks. Just remember: high heat, dry meat, and plenty of patience while it sears. You've got this! Enjoy your Pan Seared Chicken.
Recipe FAQs
How to sear chicken quickly?
Pound the meat to a uniform 3/4 inch thickness. This ensures the chicken cooks evenly and rapidly without overcooking the thinner edges.
How to cook chicken for someone with gastritis?
Skip the garlic, lemon juice, and black pepper. Use only salt and avocado oil to minimize irritation to the stomach lining.
How to cook chicken for diabetic patients?
Stick to the official recipe ingredients. Using low-sodium broth and fresh lemon juice avoids the added sugars often found in processed marinades.
Can a diabetic eat baked chicken?
Yes, baked chicken is a safe, low-glycemic choice. As long as you avoid sugary glazes or breading, it is an excellent protein for blood sugar management.
What are some quick chicken recipe without using the oven?
Pan-sear chicken breasts in a skillet for a fast, stovetop meal. You can pair this protein with a creamless sauce for a complete dinner without using the oven.
Quick pan seared chicken thighs?
Yes, though they require a longer sear time than breasts. Follow the same searing technique but allow more time per side to accommodate the higher fat content of the thigh.
How to prevent the chicken from sticking to the pan?
Heat the avocado oil until it shimmers before adding the meat. Let the chicken sear undisturbed for 5-6 minutes; the meat will release naturally once the crust forms.
Pan Seared Chicken Breast