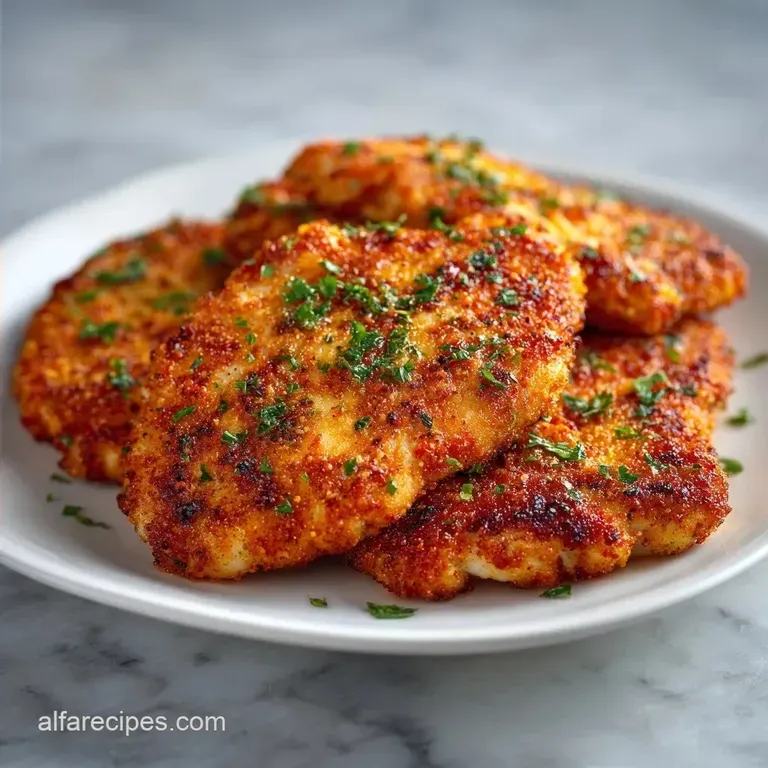
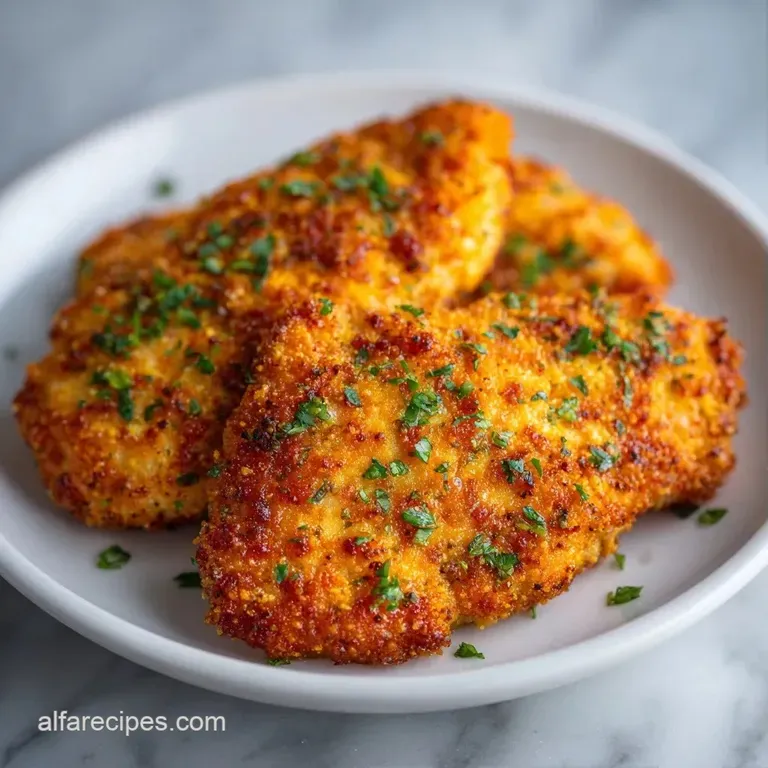
Pan Fried Chicken Breast: Ultimate and Crispy
- Time: 5 min active + 20 min cook
- Flavor/Texture Hook: Shattering mahogany crust with a garlic butter finish
- Perfect for: A hearty family weeknight dinner that feels special
- The Secret to Perfect Pan Fried Chicken Breast
- Why This Works
- Ingredient Deep Dive
- Shopping List Breakdown
- Key Steps for Success
- Common Mistakes & Troubleshooting
- Creative Twists and Swaps
- Dish Myths and Truths
- Storage Guidelines and Zero Waste
- What to Serve This With
- High in Sodium
- Recipe FAQs
- 📝 Recipe Card
The Secret to Perfect pan fried Chicken Breast
That loud, aggressive sizzle the second the meat hits the hot oil is the best part of the whole process. But for a long time, my dinners ended in a tragedy of "rubbery chicken." I'd have these breasts that were burnt on the outside and somehow still raw in the center, or worse, they'd just be dry and tasteless.
It's a frustrating cycle that makes most people just give up and buy frozen nuggets.
The fix isn't a fancy tool or an expensive cut of meat. It's all about the thickness. Most chicken breasts are shaped like a football, with one end thick and the other thin. When you throw that in a pan, the thin end overcooks before the thick end even gets warm. That's where the rubbery texture comes from.
Once I started pounding my meat to a consistent size, everything changed. Now, I can guarantee a pan fried Chicken Breast that is juicy from edge to edge with a crust that actually shatters when you bite into it. It's a no fuss way to get a hearty meal on the table without the stress of guessing if the middle is done.
Why This Works
The secret to this dish isn't magic, it's just a few simple rules of heat and moisture. When we control the shape of the meat and the way it's coated, we control the final result.
- Uniform Thickness: Pounding the meat ensures the entire breast hits the pan surface evenly, so it cooks at the exact same speed.
- Double Flour Dusting: The first layer of flour grips the meat, while the second layer creates a textured surface for the oil to crisp up.
- Butter Basting: Adding butter at the end creates a velvety sauce that seeps into the crust and keeps the meat moist.
- Carryover Cooking: Taking the meat off at 165°F allows it to rest, which lets the juices redistribute instead of leaking onto the plate.
| Prep Method | Cook Time | Texture | Best For |
|---|---|---|---|
| Fresh Pounded Breast | 20 minutes | Shattering crust, juicy center | Family dinner, meal prep |
| Pre cut Tenders | 12 minutes | Softer crust, leaner | Quick lunches, kids |
Ingredient Deep Dive
Understanding what each part of the recipe does helps you make better choices in the kitchen. I don't believe in adding ingredients "just because." Every bit of this list has a job.
| Ingredient | Science Role | Pro Secret |
|---|---|---|
| All purpose Flour | Starch barrier | Shake off excess to avoid a "pasty" crust |
| Unsalted Butter | Fat & Flavor | Adds a nutty aroma when browned with garlic |
| Egg & Milk | Binding agent | Milk thins the egg for a more even coat |
| Garlic Powder | Dry seasoning | Sticks to the meat better than fresh garlic during the first sear |
Shopping List Breakdown
Keep it simple. You probably have most of this in your pantry already. I prefer using Kosher salt because the grains are larger and easier to distribute evenly across the meat.
- 4 boneless skinless chicken breasts (approx. 1.5 lbs / 680g)
- 1 tsp Kosher salt Why this? Better control over seasoning levels
- ½ tsp Black pepper
- 1 tsp Garlic powder
- 1 tsp Paprika
- ½ cup all purpose flour Why this? Creates the classic golden crust
- 1 large egg
- 2 tbsp milk Why this? Helps the egg wash flow smoothly
- 2 tbsp olive oil Why this? High smoke point for the initial sear
- 3 tbsp unsalted butter Why this? Essential for the baste finish
- 4 cloves fresh garlic, smashed
Ingredient Swaps
| Original Ingredient | Substitute | Why It Works |
|---|---|---|
| Milk (2 tbsp) | Almond Milk (2 tbsp) | Similar liquid consistency. Note: No real flavor difference here |
| All purpose Flour | Almond Flour (1/2 cup) | Keto friendly. Note: Browns faster and is more fragile |
| Olive Oil | Avocado Oil | Very high smoke point. Note: More neutral flavor |
I once tried using only butter for the whole fry, and it was a disaster. The butter burnt long before the chicken was done, leaving me with a bitter taste and a smoky kitchen. Stick to the oil for the sear and the butter for the finish.
Key Steps for Success
Right then, let's get into the flow. I like to treat this as a three phase process: the prep, the coat, and the sizzle. This keeps the kitchen from getting chaotic.
Phase 1: Prepping for Success
- Place chicken breasts between two sheets of plastic wrap. Use a meat mallet to pound the thickest part until the entire breast is a uniform thickness of about ¾ inch. Note: This prevents the edges from drying out.
- Combine salt, pepper, garlic powder, and paprika in a small bowl.
- Coat both sides of the chicken breasts generously with the seasoning. Press the spices into the meat with your fingers so they don't just slide off in the pan.
Phase 2: The Perfect Coating
- Set up a three bowl breading station: one with flour, one with the beaten egg and milk, and a third for a final light dusting of flour.
- Dip the chicken in flour and shake off any excess. Note: Too much flour creates a thick, doughy layer.
- Dip into the egg wash, then finish with a final light coat of flour. Ensure the coating is thin and even across the whole surface.
Phase 3: The Searing Process
- Heat olive oil in a heavy bottomed skillet over medium high heat until it shimmers.
- Carefully place the chicken in the pan, pressing down lightly. Cook undisturbed for 5–7 minutes until a mahogany crust forms.
- Flip the chicken. Immediately add the unsalted butter and smashed garlic cloves to the pan.
- Baste the chicken with the melting garlic butter for the final 3 minutes of cooking until the internal temperature reaches 165°F. According to Serious Eats, resting the meat for a few minutes after this helps the juices settle.
Chef Note: If you're using a stainless steel pan, the chicken will "stick" for the first 2 minutes. Don't panic. When the crust has developed, the meat will naturally release itself from the pan. If you force it, you'll rip the crust off.
Common Mistakes & Troubleshooting
Most people struggle with pan fried Chicken Breast because of temperature control. If the pan is too cold, the chicken steams. If it's too hot, the flour burns before the meat cooks.
| Issue | Solution |
|---|---|
| Why Your Chicken Is Rubbery | This usually happens when the meat is too thick in some areas and overcooked in others. The muscle fibers tighten up and squeeze out all the moisture. |
| Why Your Coating Falls Off | If the chicken is too wet when it hits the flour, the coating won't stick. Pat your meat dry with paper towels before seasoning. Also, make sure you shake off the excess flour after the first dip. |
| Why Your Butter Burnt | Butter has milk solids that burn quickly. If you add it at the start, it will turn black. Always add the butter in the last few minutes of cooking to get that nutty flavor without the bitter char. |
Common Mistakes Checklist
- ✓ Patted the chicken dry before seasoning
- ✓ Pounded meat to exactly ¾ inch thickness
- ✓ Waited for oil to shimmer (not smoke)
- ✓ Added butter only during the final flip
- ✓ Rested the meat for 5 minutes before slicing
Creative Twists and Swaps
Once you have the basic pan fried Chicken Breast down, you can play with the seasonings. I often change the spice mix depending on what my family is craving that week.
For a zesty Italian vibe, add a tablespoon of grated Parmesan cheese and some dried oregano to the final flour dusting. This adds a salty, nutty layer that pairs great with a squeeze of fresh lemon. If you want something with a spicy kick, mix a teaspoon of cayenne pepper or smoked paprika into the initial seasoning.
If you're looking for a lower carb option, you can skip the flour and use a mixture of almond flour and crushed pork rinds. It won't be exactly the same, but it still gives you a satisfying crunch. For those who prefer something even lighter, my Baked Healthy Chicken Strips are a great alternative when you don't want to deal with the frying pan.
Adjusting for Batch Size
If you're cooking for a crowd and need to double the recipe, don't crowd the pan. If you put 8 breasts in one skillet, the temperature will drop, and you'll end up with soggy meat. Work in batches of two or three.
For the seasonings, don't just double everything. I find that spices and salt don't always scale linearly. Start with 1.5x the seasoning and taste a small piece of the coating before proceeding. For liquids like the egg wash, you can double them safely since the chicken just needs to be coated.
Dish Myths and Truths
There are a lot of "old wives' tales" in the kitchen, especially with chicken. Let's clear a few up.
Myth: Searing "locks in" the juices. This is simply not true. Searing creates a crust and adds flavor through browning, but it doesn't create a waterproof seal. Moisture loss happens regardless of how you sear it. The real key to juiciness is not overcooking the meat.
Myth: You must use a specific type of oil. While some oils have higher smoke points, you don't need a "special" oil. Olive oil works fine for medium high heat. The important part is that the oil is hot enough to create that instant sizzle.
Myth: Milk in the egg wash is optional. You can skip it, but you'll notice the coating is thicker and more prone to clumping. Milk thins the protein in the egg, allowing for a thinner, more professional layer of flour.
Storage Guidelines and Zero Waste
I rarely have leftovers of this dish because my kids devour it, but if you do, here is how to handle it.
Fridge and Freezer Store the chicken in an airtight container for up to 3 days in the fridge. To reheat, avoid the microwave if you can. A microwave will turn that beautiful crust into a sponge. Instead, put it back in a dry skillet over medium heat for 2-3 minutes per side.
This brings back the crunch. For the freezer, you can freeze cooked breasts for up to 2 months, though the texture of the crust will soften.
Zero Waste Tips Don't throw away the leftover flour and egg wash. While you can't reuse them for another batch of chicken for safety reasons, you can use the leftover seasoned flour to thicken a gravy.
If you have the bones from other chicken parts, keep them in a freezer bag. Once you have a few, simmer them with onion scraps and carrot peels to make a basic stock. This stock is amazing for making a sauce to go over your Cream Cheese Chicken or other poultry dishes.
What to Serve This With
Since the pan fried Chicken Breast is quite rich thanks to the butter and flour, you need something to cut through that fat.
The Fresh Contrast A crisp arugula salad with a lemon vinaigrette is my go to. The bitterness of the greens and the acidity of the lemon balance the buttery crust perfectly. Alternatively, some steamed broccoli with a pinch of salt keeps the meal feeling light and healthy.
The Comfort Pairing If it's a rainy day and you want something hearty, serve the chicken over a bed of garlic mashed potatoes. The butter from the pan can be drizzled right over the potatoes for extra flavor.
Some honey glazed carrots on the side add a touch of sweetness that complements the savory paprika in the seasoning.
The Sauce Option While the garlic butter baste is usually enough, some people prefer a sauce. A simple lemon caper butter sauce made in the same pan after the chicken is removed is a classic move.
Just deglaze the pan with a splash of white wine or chicken broth, whisk in a knob of cold butter, and add capers and lemon juice. It takes 3 minutes and makes the whole meal feel like it came from a bistro.
High in Sodium
1120 mg 1120 mg of sodium per serving (49% 49% of daily value)
The American Heart Association recommends a daily sodium limit of no more than 2,300 mg, with an ideal limit of 1,500 mg for most adults.
Tips to Reduce Sodium
-
Reduce Added Salt-25%
Reduce or eliminate the Kosher salt. Since the chicken is breaded, you can significantly lower the sodium by cutting this ingredient in half.
-
Add Citrus Acid-15%
Squeeze fresh lemon juice over the chicken after cooking. Acid mimics the brightness of salt, allowing you to use less sodium without losing flavor.
-
Amplify Aromatics-10%
Increase the amount of fresh garlic or add shallots to the pan to build a more complex, savory base that compensates for less salt.
-
Enhance with Herbs
Add dried oregano or fresh parsley to the flour mixture to add aromatic depth and flavor complexity.
Recipe FAQs
How long should you cook chicken breast pan-fried?
Cook for 5 7 minutes on the first side and 3 minutes after flipping. Use a meat thermometer to ensure the internal temperature reaches 165°F.
How to cook chicken for someone with gastritis?
Omit the paprika, pepper, and butter. Use a minimal amount of olive oil and skip the breading to keep the meal gentle on the stomach.
Is chicken breast good for diabetics?
Yes, it is an excellent lean protein. Be mindful of the flour coating, as it adds refined carbohydrates to the dish.
How to pan fry chicken breast without it going dry?
Pound the meat to a uniform 3/4 inch thickness. This ensures the entire breast cooks evenly so the edges don't overcook before the center reaches 165°F.
What are your favorite healthy recipes using chicken breasts?
Try grilling them on skewers. If you enjoyed the lean protein focus here, see how we use a similar approach in our paleo chicken yakitori.
Can I serve pan fried chicken breast with a sauce?
Yes, deglaze the pan after removing the meat. Use the remaining garlic butter and a splash of water or broth to create a quick pan sauce.
Why does the breading fall off the chicken?
The meat was too wet before dredging. Pat the chicken breasts dry with paper towels so the flour and egg wash can adhere properly.
pan fried Chicken Breast

