Skillet Chicken Dinner: Golden and Juicy
- Time: 5 min active + 20 min cooking = Total 25 min
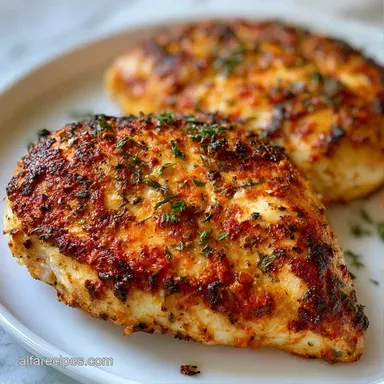
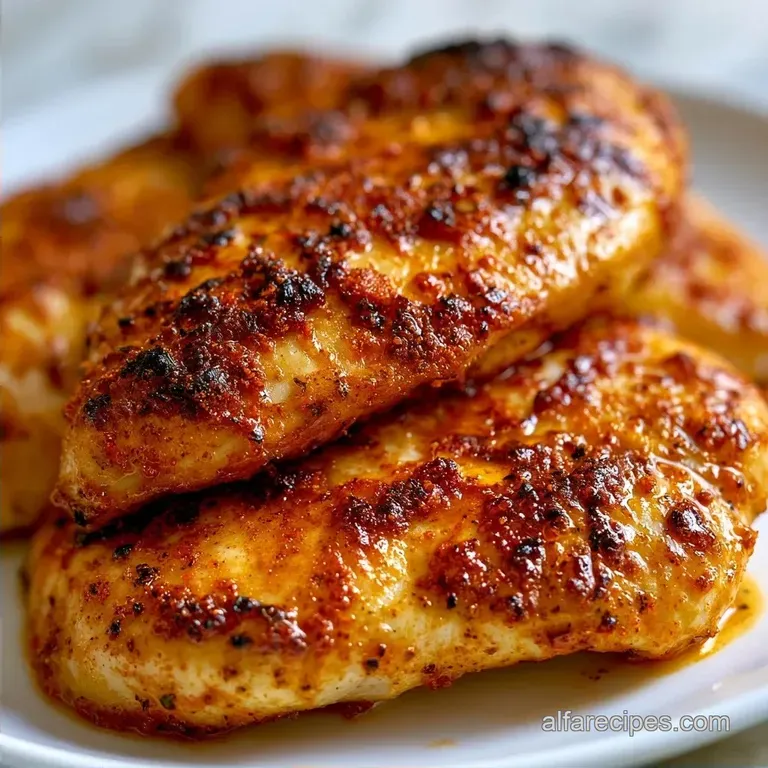
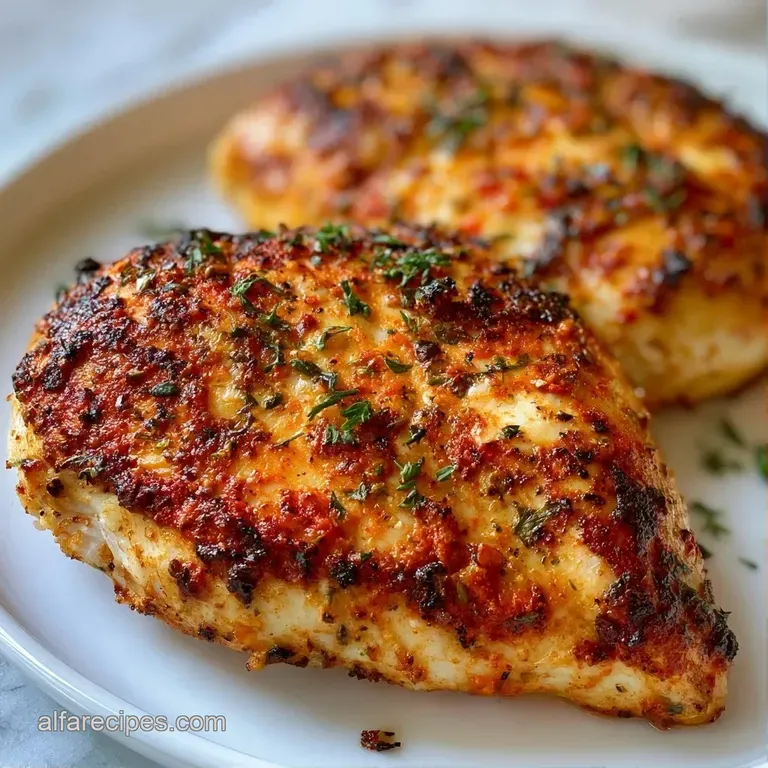
- Flavor/Texture Hook: Mahogany crust with a velvety lemon butter glaze
- Perfect for: No fuss family weeknight dinners
- Juicy and Easy Skillet Chicken
- Why This Method Works
- Essential Ingredient Breakdown
- The Building Blocks
- Step-by-Step Cooking Guide
- Fixing Common Cooking Issues
- Flavor Twists to Try
- Adjusting the Batch Size
- Debunking Kitchen Myths
- Storing and Reducing Waste
- Best Ways to Serve
- Recipe FAQs
- 📝 Recipe Card
That loud, aggressive sizzle when the meat hits the hot oil is the sound of a dinner win. I can't tell you how many times I've served chicken that was a total disaster, where the thin end of the breast was basically leather while the thick center was still practically raw.
It's the "football shape" problem that plagues almost every home cook.
I used to think the secret was some fancy thermometer or a specific brand of pan. Honestly, it's much simpler than that. The trick is just a bit of muscle and a meat mallet. Once I started pounding my chicken to an even thickness, everything changed.
Now, my family actually asks for this for dinner because it's consistent and hearty.
This Skillet Chicken recipe is all about simplicity and reliability. We're using a few basic pantry staples to create a sauce that tastes like it took hours, but it actually comes together in the time it takes for the meat to rest. It's a no fuss approach that ensures a crowded table stays happy.
Juicy and Easy Skillet Chicken
The real magic of this dish is the contrast between the browned exterior and the tender inside. Most people rush the searing process, flipping the meat too early, which leaves you with a pale, steamed piece of protein. To get that deep, savory crust, you have to leave it alone.
Trust me on this, the patience pays off. When you see the chicken naturally release from the pan, that's your cue. If it's sticking, it's not ready yet. This approach creates those little brown bits on the bottom of the pan, known as fond, which provide the base for a rich, velvety sauce.
I've found that using a 12 inch skillet is the sweet spot. If the pan is too small, the chicken crowds together, the temperature drops, and you lose that sear. We want the meat to fry in the oil, not boil in its own juices.
Why This Method Works
I've always been curious about why some pan sauces break while others stay silky. It comes down to a few simple mechanical steps.
- Uniform Thickness: Pounding the meat ensures every square inch hits the pan at the same time, preventing dry edges.
- Temperature Gradient: Searing at medium high heat creates a crust that adds depth without overcooking the interior.
- Deglazing: Adding liquid to a hot pan lifts the caramelized proteins, integrating that concentrated flavor back into the sauce.
- Cold Butter Finish: Whisking in cold butter at the end creates a stable emulsion, giving the sauce its velvety texture.
| Method | Time | Texture | Best For |
|---|---|---|---|
| Stovetop | 25 mins | Crispy crust, silky sauce | Quick weeknights |
| Oven Baked | 40 mins | Uniformly soft, less crust | Large crowds |
| Air Fryer | 20 mins | Very dry exterior, lean | Single servings |
Essential Ingredient Breakdown
Before we get into the pan, it's helpful to understand what each component is actually doing. It's not just about flavor, it's about how the ingredients interact under heat.
| Ingredient | Science Role | Pro Secret |
|---|---|---|
| Chicken Breast | Protein Base | Pat bone dry for a better sear |
| Cold Butter | Thickener/Gloss | Keep it in the fridge until the last second |
| Chicken Broth | Solvent | Use low sodium to control the salt level |
| Lemon Juice | Acidity | Cuts through the fat of the butter |
The Building Blocks
For this Skillet Chicken, we keep the list short. I don't believe in adding ten different spices when three or four do the job perfectly.
- 1.5 lbs boneless skinless chicken breasts Why this? Lean protein that cooks quickly
- 1 tbsp olive oil Why this? High smoke point for searing
- 1 tsp kosher salt Why this? Better grain size for even coating
- 1/2 tsp black pepper Why this? Adds a subtle, sharp heat
- 1 tsp garlic powder Why this? Distributes flavor more evenly than fresh garlic
- 1 tsp smoked paprika Why this? Gives that mahogany color and earthy aroma
- 2 cloves garlic, minced Why this? Fresh punch of flavor in the sauce
- 1/2 cup low sodium chicken broth Why this? Liquid for deglazing the pan
- 1 tbsp fresh lemon juice Why this? Brightens the heavy butter notes
- 1 tsp dried oregano Why this? Classic herbal note
- 1 tbsp cold unsalted butter Why this? Creates the velvety finish
Substitution Options
| Original Ingredient | Substitute | Why It Works |
|---|---|---|
| Olive Oil | Avocado Oil | Even higher smoke point. Note: Neutral flavor |
| Chicken Broth | White Wine | Adds sophisticated acidity. Note: Use a dry variety |
| Unsalted Butter | Vegan Butter | Similar fat structure. Note: May slightly alter saltiness |
| Smoked Paprika | Sweet Paprika | Still adds color. Note: Loses the smoky depth |
Right then, let's talk tools. You don't need a professional kitchen here. A heavy bottomed skillet (stainless steel or cast iron) is your best friend because it holds heat better than non stick. If you use non stick, you won't get as much fond, which means the sauce won't be as deep.
Step-by-step Cooking Guide
Let's get into the actual process. Remember to stay focused on the visual cues rather than just the timer.
- Pat the chicken breasts completely dry with paper towels. Note: Moisture on the surface creates steam, which prevents browning.
- Use a meat mallet to pound the thickest part of the breast to an even thickness.
- Rub salt, pepper, garlic powder, and paprika evenly across both sides.
- Heat olive oil in a 12 inch skillet over medium high heat until shimmering.
- Place chicken in the pan and sear undisturbed for 5-7 minutes until a mahogany crust forms.
- Flip and cook for another 5-7 minutes until the internal temperature hits 165°F.
- Remove chicken to a plate to rest. Note: This lets juices redistribute so they don't run out immediately.
- Lower heat to medium. Add minced garlic and sauté for 30 seconds until fragrant.
- Pour in chicken broth and lemon juice, scraping the bottom of the pan to release the fond.
- Stir in dried oregano and whisk in cold butter. Return the chicken to the pan for 1 minute to glaze.
Chef's Tip: If your sauce looks too thin, let it bubble for an extra 2 minutes before adding the butter. This reduces the liquid and concentrates the flavor.
Fixing Common Cooking Issues
Even with a simple recipe, things can go sideways. Most of the time, it's a temperature or spacing issue.
Rubberized Meat Issues
This happens when the chicken is cooked too quickly on the outside or held at a temperature just below boiling. According to Serious Eats, managing the heat and allowing meat to rest is the key to avoiding a rubbery texture.
Thin Sauce Fixes
If your sauce is more like water than a glaze, you likely didn't reduce the broth enough. You can fix this by simmering it longer or adding a tiny pinch of cornstarch mixed with water.
Lack of Browning
If your meat is grey instead of brown, your pan wasn't hot enough, or you crowded the skillet. This forces the chicken to steam in its own moisture.
| Problem | Root Cause | Solution |
|---|---|---|
| Meat sticking | Pan not hot enough | Wait for oil to shimmer before adding |
| Burnt garlic | Heat too high during sauce | Lower heat to medium before adding garlic |
| Dry chicken | Overcooked beyond 165°F | Use a meat thermometer for precision |
Quick Checklist for Success:
- ✓ Meat is pounded to an even thickness
- ✓ Paper towels were used to dry the surface
- ✓ Pan is large enough to avoid crowding
- ✓ Butter was kept cold until the final step
- ✓ Chicken rested for 5 mins before glazing
Flavor Twists to Try
One of the best things about Skillet Chicken is how easy it is to pivot the flavor profile. Once you have the technique down, you can play with the seasonings.
Tex Mex Zest Swap the paprika for chili powder and the oregano for cumin. Instead of lemon juice, use a squeeze of lime and top with fresh cilantro. This version pairs great with a side of Steamed Asparagus to balance the spice.
Italian Garden Increase the oregano and add a pinch of dried basil. Stir in a handful of halved cherry tomatoes during the deglazing phase. The tomatoes burst and create a jammy, rich addition to the butter sauce.
Low Carb Swap This recipe is already quite lean, but you can make it even more keto friendly by swapping the chicken broth for a splash of heavy cream. This creates a richer, more indulgent sauce similar to my Cream Cheese Chicken.
Dairy-free Alternative Use a high-quality vegan butter or a tablespoon of coconut oil. The flavor will be slightly nuttier, but the emulsion still works to give you that glossy finish.
Adjusting the Batch Size
Scaling a one pan meal can be tricky because the pan's surface area is fixed.
Cooking for Two (Half Batch) Use a smaller skillet (10 inch) if you have one. Reduce the cooking time by about 20% since thinner breasts (if halved) cook faster. I recommend beating one egg if any breading were involved, but here, just halve the spices.
Cooking for a Crowd (Double Batch) Don't try to fit 3 lbs of meat into one 12 inch pan. You'll end up with steamed meat. Work in batches. Sear half the chicken, remove it, then sear the second half. Combine them at the end when adding the sauce.
Pro Tip for Large Batches When doubling the recipe, only increase the salt and spices by 1.5x. Flavors can intensify in larger volumes, and you don't want the sauce to become overly salty.
Debunking Kitchen Myths
There are a few things people tell you about searing that just aren't true.
The "Seal In" Myth Many believe that searing meat "locks in the juices." This is a total myth. Searing doesn't create a waterproof barrier. The moisture loss happens regardless of the crust, but the sear is essential for flavor.
The Resting Myth Some say resting is only for big roasts. Not true. Even a small piece of Skillet Chicken needs a few minutes. If you cut into it immediately, the juices run out onto the plate, leaving the meat dry.
Storing and Reducing Waste
Don't let the leftovers go to waste. This dish actually keeps quite well in the fridge.
Storage Guidelines Store the chicken and sauce in an airtight container for up to 4 days in the fridge. If you're freezing it, I suggest removing the sauce first. Freeze the chicken for up to 3 months, then thaw in the fridge overnight.
Reheating Tips Avoid the microwave if you can. It turns the chicken rubbery. Instead, place the meat and sauce in a small pan over low heat with a splash of water or broth to loosen the glaze.
Zero Waste Hacks If you have leftover pan sauce, don't toss it. It's a fantastic base for a quick pasta. Just toss it with some linguine and a bit of pasta water. If you used bone in chicken (though this recipe uses breasts), always save the bones for a quick stock.
Best Ways to Serve
Since the sauce is so velvety, you want something that can soak it up. I usually serve this over a bed of mashed potatoes or a pile of buttery rice.
For a lighter option, a crisp green salad with a sharp vinaigrette cuts through the richness of the butter sauce. If you're feeling fancy, some sautéed spinach or roasted carrots add a nice pop of color to the plate.
The key is to keep the sides simple. The Skillet Chicken is the star here, so don't overcomplicate the rest of the meal. Just get everything on the table while it's hot and enjoy the meal together with your family.
Recipe FAQs
How to make the best chicken in a skillet?
Pound chicken breasts to an even thickness and pat them completely dry. This ensures uniform cooking and allows a mahogany crust to form during the 5-7 minute sear.
How to cook chicken for someone with gastritis?
Avoid using the black pepper and smoked paprika. Stick to salt and garlic powder for seasoning to reduce irritation while using the same pan-searing method.
Can a diabetic eat baked chicken?
Yes, baked chicken is generally an excellent choice for diabetics. This skillet version is also ideal because it uses low-sodium broth and lemon juice instead of sugary glazes.
How to cook chicken for diabetic patients?
Use the skillet method with low-sodium broth. The combination of lemon juice and dried oregano provides bold flavor while keeping the meal diabetic friendly.
What are some quick chicken recipes without using the oven?
Sear chicken breasts in a skillet over medium high heat. This method takes only 20 minutes; for other fast meal ideas, see how to make a smoothie bowl in 5 minutes.
Is it true that skillet chicken breasts always turn out dry?
No, this is a common misconception. Pounding the meat to an even thickness and allowing the chicken to rest after searing prevents it from becoming rubbery.
How to store leftover skillet chicken?
Place the meat and sauce in an airtight container for up to 4 days. Reheat in a pan over low heat with a splash of chicken broth to loosen the glaze.
Easy Skillet Chicken Dinner