Beef and Noodles: Hearty with Gravy
- Time:15 minutes active + 120 minutes simmering = 135 minutes total
- Flavor/Texture Hook: Deep mahogany beef in a velvety, glossy gravy
- Perfect for: A hearty family dinner on a cold, rainy night
- Beef and Noodles
- Why This Dish Works
- Quick Method Comparison
- Ingredient Component Analysis
- The Necessary Ingredients
- The Kitchen Gear
- Step by Step Process
- Avoiding Kitchen Disasters
- Troubleshooting Common Issues
- Tasty Flavor Variations
- Scaling for Crowds
- Common Cooking Myths
- Storage and Waste
- Final Plating Tips
- Critical Sodium Level
- Recipe FAQs
- 📝 Recipe Card
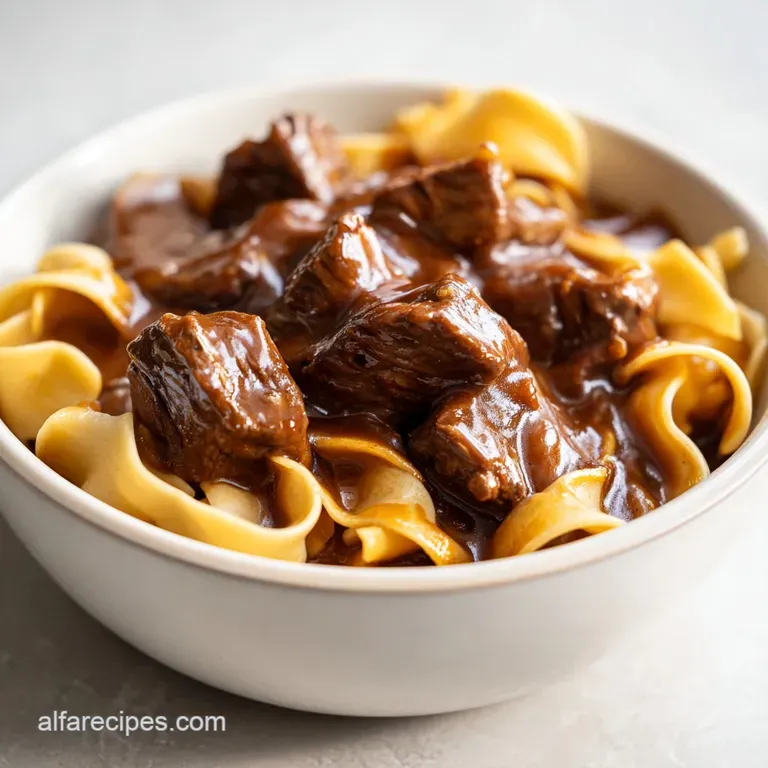
Beef and Noodles
The first thing that hits you is the sizzle. You know that sound, where the beef hits the hot oil and immediately starts to crackle, releasing that deep, savory aroma that fills every corner of the kitchen.
It's a smell that feels like a hug, reminding me of those old-fashioned Sunday dinners where the table was crowded and the conversation was loud.
For a lot of us, Beef and Noodles isn't just a meal, it's a piece of history. It's the kind of dish that comes from rural kitchens and family recipe cards, designed to stretch a modest amount of meat to feed a whole crew.
It's about patience, warmth, and the kind of comfort you can only get from a pot that's been bubbling on the stove for two hours.
I want you to imagine a bowl of these wide, buttery noodles swimming in a rich brown gravy, topped with beef that's so tender you don't even need a knife. This isn't about being fancy, it's about real life and hearty portions.
We're going to make something that tastes like it took all day, even though the active work is actually pretty minimal.
Why This Dish Works
I've spent way too much time wondering why some versions of this come out like rubbery chunks in soup, while others are silky and rich. It all comes down to how the meat and the starch interact. Here is the breakdown of what's actually happening in your pot.
Collagen Melt: Beef chuck is full of connective tissue. When we simmer it slowly at a low temperature, that collagen breaks down into gelatin, which gives the meat a tender texture and makes the gravy feel velvety.
The Flour Shield: Tossing the beef in flour before searing does two things. First, it helps the meat brown more evenly. Second, that flour toasts in the oil and then thickens the sauce as it simmers, so you don't have to make a separate roux.
Fond Recovery: Those brown bits stuck to the bottom of the pot after searing are called the fond. When we pour in the beef broth, we lift all that concentrated flavor back into the liquid, which is where the deep mahogany color comes from.
Starch Balance: By boiling the noodles separately and folding them in at the end, we prevent the pasta from absorbing all the gravy. This keeps the sauce glossy and the noodles from becoming a mushy mess.
Quick Method Comparison
Depending on how much time you have, you might choose a different route. I usually stick to the Dutch oven for the flavor, but sometimes life happens and you need a shortcut.
| Method | Total Time | Texture | Best For |
|---|---|---|---|
| Stovetop Classic | 135 minutes | Mahogany crust, rich gravy | Weekend comfort |
| Pressure Cooker | 60 minutes | Very tender, lighter sauce | Busy weeknights |
| Slow Cooker | 8 hours | Fall apart meat, thinner sauce | Set and forget |
The classic stovetop method is the way to go if you want that specific depth of flavor. Searing in a heavy pot allows for better temperature control and a more consistent crust on the beef.
Ingredient Component Analysis
When you're working with a budget, knowing why an ingredient is there helps you make better swaps. For instance, the beef chuck is the unsung hero here because it's affordable but performs beautifully under heat.
| Ingredient | Science Role | Pro Secret |
|---|---|---|
| Beef Chuck | Collagen Source | Cut into exact 1 inch cubes for even cooking |
| All Purpose Flour | Thickening Agent | Shake off excess flour to avoid a "pasty" taste |
| Beef Broth | Flavor Base | Use low sodium so you can control the salt |
| Worcestershire | Umami Boost | Adds acidity to cut through the heavy fat |
According to USDA FoodData, beef chuck is an excellent source of iron and zinc, making this dish not just filling but actually nutritious. I always suggest using a broth with a bit of depth to it, as the meat will absorb a lot of that flavor during the long simmer.
The Necessary Ingredients
Right then, let's look at what you'll need. I've kept this simple and budget friendly, focusing on pantry staples that do the heavy lifting.
- 2 lbs beef chuck, cut into 1 inch cubes Why this? High collagen for maximum tenderness (Substitute: Stew meat, but check for toughness)
- 1/4 cup all purpose flour Why this? Natural thickener for the gravy (Substitute: Cornstarch for a gluten-free option)
- 1 tsp salt Why this? Basic seasoning (Substitute: Kosher salt for better control)
- 1/2 tsp black pepper Why this? Adds a subtle bite (Substitute: White pepper for a milder heat)
- 2 tbsp vegetable oil Why this? High smoke point for searing (Substitute: Canola or Grapeseed oil)
- 1 medium yellow onion, diced Why this? Aromatic base (Substitute: White onion for a sharper taste)
- 3 cloves garlic, minced Why this? Pungent depth (Substitute: 1 tsp garlic powder)
- 4 cups beef broth Why this? The liquid gold for the gravy (Substitute: Beef stock for more intensity)
- 1 tbsp Worcestershire sauce Why this? Complex salty sweet notes (Substitute: Soy sauce for similar umami)
- 1 tsp dried thyme Why this? Earthy, herbal tone (Substitute: Dried rosemary)
- 1 bay leaf Why this? Adds a subtle floral background (Substitute: Skip if unavailable)
- 12 oz wide egg noodles Why this? Classic comfort shape (Substitute: Fettuccine or Pappardelle)
- 2 tbsp fresh parsley, chopped Why this? Freshness to balance richness (Substitute: Dried parsley)
- 1 tbsp butter Why this? Adds a silky finish to noodles (Substitute: Olive oil)
The Kitchen Gear
You don't need a professional kitchen for this, but a few specific tools make it way easier.
- Dutch Oven: A heavy bottomed pot is non negotiable. It distributes heat evenly and can handle the long simmer without scorching.
- Tongs: These are essential for flipping the beef cubes without breaking them apart.
- Whisk: I use this to scrape the bottom of the pot. It's way more efficient than a spoon for getting all those brown bits.
- Colander: For draining your noodles quickly.
Step by step Process
Let's crack on with the cooking. Trust me on this, the searing part is where the magic happens, so don't rush it.
- Toss the beef cubes in flour, salt, and pepper until evenly coated. Note: Use a bowl or a zip top bag to ensure every side is covered.
- Heat vegetable oil in a Dutch oven over medium high heat. Add the beef in batches and sear until each side is a deep mahogany brown. Remove beef and set aside. Note: If you crowd the pan, the meat will steam instead of sear.
- Lower heat to medium. Add the diced onion and sauté until translucent (about 5 minutes). Stir in the minced garlic and cook for 60 seconds until fragrant.
- Use a whisk to scrape up the brown bits (fond) from the bottom of the pot. Note: This is the secret to a dark, rich gravy.
- Return the seared beef to the pot. Pour in the beef broth and Worcestershire sauce, then add the thyme and bay leaf.
- Bring to a gentle boil, then reduce heat to low. Cover and simmer for 90 minutes, or until the beef is fork tender.
- While the beef finishes, boil the egg noodles in a separate pot of salted water until al dente. Drain and toss with butter.
- Gently fold the noodles into the beef and gravy, simmering for another 2-3 minutes until the sauce reaches a glossy, thickened consistency.
- Garnish with chopped fresh parsley before serving.
Avoiding Kitchen Disasters
Even the best of us mess up sometimes. I once tried to sear all the beef at once and ended up with a gray, boiled looking mess. It was a disaster, but it taught me the importance of batches.
Troubleshooting Common Issues
| Issue | Solution |
|---|---|
| Why Your Meat is Tough | If your beef is still chewy after two hours, it usually means the temperature was too high. If the liquid boils aggressively, the muscle fibers tighten up. Keep it at a gentle simmer, where only a few |
| Why Your Sauce is Thin | A thin gravy happens when there isn't enough flour or the liquid didn't reduce. If it looks like soup, simmer it uncovered for an extra 15 minutes. Alternatively, you can mix a teaspoon of cornstarch |
| Why Your Noodles are Mushy | Overcooking the noodles in the water is the main culprit. Since they simmer in the gravy for a few more minutes, you must pull them out of the boiling water while they still have a bit of a "bite" to |
Common Mistakes Checklist
- ✓ Sear beef in batches to get a crust.
- ✓ Use a low simmer, not a hard boil.
- ✓ Salt the pasta water generously.
- ✓ Cook noodles slightly under done before adding to pot.
- ✓ Scrape the bottom of the pot thoroughly.
Tasty Flavor Variations
I love the classic version, but once you've got the basics down, you can really play around with this. Because the base is so neutral, it takes to a lot of different additions.
If you're in the mood for something similar but different, my Creamless Alfredo Sauce uses a similar thickening logic but with a completely different flavor profile. For this Beef and Noodles recipe, try these twists:
Adding a Creamy Twist
Stir in 1/4 cup of sour cream or heavy cream during the last 5 minutes of simmering. This turns the brown gravy into a velvety, creamy sauce that's absolutely decadent. It's great if you have kids who prefer a milder, richer taste.
Introducing Garden Veggies
You can easily turn this into a one pot meal by adding carrots and peas. Toss in diced carrots with the onions, and stir in frozen peas right before you add the noodles. It adds a pop of color and a bit of sweetness that cuts through the richness.
Making it Slow Cooker Friendly
If you prefer a slow cooker, sear the beef in a pan first (don't skip this!) then throw everything except the noodles into the crockpot. Cook on low for 8 hours. Boil the noodles separately at the end and fold them in just like the stovetop version.
Scaling for Crowds
When you're feeding a crowd, you can't just multiply everything by four and hope for the best. Things like salt and thickeners don't always scale linearly.
Scaling Down (Half Batch) Use a smaller pot to keep the liquid from evaporating too quickly. I find that reducing the cooking time by about 20% works well, but always rely on the "fork tender" test rather than the clock. If you're using an egg that needs to be halved, beat it in a bowl first.
Scaling Up (Double or Triple Batch) The most important thing here is the searing. Do not try to sear 4 lbs of beef in one go, or you'll end up with gray meat. Work in 4 or 5 small batches.
For the liquids, I usually only increase the salt and spices to 1.5x the original amount, as they can become overpowering in large volumes.
If you're doubling the recipe, you might need to extend the simmering time by 15-20 minutes because the larger mass of meat takes longer to reach that magic breakdown temperature.
Common Cooking Myths
There are a few things people tell you about meat that just aren't true. Let's set the record straight so you can cook with confidence.
The Searing Seal Many people believe that searing meat "seals in the juices." According to Serious Eats, this is a myth. Searing actually causes the meat to lose a tiny bit more moisture, but the trade off is the incredible flavor created by the browning process. We sear for taste, not for moisture.
The Expensive Cut Myth You might think using a tenderloin or sirloin would make this "better." In reality, those cuts would be terrible for this. They lack the collagen needed to thicken the sauce and would become dry and tough during a two hour simmer. Chuck is the right tool for the job.
The Flour Only Thickening Some say you can't thicken a sauce without a roux. While a roux is great, the "dusting" method we use here is a perfectly valid way to achieve a thickened gravy, provided you sear the meat properly.
Storage and Waste
This is one of those dishes that actually tastes better the next day. The flavors have more time to mingle, and the gravy often thickens up even more in the fridge.
Storage Guidelines Keep your leftovers in an airtight container in the fridge for up to 3-4 days. If you're freezing it, I recommend freezing the beef and gravy separately from the noodles. Noodles tend to get mushy when frozen and thawed.
The beef base will stay great in the freezer for up to 2 months.
Reheating Tips When reheating, add a splash of beef broth or water. The noodles will have absorbed a lot of the liquid overnight, and a bit of extra moisture will bring back that glossy, velvety texture.
Zero Waste Ideas If you have leftover beef broth or a bit of the gravy left in the pot, don't toss it. I use it to cook my rice or quinoa for the next few days. For those who love rich meat dishes, this pairs well with a Classic Chili on a cold night as part of a big family meal prep.
Final Plating Tips
You've done the hard work, now make it look as good as it tastes. Since this is a rustic dish, you don't need to overthink it, but a few touches make a difference.
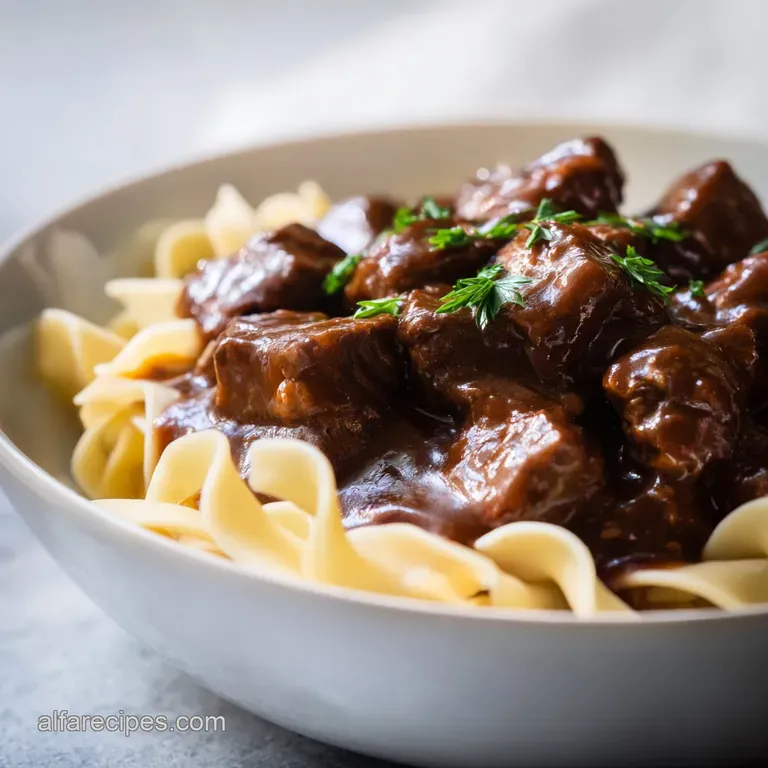
I like to serve this in wide, shallow bowls rather than deep plates. This allows the Beef and Noodles to spread out, showing off the tender chunks of meat and the glossy sauce.
A generous sprinkle of fresh parsley is key. The bright green contrast against the deep brown gravy makes the dish look fresh and vibrant. If you want to go the extra mile, serve it with a side of crusty sourdough bread or a simple garden salad.
The acidity of a vinaigrette helps cut through the richness of the gravy, making every bite feel lighter.
Just remember, the best part of this meal is the feeling of a crowded table. Don't worry if it isn't "restaurant perfect" - the heartiness and the home cooked flavor are what really matter. Right then, get your pot heating up and enjoy!
Critical Sodium Level
1180 mg 1,180 mg of sodium per serving (51% 51% of daily value)
The American Heart Association recommends a daily sodium limit of 2,300 mg, though an ideal limit of 1,500 mg is suggested for most adults to reduce cardiovascular risk.
Ways to Lower the Sodium in This Recipe
-
Swap the Beef Broth-30%
Replace the standard beef broth with low-sodium or no-salt added beef broth to significantly cut the base sodium level.
-
Reduce Added Salt-25%
Omit the 1 tsp of salt completely or reduce it by half, allowing the natural flavors of the beef and aromatics to shine.
-
Modify the Sauce-20%
Use a low-sodium Worcestershire sauce or substitute it with a mixture of balsamic vinegar and a pinch of smoked paprika.
-
Check Your Noodles-10%
Choose low-sodium egg noodles or rinse cooked noodles thoroughly to remove excess surface salt.
-
Boost the Aromatics
Increase the amount of fresh parsley, thyme, and minced garlic to add depth and complexity without adding any sodium.
Recipe FAQs
What seasonings go in beef and noodles?
Salt, black pepper, dried thyme, and a bay leaf. Worcestershire sauce is also used to add a deep, savory complexity to the beef broth.
What's the best beef for beef and noodles?
Beef chuck cut into 1 inch cubes. This cut provides the necessary fat and connective tissue to remain tender during the long simmer. If you enjoyed mastering the low-and-slow tenderizing technique here, apply it to our beef chili for similar results.
Can I use ground beef for beef and noodles?
No, it is not recommended. Ground beef will crumble and overcook during the 90-minute simmer, ruining the intended texture of the dish.
How to make a beef noodle dish?
Sear flour coated beef cubes in oil, then sauté onion and garlic. Simmer the meat with beef broth, Worcestershire sauce, thyme, and a bay leaf for 90 minutes before folding in boiled egg noodles.
Why is my beef still tough after simmering?
The cooking temperature was likely too high. Aggressive boiling causes muscle fibers to tighten, so maintain a gentle simmer to ensure the beef becomes fork tender.
Why is the gravy too thin?
The liquid has not reduced enough. Simmer the sauce uncovered for an additional 15 minutes to achieve a thicker, glossy consistency.
Is it best to freeze the noodles and beef together?
No, this is a common misconception. Freeze the beef and gravy separately from the noodles to prevent the pasta from becoming mushy upon thawing.
Beef And Noodles With Gravy

