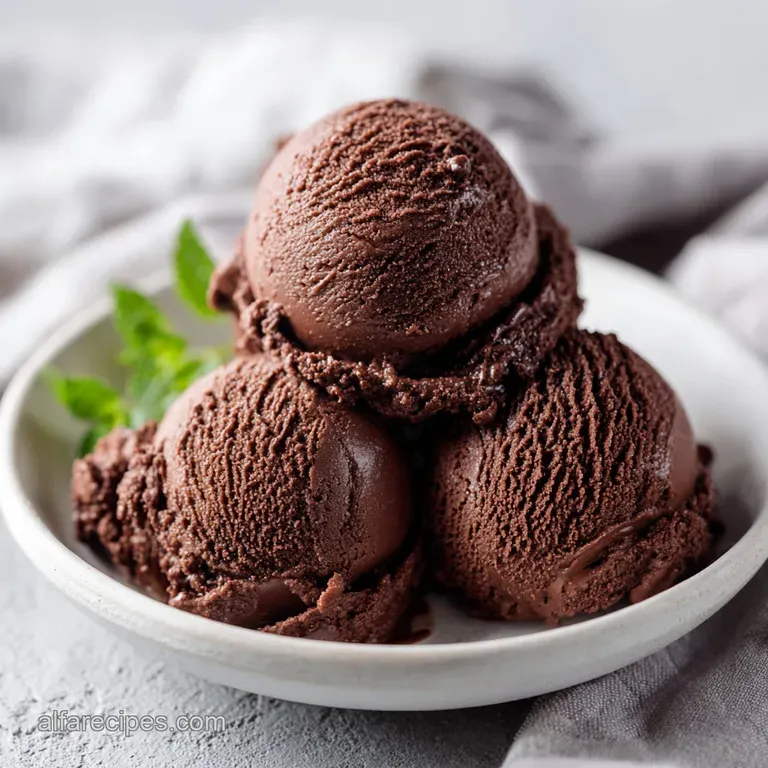
No Churn Chocolate Ice Cream: Silky and Fudgy
- Time: Active 15 minutes, Passive 360 minutes, Total 375 minutes
- Flavor/Texture Hook: Deeply fudgy, velvety, and intensely dark
- Perfect for: Stress free entertaining or a late night chocolate craving
- The Scientific Foundation for a Velvety Chocolate Ice Cream
- Precise Measurements and Critical Timing for Recipe Specs
- Analyzing the Core Elements and Their Functional Roles
- Essential Tools for Achieving Professional Results at Home
- Step-by-Step Methodology for a Flawless Dessert Mixture
- Identifying Common Technical Hurdles and Their Solutions
- Creative Variations for Customizing the Final Flavor Profile
- Long-Term Preservation and Effective Zero Waste Practices
- Enhancing the Sensory Experience of Your Finished Dessert
- Recipe FAQs
- 📝 Recipe Card
The Scientific Foundation for a Velvety Chocolate Ice Cream
Did you know that the primary enemy of a smooth Chocolate Ice Cream isn't the heat, but rather the formation of large ice crystals? Most people assume that making a frozen treat at home requires an expensive machine to constantly scrape the sides of a bowl, but the reality is much more interesting.
We are essentially performing a balancing act between water, fat, and air to keep those crystals microscopic.
When we talk about this specific Chocolate Ice Cream, we are looking at a high concentration colloid. Traditional recipes use a custard base with eggs and milk, which contains a lot of water. That water wants to freeze into hard, crunchy shards.
In this version, we bypass that struggle by using ingredients that are already low in water content. It's a clever hack that relies on the physics of viscosity and fat saturation.
The result is a texture that feels remarkably professional, almost like a dense gelato. Because there is so much cocoa and fat involved, the freezing point is naturally lowered, meaning you won't need a jackhammer to get a scoop out of the container.
We're going for a specific level of richness that coats the palate and lingers, making every bite feel like a decadent event.
Air Incorporation: Whipping the heavy cream creates a matrix of tiny air bubbles trapped by fat globules, providing the necessary "overrun" or fluffiness.
Sugar Concentration: The high sugar content in condensed milk prevents the mixture from freezing into a solid block of ice.
Emulsion Stability: Dutch processed cocoa acts as a thickening agent, helping to bind the fat from the cream to the liquid in the milk.
Temperature Control: Using chilled equipment ensures the fat in the cream remains solid during whipping, preventing it from collapsing into a greasy mess.
| Metric | Fast (No Churn) | Classic (Custard) |
|---|---|---|
| Preparation Time | 15 minutes | 1 hours 30 mins |
| Texture Style | Dense and fudgy | Light and aerated |
| Ingredient Count | 6 key elements | 8-10 elements |
The primary difference between these methods lies in the "overrun," which is the amount of air incorporated. Classic churned versions often have more air, whereas this version leans into a luxurious, truffle like density that many chocolate lovers actually prefer.
Precise Measurements and Critical Timing for Recipe Specs
When we look at the logistics of this dish, it is a masterclass in passive waiting versus active effort. You only need 15 minutes of hands on time, but the 6 hours of freezing time is non negotiable.
This is because the molecular structure of the fat and sugar needs time to stabilize at sub zero temperatures. If you try to scoop it at the 3 hour mark, you'll likely find a soft mousse rather than a firm scoop.
The weight of the ingredients is also vital. In my tests, I've found that using 480 ml (2 cups) of heavy cream with exactly 397 g (14 oz) of condensed milk creates the perfect ratio. If you add too much cream, the flavor becomes diluted; too little, and the result is overly sweet and sticky.
Precision here ensures that the final product has that signature "shatter" when you press a spoon into a firm scoop.
The Role of Temperature Control
To get the most out of your heavy cream, everything needs to be cold. I mean really cold. If your kitchen is warm, your cream will struggle to hold onto those air bubbles. I recommend putting your metal mixing bowl and whisk attachment in the freezer for about 10 minutes before you start.
This ensures the fat globules remain firm enough to build a strong structure.
Critical Freezing Milestones
At the 2 hour mark, the mixture will resemble a thick soft serve. By 4 hours, the edges will be firm, but the center might still be slightly pliable. Only at the 6 hour mark does the entire mass reach a uniform temperature where the fats have fully solidified.
This slow descent into a frozen state allows the flavors of the Dutch processed cocoa and espresso to fully meld.
| Component | Science Role | Pro Secret |
|---|---|---|
| Heavy Cream | Provides the fat structure | Use 36% fat or higher for better stability |
| Condensed Milk | Controls freezing point | Choose full fat versions to avoid iciness |
| Cocoa Powder | Adds solids and flavor | Sift twice to prevent "grit" in the final texture |
This specific combination of ingredients ensures that the water content is kept to an absolute minimum. By reducing the available water, we leave no room for large ice crystals to grow, which is the secret to that "velvety" mouthfeel we're after.
Analyzing the Core Elements and Their Functional Roles
Selecting the right components for your Chocolate Ice Cream is where the magic happens. We aren't just looking for taste; we are looking for functional properties. For instance, the Dutch processed cocoa is alkaline, which makes it dissolve more easily and gives it a darker, smoother profile than natural cocoa.
- 397 g (14 oz) Sweetened Condensed Milk: Why this? It provides sugar and milk solids without the excess water found in regular milk.
- 45 g (0.5 cup) Dutch processed cocoa powder: Why this? The alkalization process makes it more soluble and less acidic for a smoother finish.
- 15 ml (1 tbsp) pure vanilla extract: Why this? Vanilla acts as a flavor enhancer that makes the chocolate taste "more like chocolate."
- 1.5 g (0.25 tsp) fine sea salt: Why this? Salt suppresses bitterness and heightens our perception of sweetness.
- 2 g (1 tsp) instant espresso powder: Why this? It adds a deep, roasty note that rounds out the cocoa's earthiness.
- 480 ml (2 cups) heavy whipping cream (36% fat): Why this? High fat content is mandatory for creating a stable, aerated foam.
| Original Ingredient | Substitute | Why It Works |
|---|---|---|
| Dutch processed Cocoa | Natural Cocoa Powder | Works, but will be more acidic and lighter in color. |
| Espresso Powder | Instant Coffee Granules | Same flavor profile, though granules may need more whisking to dissolve. |
| Heavy Cream | Coconut Cream (Full Fat) | Similar fat level but will add a distinct tropical flavor. |
If you decide to swap the heavy cream for coconut cream, keep in mind that the texture will be slightly different because coconut fat has a different melting point. It’s still a great choice for a variation, but it won't be as "fluffy" as the dairy based version.
Essential Tools for Achieving Professional Results at Home
You don't need a laboratory, but a few specific tools will make your life much easier. I always reach for a large metal bowl for the cream. Metal conducts heat (or cold) better than plastic, helping to keep the cream chilled while you're beating it.
A silicone spatula is also essential for the "folding" stage you need something flexible to scrape the bottom without deflating the air you just worked so hard to incorporate.
Chef's Tip: Put your dry ingredients (cocoa, espresso, salt) through a fine mesh sieve. Cocoa is notorious for forming small, stubborn clumps that refuse to dissolve in the condensed milk, and sifting is the only way to ensure a perfectly smooth base.
For the container, a standard 23x13 cm (9x5 inch) loaf pan is classic, but an insulated ice cream tub is even better. Insulated containers protect the dessert from the "freeze thaw" cycles of your kitchen's freezer, which can cause ice crystals to form on the surface over time.
If you use a loaf pan, make sure you have plastic wrap or a tight fitting lid to prevent "freezer funk" from affecting the flavor.
step-by-step Methodology for a Flawless Dessert Mixture
- Whisk the 397 g of sweetened condensed milk, sifted Dutch processed cocoa, vanilla, salt, and espresso powder in a medium bowl. Note: Continue until the mixture is glossy and there are no visible lumps of cocoa.
- Chill a large metal bowl and your mixer beaters in the freezer for 10 minutes. Note: This is a crucial step to ensure the cream reaches maximum volume.
- Pour the cold heavy whipping cream into the chilled bowl.
- Beat the cream on medium high speed until stiff peaks form. Note: You'll know it's ready when the beaters leave clear tracks and the cream stands straight up when the whisk is lifted.
- Add one third of the whipped cream to the chocolate mixture.
- Stir this first batch gently to "loosen" the dense chocolate base.
- Transfer the chocolate mixture into the remaining whipped cream.
- Fold carefully using a spatula until no white streaks remain. Note: Use a "cut and fold" motion to avoid deflating the air bubbles.
- Smooth the top of the mixture into your 23x13 cm loaf pan.
- Freeze for 6 hours until the center is firm and the surface is matte.
If you are a fan of textures, this is a great time to pair a scoop with some Soft and Chewy Cookies for the ultimate ice cream sandwich. The cookies provide a gentle resistance that complements the velvety melt of the ice cream.
Identifying Common Technical Hurdles and Their Solutions
Even with a foolproof method, things can go sideways if the environment isn't right. The most common issue I see is over whipping the cream. There is a very fine line between "stiff peaks" and "chocolate butter." If you see the cream starting to look grainy or yellow, stop immediately.
At that point, the fat molecules have clumped together too much, and you've lost the smooth emulsion.
Another hurdle is "fat bloom" in the cocoa. If your cocoa powder has been sitting in a warm pantry, the fats can separate, making it harder to whisk into the condensed milk. Always store your cocoa in a cool, dark place to keep it stable.
If your mixture feels gritty despite sifting, it might be that the espresso powder hasn't fully dissolved; try whisking the espresso into the vanilla extract first to create a liquid "slurry."
Achieving the Correct Cream Consistency
Many beginners stop at "soft peaks," where the cream curls over like a wave. For this Chocolate Ice Cream, you really need stiff peaks. Because the condensed milk is quite heavy, soft peak cream won't have the structural integrity to hold it up.
The result will be a runny mixture that separates in the freezer, leaving a hard, icy layer at the bottom of the pan.
Managing Freezer Burn
If you see tiny crystals on the surface after a few days, that's freezer burn. It happens when moisture from the air settles on the cold surface and freezes. To prevent this, press a piece of plastic wrap directly onto the surface of the ice cream before putting the lid on.
This removes the air gap where moisture can accumulate.
| Problem | Root Cause | Solution |
|---|---|---|
| Gritty Texture | Cocoa lumps or undissolved espresso | Sift dry ingredients and whisk until glossy. |
| Separated Layers | Under whipped cream or rough folding | Beat cream to stiff peaks and use a gentle folding motion. |
| Too Hard to Scoop | Too much cocoa or freezer is too cold | Let it sit at room temperature for 5 mins before serving. |
Common Mistakes Checklist
- ✓ Use cream with at least 36% fat content (lower fat will not whip properly).
- ✓ Ensure the condensed milk is at room temperature for easier whisking.
- ✓ Never skip the salt it is the bridge that connects all the flavors.
- ✓ Don't over fold the mixture; stop the moment the streaks disappear.
- ✓ Make sure the freezer is set to its coldest setting for the initial 6 hour block.
Creative Variations for Customizing the Final Flavor Profile
Once you've mastered the base, the possibilities are endless. I love adding a bit of "crunch" to mine. You can fold in toasted pecans, chocolate chips, or even crushed pretzels right before freezing. If you're looking for something with a fruity twist, you might enjoy comparing this to my Vanilla Cherry Ice Cream, which uses a similar base but focuses on the bright acidity of cherries.
For a Mexican Chocolate version, add 1 teaspoon of ground cinnamon and a pinch of cayenne pepper to the cocoa mixture. The heat from the pepper is a fantastic contrast to the cold, creamy fat. If you want a more "adult" version, 2 tablespoons of bourbon or dark rum can be added.
Be careful, though alcohol lowers the freezing point even further, so it will take longer to set and will be much softer.
Scaling the Recipe for Crowds
If you need to make a larger batch, you can double the recipe easily. Use two cans (794 g) of condensed milk and 960 ml of heavy cream. However, follow the rule of thumb: only increase the salt and spices to 1.5x the original amount. Spices can become overwhelming when doubled literally.
You will also need to work in batches when whipping the cream, as most home mixers can't handle a full liter of cream at once without splashing.
If you are scaling down for a solo treat, you can use half a can of condensed milk (about 198 g) and 240 ml of cream. Use a smaller container, like a 500 ml glass jar, to store it. The freezing time will be slightly less, usually around 4 hours, because there is less mass to cool down.
Decision Shortcut for Texture
- If you want it fudgier: Add an extra 15 g of cocoa powder and reduce the cream by 50 ml.
- If you want it lighter: Increase the heavy cream to 600 ml and whip it to very stiff peaks.
- If you want it "malt style": Swap the espresso powder for 3 tablespoons of malted milk powder.
Long Term Preservation and Effective Zero Waste Practices
Storing your Chocolate Ice Cream correctly is the difference between a treat that lasts two weeks and one that is ruined in two days. Always store it in the back of the freezer, which is the coldest part and the least affected by the door opening and closing.
The constant temperature flux at the front of the freezer is what causes those dreaded ice crystals to grow.
As for zero waste, don't throw away that "chocolate water" at the bottom of the bowl! If you have leftover streaks of the chocolate base, whisk them into some warm milk for the most incredible hot cocoa you've ever had.
If you find yourself with a tiny bit of ice cream left that isn't enough for a full scoop, throw it into a blender with some milk for a quick milkshake.
You can also use the leftover "dust" from the bottom of the cocoa powder container. If you have extra cocoa and espresso, mix them with a bit of sugar and keep it in a jar. It makes a fantastic "mocha dust" for topping your morning coffee or dusting over the top of your finished ice cream scoops.
This recipe should stay fresh and flavorful for up to 3 weeks in an airtight container, though I doubt it will last that long once you taste it!
Enhancing the Sensory Experience of Your Finished Dessert
The way you serve this Chocolate Ice Cream can truly change how the flavors are perceived. Because this is a dense, high fat recipe, it is best enjoyed when it has "tempered" for about 5 minutes on the counter.
This allows the very outer layer to soften slightly, making the chocolate flavors more volatile and aromatic.
- 1. 10 Minutes
- The time your bowl should spend in the freezer before whipping.
- 2. 4°C (40°F)
- The maximum temperature your heavy cream should be before you start.
- 3. -18°C (0°F)
- The ideal temperature of your freezer for a firm, consistent set.
Think about the contrast in textures. A sprinkle of flaky sea salt on top right before serving can highlight the espresso notes. Or, for a truly decadent experience, serve a scoop alongside a warm brownie. The "sizzle" of the warm cake meeting the cold cream creates a sensory experience that's hard to beat.
Honestly, don't even bother with low-fat toppings; the richness of this ice cream demands high-quality ingredients to match its intensity. Trust me on this once you go this dark and fudgy, the store-bought stuff just won't cut it anymore. Let's crack on and get that bowl in the freezer!
Dispelling Common Kitchen Beliefs
One myth that needs to be cleared up is that "homemade ice cream always gets icy." This is only true if your recipe has a high water content or if you don't use enough fat. In our case, the 36% fat in the heavy cream and the lack of water in the condensed milk act as a chemical shield against iciness.
Another common belief is that you must use a machine to "break up" crystals. While that's true for fruit sorbets, the high sugar and fat concentration here does the job for you on a molecular level.
Finally, some people think you can't get a "dark" chocolate flavor without melting down actual chocolate bars. While melted chocolate adds a lovely texture, a high-quality Dutch processed cocoa actually provides a more concentrated flavor profile and a smoother emulsion.
It allows the chocolate to be the star without the added waxes and stabilizers often found in commercial baking chocolate. This method is simpler, faster, and arguably more intense in its cocoa delivery.

Recipe FAQs
Is it true that no-churn ice cream never sets properly?
No, this is a common misconception. By using heavy whipping cream with at least 36% fat content and freezing it for at least 6 hours, the mixture achieves a perfectly scoopable, firm texture without needing a machine.
How to ensure the chocolate mixture is completely smooth?
Sift the cocoa powder before whisking it with the condensed milk. If you enjoyed mastering the smooth, glossy texture here, the same attention to ingredient texture ensures a moist crumb in our chocolate muffins.
Why is chilling the metal mixing bowl so important?
Cold equipment is essential to reach maximum volume. Chilling your metal bowl and beaters for 10 minutes ensures the heavy cream whips efficiently into stable, stiff peaks before the fats begin to warm up.
How to fix the mixture if I accidentally over fold it?
Stop immediately if you notice the volume deflating. Because you cannot add more air back into the mixture once the whipped cream collapses, folding gently is critical to maintaining the light, airy structure.
Is it possible to use a lower fat cream for this recipe?
No, stick to cream with at least 36% fat. Lower fat dairy will not whip into the stiff peaks required to hold the chocolate base, resulting in an icy or liquid texture rather than a creamy one.
How to prevent the ice cream from forming ice crystals?
Cover the container tightly before placing it in the freezer. Ensuring the freezer is set to its coldest setting and using an airtight container prevents surface moisture from freezing into large, unpleasant ice crystals.
How to balance the intense cocoa flavor?
Do not skip the sea salt or the espresso powder. The salt acts as a bridge that connects the sweetness of the condensed milk with the bitterness of the cocoa, while the espresso powder acts as a flavor enhancer for the chocolate.
No Churn Chocolate Ice Cream

Ingredients:
Instructions:
Nutrition Facts:
| Calories | 381 kcal |
|---|---|
| Protein | 6.3 g |
| Fat | 26.3 g |
| Carbs | 32.1 g |
| Fiber | 1.9 g |
| Sugar | 27.2 g |
| Sodium | 153 mg |
