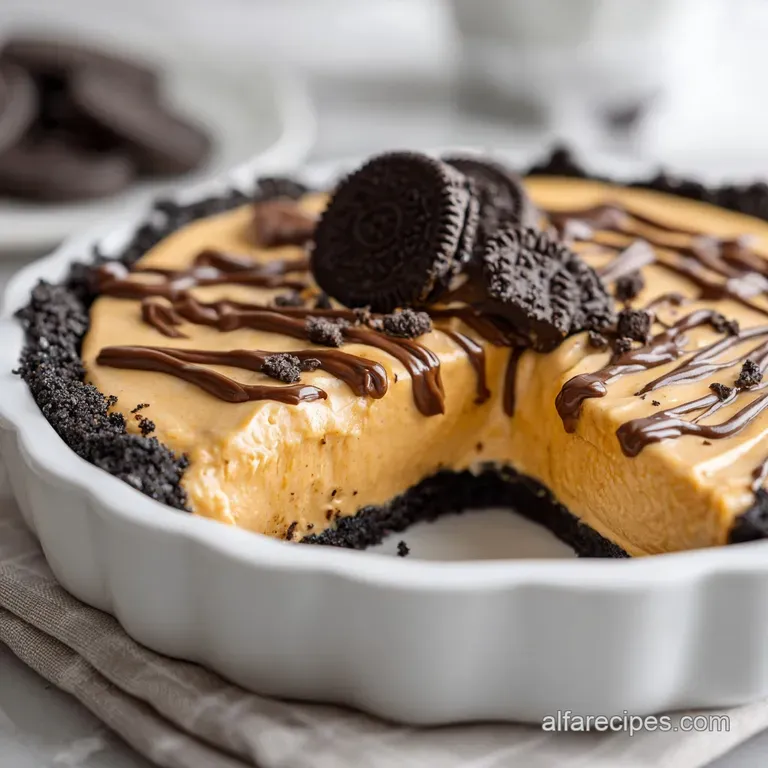
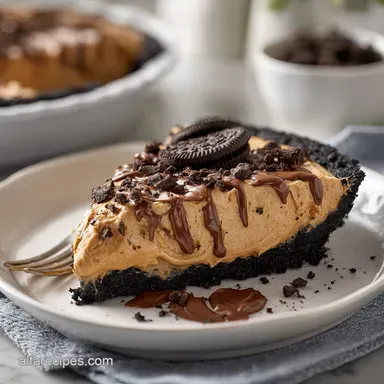
No Bake Peanut Butter Pie: Velvety and Creamy
- Time: Active 20 minutes, Passive 240 minutes, Total 260 minutes
- Flavor/Texture Hook: Silky peanut butter mousse with a shattering Oreo base
- Perfect for: Summer gatherings, make-ahead entertaining, and beginner friendly dessert engineering
- Achieving the Best No Bake Peanut Butter Pie
- Why This Works
- Texture and Timing Guide
- Vital Pie Specs
- Sourcing the Scientific Components
- Precision Tools for Success
- Executing the Multi Stage Assembly
- Solving Common Structural Failures
- Intelligent Recipe Adaptations
- Long Term Storage Protocols
- Complementary Flavor Pairings
- Recipe FAQs
- 📝 Recipe Card
Achieving the Best No Bake Peanut Butter Pie
Forget the notion that a no bake dessert is somehow a shortcut or a "lesser" version of a baked pastry. The truth is that a no bake peanut butter pie is a study in lipid management and temperature control.
While many people throw these ingredients together and hope for the best, the difference between a puddle and a sliceable masterpiece lies in the molecular structure of your cream cheese and the aeration of your heavy cream.
Most home cooks assume that chilling is just about cooling the pie down, but it's actually about allowing the saturated fats to recrystallize. When we beat the creamy processed peanut butter with the room temperature cream cheese, we are creating a uniform emulsion.
If the cream cheese is too cold, you get lumps, which act as structural weak points. If the peanut butter is natural or oily, the emulsion breaks, and you end up with a greasy mess.
This recipe is designed to be foolproof by using specific scientific ratios that ensure the pie holds its shape even under the heat of a summer patio.
The contrast between the dark, slightly bitter chocolate crust and the salt forward peanut butter filling is where the magic happens. We aren't just making a sweet treat here. We are balancing pH, salt levels, and textures.
The Oreo base provides a crunch that shatters against the velvety filling, creating a sensory experience that no oven baked pie can replicate. Let's look at why this specific method works so well from a technical perspective.
Why This Works
- Lipid Matrix Stability: By beating full fat cream cheese with peanut butter, we create a dense network of fats that traps the air introduced later by the whipped cream.
- Starch Based Thickening: The cornstarch found in the 120g of sifted powdered sugar provides a secondary stabilizing effect by absorbing excess moisture from the heavy cream.
- Cold Chain Retention: Chilling the bowl and the heavy cream before whipping ensures the fat globules remain firm, allowing them to trap more air for a lighter, more voluminous texture.
- Cohesion through Saturated Fat: The melted butter in the crust acts as a glue that, once chilled, binds the cookie crumbs into a rigid, non crumbly structural base.
Texture and Timing Guide
| Pie Thickness | Stability Chill Time | Cutting Visual Cue | Optimal Texture |
|---|---|---|---|
| 2.5 cm | 120 minutes | Firm edges, slight give | Light Mousse |
| 5.0 cm | 240 minutes | Resistance to finger pressure | Silky Custard |
| 7.5 cm | 360 minutes | Completely matte surface | Dense Fudge |
If you are looking for a different application of these same fat stabilization principles, you might want to try these peanut butter energy balls which use similar ingredients but a different binding method. Both recipes rely heavily on the natural oils in the peanut butter to provide a smooth mouthfeel without the need for additional liquid.
Vital Pie Specs
When preparing this dish, precision is your greatest ally. We aren't guessing with "a splash" of vanilla or "a bit" of cream. Every measurement here serves a specific purpose in the final structural integrity of the pie.
We are aiming for a total yield of 10 servings, and to achieve that perfectly clean slice, we need to respect the physics of the setting process.
| Component Analysis | Science Role | Pro Secret |
|---|---|---|
| Cream Cheese (226g) | Primary Structural Binder | Always use the block form, never the whipped tub version. |
| Heavy Cream (240ml) | Aeration and Lightness | Chill the whisk and bowl for 15 minutes before starting. |
| Oreo Cookies (265g) | Structural Base | Pulse until sand like; large chunks cause the crust to crack. |
| Powdered Sugar (120g) | Sweetener and Stabilizer | Sift before adding to prevent microscopic sugar lumps. |
You need to ensure that your cream cheese is at exactly room temperature (around 20°C to 22°C) before you begin. If it is any colder, it will not emulsify with the peanut butter, and you will see white specks in your filling.
These specks aren't just an aesthetic issue; they represent unbonded fat which will cause the pie to weep moisture as it sits in the fridge.
Sourcing the Scientific Components
The ingredients for a no bake peanut butter pie must be chosen with care. You aren't just buying food; you're buying building materials. For the peanut butter, stick to a creamy processed brand like Jif or Skippy.
Natural peanut butters that require stirring are too high in liquid oil and will cause the pie to collapse.
- 24 standard Oreo cookies (265g): These provide the sugar and cocoa solids for the base. Why this? The filling in Oreos acts as an additional binder for the crust. (Substitute: Chocolate graham crackers with 20g extra butter).
- 5 tbsp Unsalted butter, melted (70g): This is the glue. Why this? Unsalted allows you to control the exact sodium levels in the base. (Substitute: Salted butter, but omit the extra sea salt).
- 1/4 tsp Fine sea salt (1.5g): Enhances the cocoa and peanut flavors. Why this? Fine grains dissolve faster into the lipid heavy crust. (Substitute: Table salt, use slightly less).
- 1 cup Creamy processed peanut butter (250g): The flavor core. Why this? Stabilizers in processed PB ensure a consistent, non oily emulsion. (Substitute: Almond butter, but it must be the "no stir" variety).
- 8 oz Full fat cream cheese (226g): The structural anchor. Why this? Full fat cheese has the protein density needed to hold the air. (Substitute: Mascarpone for a richer, less tangy profile).
- 1 cup Powdered sugar, sifted (120g): Sweetness and structure. Why this? Cornstarch in the sugar helps stabilize the whipped cream. (Substitute: Granulated sugar, but the texture will be slightly gritty).
- 1 tsp Pure vanilla extract (5ml): Aromatic depth. Why this? Vanilla rounds out the sharp saltiness of the peanuts. (Substitute: Vanilla bean paste for visual flecks).
- 1 cup Heavy whipping cream, cold (240ml): The aeration agent. Why this? Must be at least 36% fat to hold stiff peaks. (Substitute: Prepared whipped topping, though it is much sweeter).
- 1/4 cup Roasted peanuts, crushed (35g): Texture contrast. Why this? Provides a crunch to break up the velvety filling. (Substitute: Salted pretzels for a salty sweet twist).
- 2 oz Semi sweet chocolate, melted (55g): Visual and flavor garnish. Why this? High cocoa content offsets the sugar in the filling. (Substitute: Dark chocolate 70%).
- 4 Mini peanut butter cups, chopped (36g): The final aesthetic touch. Why this? Reinforces the peanut butter theme visually. (Substitute: Chopped Reese's Pieces).
For a lighter way to enjoy these flavors without the heavy cream cheese base, my banana peanut butter coffee smoothie offers a great alternative for a quick breakfast that hits the same flavor notes.
Precision Tools for Success

To execute this no bake reeses peanut butter pie perfectly, you don't need a professional kitchen, but you do need the right mechanical advantages. A food processor is non negotiable for the crust if you want that "shattering" texture.
If you smash the cookies in a bag with a rolling pin, the pieces are often too uneven, leading to a weak structure that falls apart when you try to lift a slice.
A stand mixer is your best friend for the filling. It provides the consistent torque needed to emulsify the heavy peanut butter and cream cheese without over incorporating air too early. You'll also need a separate chilled bowl for the whipped cream.
Using an offset spatula for the final smoothing of the top isn't just for looks; it helps compress the filling slightly, removing any large air pockets that could cause the pie to sag later.
Executing the Multi Stage Assembly
- Pulverize the cookies. Place 24 standard Oreo cookies (265g) in a food processor and pulse until they reach the consistency of fine sand. Note: Stopping too early leaves chunks that will break your crust later.
- Hydrate the crumbs. In a bowl, combine the cookie crumbs with 70g melted butter and 1.5g sea salt. Press the mixture firmly into the bottom and up the sides of a 9 inch pie plate. Note: Use the bottom of a measuring cup to ensure the base is packed tight.
- Flash freeze the base. Place the crust in the freezer to set while preparing the filling. Note: This hardens the butter immediately, creating a moisture barrier.
- Emulsify the fats. In a stand mixer, beat 226g softened cream cheese and 250g creamy peanut butter until smooth and completely emulsified.
- Incorporate the aromatics. Add 120g sifted powdered sugar and 5ml vanilla extract; beat on low speed until combined, then increase speed until light and fluffy.
- Create the aeration. In a separate chilled bowl, whip 240ml heavy cream until it reaches stiff peaks.
- Manage the structural integrity. Using a rubber spatula, gently fold the whipped cream into the peanut butter mixture in three separate additions. Note: This prevents the heavy peanut butter from deflating the air bubbles in the cream.
- Level the filling. Pour the filling into the chilled crust and smooth the top with an offset spatula until perfectly flat.
- Apply the garnishes. Drizzle with 55g melted semi sweet chocolate and top with 35g crushed peanuts and 36g chopped mini peanut butter cups.
- Stabilize the emulsion. Refrigerate for at least 4 hours until the fat matrix is firm and sliceable.
Solving Common Structural Failures
The most frequent complaint with an easy peanut butter pie with oreo crust is that it turns out too soft or "soupy." This usually happens because of temperature mismanagement. If you try to fold whipped cream into warm peanut butter, the fat in the cream will melt instantly, destroying your aeration.
On the flip side, if the cream cheese is too cold when you start, you'll never get that velvety smooth mouthfeel.
Why Your Pie Is Runny
If your filling isn't holding its shape after four hours, the issue is likely the whipping of the cream. You need "stiff peaks," which means when you lift the whisk, the cream should stand straight up without drooping.
If you under beat the cream, you're essentially adding liquid to your pie, which ruins the structural integrity.
| Problem | Root Cause | Solution |
|---|---|---|
| Crumbly Crust | Not enough compression | Use a flat bottomed glass to pack crumbs firmly. |
| Lumpy Filling | Cold cream cheese | Ensure cheese is at 22°C before mixing. |
| Oily Surface | Natural peanut butter used | Use processed brands with stabilizers for better binding. |
Another common mistake is skipping the sifting of the powdered sugar. While it seems like a small step, the cornstarch in the sugar needs to be evenly distributed to help absorb any residual moisture from the cream cheese. If the sugar clumps, you get pockets of moisture that can cause the pie to slide off the crust.
Common Mistakes Checklist:
- ✓ Using "Natural" peanut butter (the oil separation will ruin the emulsion).
- ✓ Not chilling the bowl before whipping the heavy cream.
- ✓ Rushing the folding process (folding should take about 2 minutes of gentle motion).
- ✓ Over beating once the cream is added (this can turn the cream into butter).
- ✓ Cutting the pie before the full 4 hour stabilization period.
Intelligent Recipe Adaptations
When you need to adjust this creamy peanut butter pie no bake for different crowds, the math matters. Doubling the recipe is straightforward for the filling, but be careful with the crust.
A 2x batch of crust often requires slightly less butter (about 10% less) because the volume of crumbs retains moisture more efficiently in a larger bowl.
If you want a 3 ingredient no bake peanut butter pie style simplicity, you can technically omit the vanilla and salt, but you lose the flavor complexity that makes this recipe stand out.
For those looking for a "no bake reeses peanut butter pie" experience, you can increase the chopped peanut butter cups to 1/2 cup and fold half of them directly into the filling before chilling.
| Crust Method | Setting Time | Texture | Best For |
|---|---|---|---|
| Freezer Set | 20 minutes | Delicate, melting | Quick prep |
| Oven Baked | 8 minutes | Sturdy, snappy | Making ahead |
| Fridge Set | 60 minutes | Soft, chewy | Minimal effort |
For the ultimate chocolate peanut butter pie recipe experience, try adding a layer of chocolate ganache directly onto the crust before adding the peanut butter filling. This creates a "hidden" chocolate snap in every bite.
Simply melt 100g of chocolate with 50ml of heavy cream and spread it thin on the Oreo base, then chill for 10 minutes before proceeding with step 7.
Long Term Storage Protocols
This pie is remarkably stable once it has set, making it an excellent candidate for meal prep or early party preparation. Because the fat matrix is so dense, it resists taking on "fridge smells" better than lighter desserts, but you should still keep it covered to maintain the moisture balance.
- Fridge: Store in an airtight container for up to 5 days. The crust may soften slightly after day 3 due to the moisture in the filling.
- Freezer: This pie freezes beautifully. Wrap it tightly in plastic wrap and then foil. It will stay fresh for up to 3 months. For a "frozen treat" experience, eat it directly from the freezer; it will have a texture similar to high end ice cream.
- Zero Waste: If you have leftover Oreo crumbs, stir them into vanilla yogurt or use them as a topping for morning oatmeal. Leftover peanut butter filling that didn't fit in the pie plate can be used as a dip for apple slices.
Complementary Flavor Pairings
When serving this chocolate peanut butter pie recipe, you want to think about acidity and bitterness to cut through the high fat content. A dark roast coffee is the traditional choice, as the tannins in the coffee help cleanse the palate of the heavy peanut oils.
If you are looking for a decision shortcut for your next event: If you want a crunchy texture, swap the Oreo base for a pretzel and butter crust. If you want a deeper flavor, use dark cocoa Oreos and a 70% cacao chocolate drizzle.
If you want a lighter feel, increase the heavy cream to 1.5 cups and use 50g less peanut butter.
Debunking Pie Myths
- Myth 1: You need gelatin to make a no bake pie stable. Truth: The high saturated fat content of the cream cheese and peanut butter, combined with the proteins in the dairy, provides all the structure you need if chilled correctly.
- Myth 2: low-fat cream cheese works just as well. Truth: low-fat versions have a higher water content and lower melting point, which leads to a sagging, watery pie that won't hold its shape at room temperature.
- Myth 3: You can't over whip the filling. Truth: Once the heavy cream is folded in, excessive stirring will deflate the air bubbles and can eventually cause the fats to separate, resulting in a grainy texture.
This no bake peanut butter pie with ganache and crushed peanuts is a masterclass in balance. By following the precise measurements and respecting the chilling times, you'll produce a dessert that looks like it came from a professional pastry kitchen but was assembled right on your counter.
Trust the science of the emulsion, keep your ingredients at the right temperatures, and you'll have a foolproof dessert every single time.

Recipe FAQs
What is the recipe for Dolly Parton's peanut butter pie?
This recipe follows the same core logic of a stabilized peanut butter mousse. It combines cream cheese, creamy processed peanut butter, powdered sugar, and vanilla, which is then lightened with whipped heavy cream and set inside an Oreo cookie crust.
What are the three ingredients in peanut butter pie with condensed milk?
This recipe does not use condensed milk. To maintain the structural integrity and fat emulsion required for this specific mousse, we rely on a combination of cream cheese, peanut butter, and heavy whipping cream instead.
What are the 4 ingredients in peanut butter bites?
We do not use peanut butter bites in this recipe. If you are looking for simple snacks using similar flavor profiles, our Almond Joy Chia Pudding offers a quick, protein rich alternative.
What is Dolly Parton pie?
It is a popular American dessert known for its rich peanut butter filling and chocolate cookie crust. It emphasizes a dense, sweet flavor profile typically achieved through whipped dairy and processed peanut butter.
How to ensure the filling stays firm after slicing?
Refrigerate for at least 4 hours, ideally overnight. This cooling period is critical to allow the saturated fats in the cream cheese and heavy cream to recrystallize, which stabilizes the emulsion so the slice holds its shape.
How to fold the whipped cream without losing volume?
Gently incorporate the whipped cream in three separate additions using a rubber spatula. This incremental approach maintains the aeration of the lipids, ensuring the mousse stays light rather than dense or flat.
Is it true that natural peanut butter works the same as processed?
No, this is a common misconception. You must use creamy processed peanut butter because the stabilizers in processed versions are essential for maintaining a stable fat emulsion with the cream cheese; natural peanut butter is too oily and will cause the mixture to separate.
No Bake Peanut Butter Pie
Ingredients:
Instructions:
Nutrition Facts:
| Calories | 598 kcal |
|---|---|
| Protein | 11.1 g |
| Fat | 44.4 g |
| Carbs | 43.3 g |
| Fiber | 1.9 g |
| Sugar | 31.8 g |
| Sodium | 242 mg |
