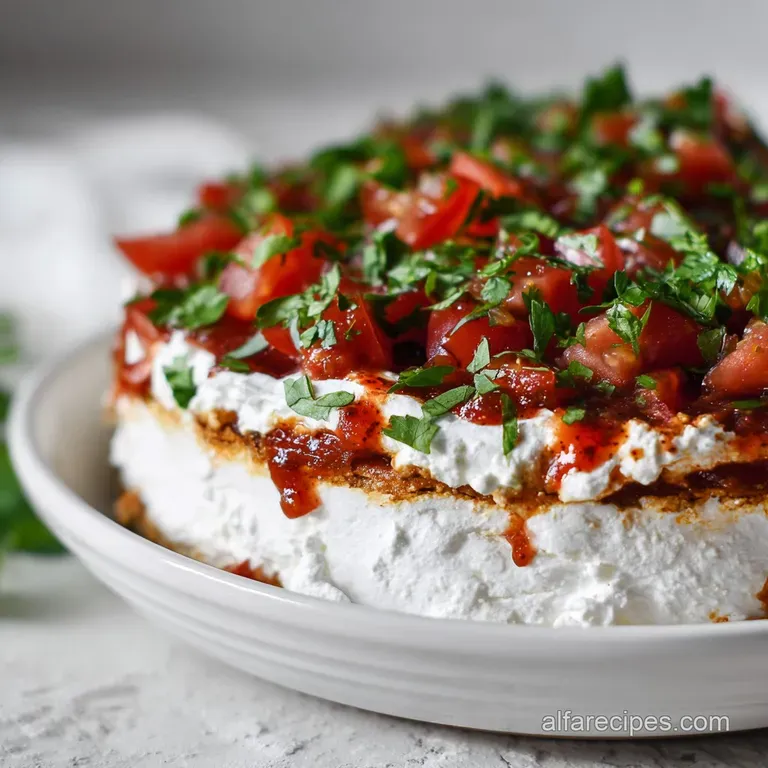
The Best Fresh Healthy 7-Layer Dip Recipe by Ambitious Kitchen
- Time: Active 20 minutes, Passive 0 minutes, Total 20 minutes
- Flavor/Texture Hook: Velvety yogurt meets zesty salsa and buttery guacamole
- Perfect for: Game day prep or high protein snack meal prepping
- The Best Fresh Healthy 7 Layer Dip Recipe by Ambitious Kitchen
- Science Behind the Perfect Layer Stability
- Component Analysis and Structural Roles
- Essential Components and Smart Substitutions
- Necessary Tools for Efficient Assembly
- Building the Perfect Healthy Layers
- Preventing Common Texture and Stability Issues
- Creative Variations for Your Flavor Profile
- Proper Storage and Zero Waste Strategies
- How to Serve This Vibrant Appetizer
- Recipe FAQs
- 📝 Recipe Card
The Best Fresh Healthy 7 Layer Dip Recipe by Ambitious Kitchen
Picture this: it is 3:00 PM on a Sunday, the game is about to start, and you are staring at a bowl of greasy, heavy dip that feels more like a lead weight than a snack. We have all been there.
I used to think the only way to get that classic Tex Mex flavor was to pile on the sour cream and full fat cheese, but then I realized the secret to a better dip is all about texture and freshness.
The first time I served this to my friends, I didn't tell them about the Greek yogurt swap. I just watched as they kept going back for "one more scoop," praising how the layers stayed distinct and the flavors popped.
There is a specific satisfaction in hearing the "thwack" of a sturdy chip hitting the dense, seasoned bean layer without the whole thing turning into a soggy mess.
We are ditching the heavy fillers and focusing on nutrition dense building blocks. You get the same salty, tangy, and creamy satisfaction but with nearly 10 grams of protein per serving. It is budget friendly, looks stunning in a glass dish, and actually keeps you full instead of just giving you a salt induced nap.
Let's get into how we make this work without sacrificing an ounce of flavor.
Science Behind the Perfect Layer Stability
Viscosity Control: Using non fat Greek yogurt provides a much higher protein to water ratio than sour cream, which prevents the "weeping" effect where liquid pools at the bottom of the dish. This structural integrity ensures each scoop maintains its distinct stripes.
Osmotic Management: Draining the salsa is a non negotiable step because salt in the surrounding ingredients will draw moisture out of the tomato solids over time. By removing the excess juice early, you prevent the middle of your dip from becoming a watery soup.
| Component | Fresh Method | Shortcut Method | Impact on Result |
|---|---|---|---|
| Bean Base | Canned Fat Free | Dry Beans (Soaked) | Canned is faster, texture is nearly identical |
| Creamy Layer | Non Fat Greek Yogurt | low-fat Sour Cream | Yogurt adds 50% more protein per ounce |
| Guacamole | Freshly Mashed | store-bought Tub | Fresh has better color, store-bought saves 10 mins |
The beauty of this Healthy 7 Layer Dip Recipe is that it relies on density. Placing the heaviest layer (the beans) at the bottom provides a structural foundation that supports the lighter, moisture rich layers like salsa and tomatoes. If you are planning a bigger feast, you could even serve this alongside a Crockpot Chicken Enchiladas recipe for a full themed spread.
Component Analysis and Structural Roles
| Ingredient | Science Role | Pro Secret |
|---|---|---|
| Greek Yogurt | Emulsified Base | Whisk with taco seasoning for 30 seconds to hydrate the spices fully |
| Refried Beans | Structural Anchor | Stir in cumin and chili powder while cold to keep the flavor concentrated |
| Roma Tomatoes | Texture Garnish | Seed them thoroughly to remove 80% of the internal moisture |
To keep this budget friendly, I always suggest buying the large tubs of yogurt and generic store brand beans. The spices do the heavy lifting anyway. For another vibrant option that fits the healthy vibe, my Greek Quinoa Salad recipe uses similar principles of fresh produce and high protein.
Essential Components and Smart Substitutions
This Healthy 7 Layer Bean Dip relies on these exact amounts for a standard 9x9 inch or 7x11 inch dish. If you change the pan size, you might need to spread the layers thinner to cover the surface area.
- 1 (15 oz) can fat free refried beans: Why this? Provides the thick, fiber rich foundation needed for stability. (Swap: Mashed black beans with a splash of lime juice).
- 1/2 tsp ground cumin: Why this? Adds the signature earthy aroma without extra calories. (Swap: Smoked paprika for a deeper flavor).
- 1/4 tsp chili powder: Why this? Provides a subtle back of-the throat warmth. (Swap: Crushed red pepper flakes).
- 2 cups plain non fat Greek yogurt: Why this? The high protein, thick substitute for sour cream. (Swap: low-fat sour cream, though it's less nutritious).
- 1 oz low sodium taco seasoning: Why this? Seasons the yogurt layer instantly. (Swap: Homemade mix of chili, garlic, and onion powder).
- 1.5 cups chunky guacamole: Why this? Provides healthy fats and a velvety mouthfeel. (Swap: Mashed avocado with salt and lime).
- 1 cup chunky salsa, well drained: Why this? Adds acidity and brightness to cut through the beans. (Swap: Pico de gallo).
- 1 cup shredded sharp cheddar cheese: Why this? Sharpness means you need less to get big flavor. (Swap: Monterey Jack or Pepper Jack).
- 1/2 cup black olives, sliced: Why this? Adds a salty, briny pop. (Swap: Pickled jalapeños).
- 1/4 cup green onions, finely chopped: Why this? Provides a fresh, sharp crunch. (Swap: Chives).
- 1/2 cup Roma tomatoes, seeded and diced: Why this? Roma tomatoes have more flesh and less water than other varieties. (Swap: Cherry tomatoes halved).
- 1/4 cup fresh cilantro, chopped: Why this? The ultimate fresh herbal finish. (Swap: Flat leaf parsley if you dislike cilantro).
Necessary Tools for Efficient Assembly

You do not need anything fancy here, which is why I love this for meal prep. A standard medium sized glass baking dish (about 2 quarts) is best because seeing the layers from the side is half the fun. You will also want a fine mesh strainer.
This is the single most important tool for this Healthy Taco Dip Recipe because it is used to drain the salsa.
A rubber spatula is your best friend for getting those clean, flat layers. If you use a metal spoon, you risk dragging the bottom layers up into the top ones, which creates a muddy look. Also, have a small whisk on hand to combine the taco seasoning into the Greek yogurt so you don't end up with spice clumps.
Building the Perfect Healthy Layers
- Prep the salsa. Place your salsa in a fine mesh strainer over a bowl and let it sit for at least 10 minutes. Note: This prevents the dip from becoming watery later.
- Season the beans. Mix the refried beans with the cumin and chili powder in a small bowl.
- Spread the base. Spread the bean mixture into an even layer at the bottom of your dish. Cook 0 mins until the surface is smooth and flat.
- Flavor the yogurt. Whisk the Greek yogurt and taco seasoning together until the color is uniform.
- Layer the cream. Carefully spread the seasoned yogurt over the beans, pushing it all the way to the edges.
- Add the green. Spoon the guacamole over the yogurt layer and smooth it out gently.
- Apply the salsa. Spread the drained salsa over the guacamole. Watch for any liquid and pat dry with a paper towel if needed.
- Shower with cheese. Sprinkle the shredded cheddar evenly over the salsa layer.
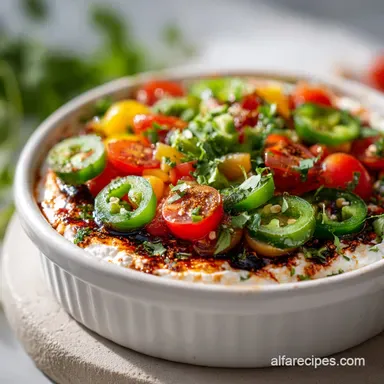
- Garnish the top. Scatter the olives, diced tomatoes, green onions, and cilantro over the cheese.
- Chill and set. Cover the dish and refrigerate for at least 30 minutes until the flavors have melded and the yogurt has firmed up.
Chef's Tip: If you are making this ahead of time, wait to add the tomatoes and cilantro until right before serving. This keeps the herbs from wilting and the tomatoes from releasing extra juice into the cheese layer.
Preventing Common Texture and Stability Issues
Why Your Layered Appetizer Is Runny
The biggest culprit is almost always the salsa or the tomatoes. If you skip the draining step, the salt in the beans and cheese will pull the water out of the vegetables through osmosis. Within two hours, you will have a pool of red liquid at the bottom.
Why the Guacamole Turns Brown
Avocados oxidize when exposed to air. In a 7 layer dip, the guacamole is sandwiched between layers, which helps, but air can still get in from the sides. Ensure your yogurt layer and salsa layer completely cover the guacamole to create an airtight seal.
| Problem | Root Cause | Solution |
|---|---|---|
| Watery Bottom | Salsa or tomatoes released liquid | Drain salsa in a mesh sieve for 10 mins before adding |
| Muddy Layers | Ingredients were too warm or thin | Chill the beans and yogurt before assembly |
| Bland Flavor | Seasoning stayed in one spot | Whisk the spices into the yogurt and beans separately |
Common Mistakes Checklist
- ✓ Forget to drain the salsa (leads to "Salsa Soup").
- ✓ Using "runny" Greek yogurt (stick to Fage or Chobani for thickness).
- ✓ Over mixing the layers while spreading (disturbs the visual lines).
- ✓ Seeding the tomatoes poorly (the jelly inside is pure water).
- ✓ Skipping the chill time (the layers need 30 minutes to "bond").
Creative Variations for Your Flavor Profile
If you want to scale this down for a personal meal prep snack, use small mason jars. Divide the ingredients into 4 or 6 jars, following the same layering order. This keeps the portions controlled and makes it easy to grab for lunch.
For scaling up for a large party (24 servings), double the ingredients but use two separate dishes instead of one giant deep dish. A dip that is too deep becomes difficult to scoop without the chip breaking. If you choose to double the spices, only go to 1.5x the amount of taco seasoning first, then taste.
Sometimes the saltiness can become overwhelming when doubled.
| Goal | Adjustment | Outcome |
|---|---|---|
| Extra Spicy | Add 2 tbsp diced jalapeños to the salsa | Increases heat without adding fat |
| Vegan Version | Use dairy-free yogurt and nut based cheese | Alters the tanginess but keeps the protein |
| Budget Save | Use home cooked dried beans | Saves roughly $1.50 per batch |
Proper Storage and Zero Waste Strategies
This Healthy Seven Layer Dip is best enjoyed within 24 to 48 hours. After that, the moisture migration is inevitable, and the guacamole may begin to lose its vibrant green hue. Keep it tightly covered with plastic wrap, pressing the wrap directly onto the surface of the dip to minimize air contact.
If you have leftovers that are looking a bit messy, don't throw them out! You can stir the remains into a hot skillet with some leftover rice or use it as a filling for a "trash burrito." The flavors are all there, even if the beautiful layers have merged. You can even use the leftover dregs as a topping for a Whiting Fish Recipe to add a creamy, zesty kick to the baked fish.
How to Serve This Vibrant Appetizer
Presentation is everything with a Healthy 5 Layer Dip or 7 layer version. Always serve this in clear glass. It makes the dish look much more expensive and professional. Pair it with sturdy options like whole grain corn chips, cucumber slices, or bell pepper strips to keep the nutrition profile high.
Right then, let's crack on. This dip is proof that healthy eating doesn't have to be boring or restrictive. It is about making smart choices, like that Greek yogurt swap, that actually improve the final texture.
Trust me on this: once you try the high protein version, you will never go back to the heavy, oily stuff again. It is vibrant, satisfying, and honestly, just a better way to snack.

Recipe FAQs
Can I use sour cream instead of Greek yogurt for the creamy layer?
No, Greek yogurt is highly recommended. The high protein content in Greek yogurt creates a structural integrity that prevents weeping, unlike sour cream which can result in a runnier dip.
How far in advance can I assemble the 7 Layer Dip?
Assemble up to 24 hours ahead. For best texture and visual appeal, it is crucial to drain the salsa thoroughly and cover the dip tightly, pressing plastic wrap directly onto the surface.
How do I stop the guacamole layer from turning brown?
Completely seal the layer with the next ingredient. Ensure the layer of salsa and cheese fully covers the guacamole edge-to-edge to minimize air exposure, which causes oxidation.
What is the most important step to prevent a watery dip?
Drain the salsa completely. Place the salsa in a fine mesh strainer for at least ten minutes; excess moisture will inevitably migrate into the surrounding layers, leading to a soupy bottom.
How do I ensure the sturdy layers don't collapse when scooping?
Use the refried beans as a chilled, seasoned anchor. Spreading the seasoned beans cold and flat on the bottom provides a stable base; this technique of building density works similarly when you are prepping items like a Low Calorie Peanut recipe for meal prep stability.
What should I serve with this dip that keeps the snack healthy?
Serve with sturdy, whole food options. Whole grain corn chips, cucumber slices, or fresh bell pepper strips offer the best structural support and complement the fresh flavors.
How to make the yogurt layer taste flavorful without adding fat?
Whisk the taco seasoning into the yogurt thoroughly first. Whisking the spices into the non fat Greek yogurt for 30 seconds ensures the seasoning hydrates evenly, distributing flavor instead of leaving clumps.
Healthy 7 Layer Dip
Ingredients:
Instructions:
Nutrition Facts:
| Calories | 168 calories |
|---|---|
| Protein | 9.5 g |
| Fat | 8.2 g |
| Carbs | 14.1 g |
| Fiber | 3.9 g |
| Sugar | 3.1 g |
| Sodium | 485 mg |
