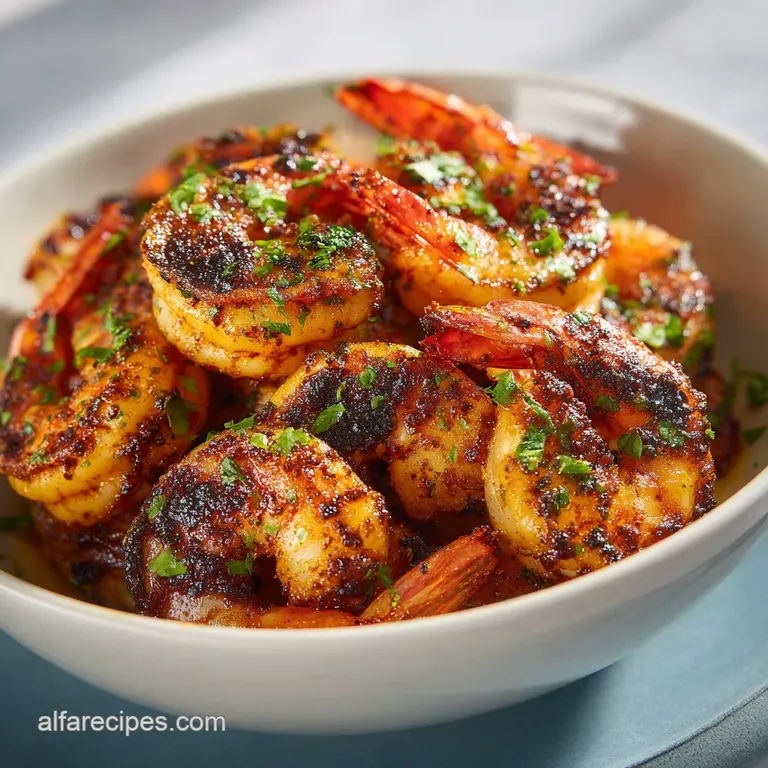
Blackened Shrimp: Juicy and Spicy
- Time: Active 10 minutes, Passive 5 minutes, Total 15 minutes
- Flavor/Texture Hook: A smoky, crispy exterior that gives way to a tender, juicy center.
- Perfect for: Busy weeknights, family taco nights, or quick meal prep.
- Making the Ultimate Blackened Shrimp at Home
- Why This Hearty Family Dish Works
- Quick Specs and Easy Timing
- Quality Ingredients for the Best Flavor
- Simple Tools for Better Cooking
- From Raw Prep to Golden Sear
- Fixing Common Mistakes and Searing Errors
- Fun Variations for Any Weeknight
- Keeping Leftovers Fresh and Tasty
- The Best Sides for Serving
- Recipe FAQs
- 📝 Recipe Card
Making the Ultimate Blackened Shrimp at Home
I still remember the first time I tried to make blackened shrimp in my old apartment. I had the heat cranked up, the spices ready, and a pan that wasn't quite right. Five minutes later, my smoke alarm was screaming and my kitchen looked like a fog bank.
But even through the haze, that first bite was a total game changer. The spice crust had this incredible shatter, and the shrimp inside were still sweet and snappy. It was the kind of hearty, no fuss meal that makes you feel like a pro cook even on a Tuesday night.
Since that smoky disaster, I've learned a few tricks to get that deep, dark crust without calling the fire department. It's all about the balance of the blackening spice and the type of fat you use to sear.
We've made this dozens of times for family get togethers, and it’s always the first thing to disappear from the table. Whether you're tossing them into a salad or serving them over a big bowl of grits, this method works every single time because it relies on simple physics rather than complicated kitchen gear.
You don't need a fancy gourmet setup to pull this off. Honestly, the beauty of this dish is how it turns basic pantry staples into something that feels special. We're going to use high heat, a specific blend of herbs, and a little bit of butter to create that signature look and flavor.
It’s a fast, reliable recipe that fits perfectly into real life, especially when you have a hungry family waiting for a meal that actually tastes like you spent hours on it.
Why This Hearty Family Dish Works
Getting that dark, flavorful exterior on your shrimp isn't about burning them, it's about controlled caramelization. By combining specific spices with a touch of sugar and high heat, we trigger several reactions at once that result in that deep mahogany color and complex taste.
It’s a fast process that relies on the shrimp being bone dry and the pan being properly preheated.
- Maillard Magic: High heat causes the proteins and sugars on the surface of the shrimp to react, creating hundreds of new flavor compounds and a dark crust.
- Fat Conductivity: Melted butter acts as a vehicle for the spices, ensuring every nook and cranny of the shrimp is coated for an even sear.
- Hygroscopic Balancing: The brown sugar in the rub absorbs a tiny amount of moisture, helping the spices stick while encouraging rapid browning.
- Thermal Momentum: Using a heavy skillet maintains a consistent temperature even when you drop the cold shrimp in, preventing them from steaming in their own juices.
| Thickness | Internal Temp | Rest Time | Visual Cue |
|---|---|---|---|
| Small (41/50) | 145°F | 1 minute | Translucent center disappears |
| Medium (26/30) | 145°F | 1 minute | C shape and pink edges |
| Jumbo (16/20) | 145°F | 2 minutes | Opaque white with charred spots |
Choosing the right size of shrimp is the first step toward success. I always reach for the 16/20 count (jumbo) because they stay juicy even under the intense heat required for blackening. If you use smaller ones, they tend to overcook before you can get a good crust on them.
It’s a simple trade off that makes a huge difference in the final texture of the meal.
Quick Specs and Easy Timing
When you're feeding a family, timing is everything. This recipe moves fast once the shrimp hit the pan, so having everything measured out and ready to go is the secret to a stress free evening.
We aren't dealing with long braises or complicated reductions here, just high impact flavor in under 20 minutes.
Component Analysis
| Ingredient | Science Role | Pro Secret |
|---|---|---|
| Smoked Paprika | Color and Base | Provides the deep red hue without the acrid bitterness of burnt chili. |
| Avocado Oil | High Heat Stability | With a smoke point over 500°F, it keeps your kitchen clear while the shrimp sear. |
| Melted Butter | Flavor and Adhesion | The milk solids in butter help the spice rub "shatter" into a crispy crust. |
| Brown Sugar | Surface Tension | Accelerates the browning process so the shrimp don't overcook while you wait for color. |
This isn't just a list of random items; each one plays a part in the chemistry of the sear. For instance, if you're out of fresh shrimp, you can check out my Frozen Shrimp recipe for tips on how to thaw and prep them properly so they don't turn out soggy. The most important part of the prep is making sure that shrimp are as dry as possible before the spices touch them.
Quality Ingredients for the Best Flavor
I always say that a recipe is only as good as what you put into it, but that doesn't mean you need to break the bank. We use 1 lb jumbo shrimp (16/20 count), peeled and deveined, as our foundation. These are large enough to handle the heat.
The blackening spice is a blend of 2 tbsp smoked paprika, 1 tsp cayenne pepper (adjust if the kids don't like heat!), 1 tsp garlic powder, 1 tsp onion powder, 0.5 tsp dried thyme, and 0.5 tsp dried oregano.
To round out the flavors, we add 1 tsp kosher salt, 0.5 tsp cracked black pepper, and 0.5 tsp brown sugar. To get that sear, you'll need 2 tbsp unsalted butter, melted, and 1 tbsp avocado oil. I prefer avocado oil over olive oil here because it can handle the temperature without breaking down.
If you need to make a swap, check the table below to see how it might change the outcome of your dish.
| Original Ingredient | Substitute | Why It Works |
|---|---|---|
| Unsalted Butter | Ghee | Higher smoke point than butter but keeps the same rich, nutty flavor. |
| Smoked Paprika | Sweet Paprika | Note: You'll lose the smoky depth but it’s less intense for kids. |
| Avocado Oil | Grapeseed Oil | Similar high smoke point and neutral flavor profile. |
| Brown Sugar | Coconut Sugar | Similar caramelization properties with a slightly more toasted taste. |
Make sure your spices are fresh. If that oregano has been sitting in your cabinet since the last decade, it’s probably lost its punch. When we cook for the family, we want those herbs to be vibrant.
The dried thyme and oregano provide an earthy backbone that balances the sharp heat of the cayenne and the sweetness of the shrimp.
Simple Tools for Better Cooking
You don't need a kitchen full of gadgets for this, but a few specific tools make the process much easier. A heavy cast iron skillet is my top recommendation because it holds heat like nothing else.
If you don't have one, a heavy bottomed stainless steel pan will work, but avoid non stick pans as they aren't designed for the high heat we need to get a real blackened crust.
You'll also need a large mixing bowl to toss the shrimp with the spices and a pair of sturdy tongs. Tongs give you the control you need to flip each shrimp individually so you can monitor the browning.
I also like to keep a small metal spoon handy for basting the shrimp with any leftover butter in the pan toward the end of the cooking time.
From Raw Prep to Golden Sear
The key to this recipe is the workflow. Because it cooks so fast, you want to have your side dishes nearly finished before the shrimp ever touch the heat. I usually have a pot of rice or some corn on the cob ready to go.
Once the shrimp are in the pan, you only have about five minutes until they need to be on the plate.
- Pat the 1 lb jumbo shrimp completely dry with paper towels Note: moisture is the enemy of a good sear.
- Whisk together the smoked paprika, cayenne, garlic powder, onion powder, thyme, oregano, salt, pepper, and brown sugar in a bowl.
- Drizzle the 2 tbsp melted butter over the shrimp and toss until they are evenly coated and glistening.
- Sprinkle the spice blend over the buttery shrimp, tossing them again until every shrimp is heavily coated in the red rub.
- Heat the 1 tbsp avocado oil in a large skillet over medium high heat until the oil is shimmering and just starting to wisps of smoke.
- Place the shrimp in the pan in a single layer, ensuring they aren't touching each other Note: work in batches if your pan is small.
- Sear for 2 minutes without moving them until a dark, crusty shell forms on the bottom.
- Flip each shrimp using tongs and cook for another 2 to 3 minutes until the centers are opaque and they feel firm to the touch.
- Remove the shrimp from the pan immediately to a warm platter to prevent overcooking.
- Serve hot with a squeeze of fresh lemon juice to brighten all those heavy spices.
Prepping for Maximum Spice Adhesion
Getting the spices to stay on the shrimp rather than sticking to the pan is all about that butter coating. When you toss the shrimp in melted butter before adding the dry rub, you're creating a tacky surface that holds the spices in place.
This "armor" of spices is what protects the delicate meat inside from the direct heat of the pan, allowing it to cook gently while the outside gets that signature char.
Executing the High Heat Sear
Don't be afraid of the heat! You want to hear a loud sizzle the moment the shrimp hit the oil. If the pan isn't hot enough, the butter will just melt off and the shrimp will boil in their own liquid, leaving you with a grey, rubbery mess. If you're looking for another way to use this technique, it's very similar to how I start the base for my Creamy Garlic Tuscan recipe, where building flavor in the pan is the most important step.
Mastering the Final Timing
Shrimp are done much faster than most people think. They should just barely curl into a "C" shape. If they curl tightly into an "O", you've gone too far and they’ll be tough. Look for the color change at the thickest part of the back; once the translucency is gone and it's a solid, vibrant white, pull them off.
The carryover heat will finish the job as they sit on the platter for a minute before serving.
Fixing Common Mistakes and Searing Errors
Even the most seasoned home cooks can run into trouble with over high heat cooking. The most common issue I see is the spices burning and turning acrid before the shrimp are cooked through. This usually happens if the heat is too high or if you’re using an oil with a low smoke point, like extra virgin olive oil.
If you smell something bitter, turn the heat down slightly and add a tiny bit more oil to the pan.
Why Your Shrimp Lack Crunch
If your shrimp come out soft or soggy, it’s almost always because of moisture. Frozen shrimp release a lot of water as they thaw. Even if they look dry, they might still be "weeping" liquid. I always wrap my thawed shrimp in a clean kitchen towel and give them a gentle squeeze before starting.
Another culprit is overcrowding the pan; if there’s no room for steam to escape, your shrimp will steam instead of sear.
| Problem | Root Cause | Solution |
|---|---|---|
| Spices Tastes Bitter | Heat was too high or sugar burnt | Lower the heat slightly and ensure the pan isn't dry. |
| Shrimp are Rubbery | Cooked too long | Watch for the "C" shape and remove immediately. |
| Spices Falling Off | Shrimp were too wet | Pat dry and use the butter first coating method. |
Common Mistakes Checklist ✓ Pat the shrimp bone dry before adding spices to prevent steaming. ✓ Use a heavy cast iron skillet for the most consistent crust. ✓ Don't overcrowd the pan; leave at least half an inch between each shrimp.
✓ Preheat the pan for 3 to 4 minutes before adding the oil. ✓ Flip only once to ensure the crust has time to set properly. ✓ Pull the shrimp off the heat the second they turn opaque.
Fun Variations for Any Weeknight
Once you have the basic technique down, you can use these shrimp in so many different ways. My family loves "Build Your Own" nights where I put out a big platter of these shrimp and a bunch of toppings. It's a no fuss way to feed a crowd without having to plate everything yourself.
It keeps the atmosphere casual and lets everyone customize their heat level with different salsas or sauces.
Building Blackened Shrimp Tacos
This is our go to Friday night meal. I char some corn tortillas right over the gas flame on the stove, then pile in the blackened shrimp. Top them with a simple slaw of shredded cabbage, lime juice, and a little cilantro. The coolness of the cabbage is the perfect foil for the blackening spice.
You can even add a dollop of sour cream or crema to help temper the cayenne heat for the little ones.
Creating Blackened Shrimp Pasta
If you want something a bit more filling, toss these shrimp into a bowl of fettuccine. I like to make a quick pan sauce by deglazing the skillet with a splash of heavy cream after the shrimp are done.
All those browned bits of spice from the bottom of the pan get swirled into the cream, creating a velvety sauce that coats the noodles beautifully. It’s a great way to stretch a pound of shrimp to feed four or five people comfortably.
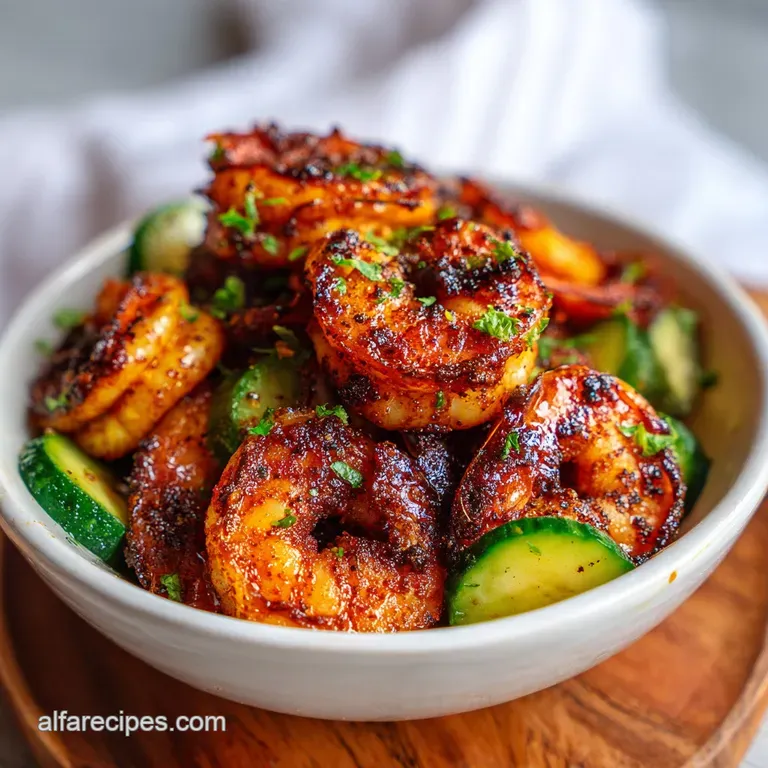
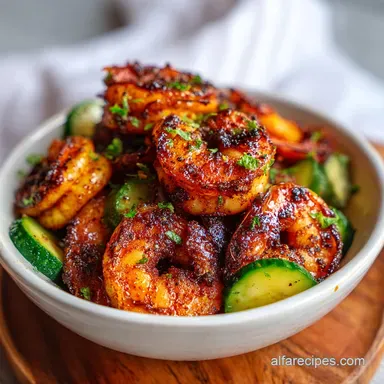
- If you want a low carb meal, serve the shrimp over a bed of sautéed zucchini noodles or cauliflower rice.
- If you want a classic Southern feel, spoon the shrimp and their pan juices over a bowl of buttery stone ground grits.
- If you want a fresh salad, let the shrimp cool slightly and toss them with romaine, avocado, and a creamy ranch or blue cheese dressing.
Keeping Leftovers Fresh and Tasty
Leftover shrimp are a gift for the next day's lunch, provided you handle them right. They stay fresh in an airtight container in the fridge for up to 3 days. I don't recommend freezing them once they've been cooked, as the texture can become quite grainy and lose that signature snap.
To keep them from drying out, I always store them with any leftover juices from the pan.
When it comes to zero waste, don't throw away the shrimp tails or shells if you peeled them yourself! You can toss them into a freezer bag and save them to make a quick seafood stock later.
Just simmer the shells with some onion scraps, celery, and water for 20 minutes, and you've got a fantastic base for a chowder or a risotto. It’s a small step that really maximizes the value of your ingredients.
To reheat blackened shrimp without turning them into rubber bands, avoid the microwave if possible. Instead, heat a small skillet over medium heat with a teaspoon of butter. Toss the shrimp in just until they are warmed through usually only about 60 to 90 seconds.
This helps maintain that crispy exterior while keeping the inside juicy. If you must use a microwave, use the 50% power setting and heat them in short 20 second bursts.
The Best Sides for Serving
A hearty family meal is all about the balance on the plate. Since blackened shrimp are quite intense and spicy, I like to pair them with sides that are a bit more neutral or slightly sweet.
A big bowl of fluffy jasmine rice or a simple corn maque choux (stewed corn with peppers and onions) are traditional favorites in our house. The sweetness of the corn really sings alongside the smoked paprika and cayenne.
If you're looking for something green, a simple roasted broccoli or a quick cucumber salad with a vinegar dressing works wonders. The acidity in the vinegar helps cut through the richness of the butter and the weight of the spices. No matter what you choose, make sure you have plenty of lemon wedges on the table.
That hit of fresh citrus right at the end is what makes the whole dish pop and keeps everyone coming back for seconds.
| Servings | Shrimp Amount | Pan Size | Cook Time |
|---|---|---|---|
| 2 People | 0.5 lb | 10 inch skillet | 4-5 minutes |
| 4 People | 1 lb | 12 inch skillet | 5-6 minutes |
| 6 People | 1.5 lb | Two 12 inch pans | 5-6 minutes |
The Truth About Searing
There is a common misconception that you need to see flames to "blacken" food. In reality, real blackening is about the spices darkening, not the meat burning. You want a dark brown, almost ebony color from the paprika and butter reacting, but if the shrimp themselves are turning black and smelling like charcoal, the heat is too high.
It's a fine line, but once you find that sweet spot on your stove, you'll be able to nail it every time.
Another myth is that you can't get a good sear on shrimp if they've been frozen. As long as you thaw them completely and dry them thoroughly, they will sear just as well as fresh ones.
The "fresh" shrimp at most grocery store counters were actually frozen on the boat and thawed anyway, so don't feel like you're compromising on quality by using a bag from the freezer section. Just give them the attention they deserve during the prep phase, and they'll turn out beautiful.

Recipe FAQs
What does blackened mean for shrimp?
It means creating a dark, heavily seasoned crust. Blackening is a high heat cooking technique where spices char quickly on the surface, resulting in an intense, complex, smoky exterior while the interior remains juicy.
What seasoning do you use to blacken shrimp?
Use a robust blend of paprika, cayenne, garlic, onion, thyme, and oregano. The specific spice mix, combined with a little brown sugar, creates the necessary chemical reaction for the signature dark crust under high heat.
What is the difference between grilled shrimp and blackened shrimp?
Grilled shrimp develops surface char from direct flame, while blackened shrimp develops a crust from seasoned butter in a ripping hot cast iron skillet. Grilling offers distinct grill marks, whereas blackening coats the entire surface evenly with a dark spice rub.
What makes something blackened?
The creation of a dark, flavorful crust is what makes food blackened. This is achieved by coating food with a specific spice blend and searing it quickly in a smoking hot, butter coated pan, triggering the Maillard reaction rapidly.
Is it true I must use a cast iron skillet to achieve a true blackening?
No, while cast iron is ideal, a heavy bottomed stainless steel pan will work well. Cast iron retains heat consistently, which is crucial for the rapid sear required, but any pan that can withstand and maintain very high temperatures will suffice.
How do I prevent the shrimp from becoming tough and rubbery during searing?
Remove the shrimp immediately when they turn opaque white. They should curl into a "C" shape; if they tightly form an "O," they are overcooked and will be tough.
How to get the spice rub to adhere properly to the shrimp?
Toss the completely dry shrimp in melted butter first before adding the dry spice blend. The butter acts as a binder, creating a tacky surface that ensures the heavy seasoning sticks during the intense high heat cooking process.
Blackened Shrimp Fast Sear
Ingredients:
Instructions:
Nutrition Facts:
| Calories | 208 kcal |
|---|---|
| Protein | 23.4 g |
| Fat | 10.8 g |
| Carbs | 2.6 g |
| Fiber | 0.8 g |
| Sugar | 0.6 g |
| Sodium | 585 mg |
