Stand Mixer Recipe with White Bread Dough
- Time: Active 25 minutes, Passive 2 hours 20 mins, Total 2 hours 45 mins
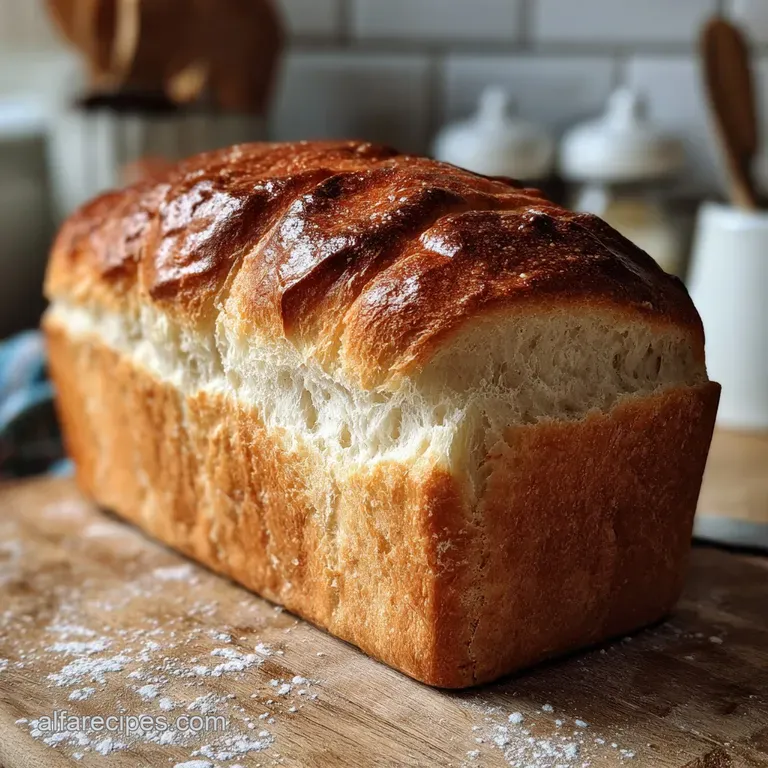
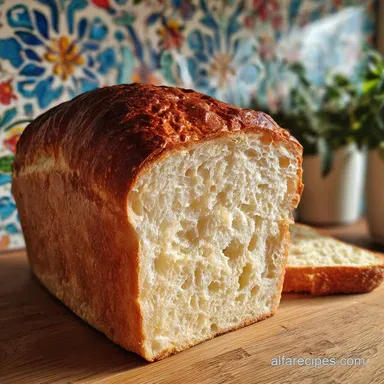
- Flavor/Texture Hook: Velvety soft interior with a golden, buttery crust
- Perfect for: Family dinner sides, hearty sandwich bases, or beginner friendly baking
- Getting Started with This Stand Mixer Recipe with White Bread
- Technical Specs for Better Baking
- Choosing Ingredients for Fluffy Results
- Tools Needed for Better Dough
- Easy Steps for Consistent Loaves
- Fixing Issues and Common Failures
- Scaling This Bread Recipe
- Myths About Stand Mixer Bread
- Storing and Warming Your Loaf
- Optimal Serving and Pairing Ideas
- Recipe FAQs
- 📝 Recipe Card
Getting Started with This Stand Mixer Recipe with White Bread
Nothing beats the scent of yeast blooming in a warm kitchen on a Saturday morning. I used to think making bread from scratch required the forearms of a blacksmith and hours of wrestling with sticky dough on a floured counter.
After one too many loaves ended up as dense bricks because I got tired of kneading, I finally leaned on my stand mixer. This stand mixer recipe yields a perfectly soft and fluffy white bread.
It's the kind of loaf that fills the house with a cozy aroma and brings everyone to a crowded table before the butter even hits the board.
We've all been there, staring at a bag of flour and wondering if the effort is worth the payoff. Trust me, it is. When the warm water hits the honey and yeast, and that first earthy, sweet scent rises, you'll know you're onto something special.
This isn't about tiny portions or fancy techniques, it's about real life and providing a hearty staple for your family. We are going to tackle the common fear of "yeast anxiety" together and show you how a few simple ingredients can turn into a cloud like loaf.
Right then, let's get into the details. We are aiming for a crust that offers a slight shatter when you slice it, revealing a center so soft it bounces back when pressed. It's a no fuss approach that relies on the mechanical consistency of your mixer to build the structure your bread needs.
You won't need a gym membership for this one, just a bit of patience while the dough does its thing in the bowl.
The Physics of the Rise
Gluten Alignment: The spinning action of the dough hook stretches and aligns proteins into a strong, elastic web that traps carbon dioxide. This mechanical tension ensures the loaf expands upward rather than spreading outward into a flat puddle.
Chef Tip: Freeze your flour for 20 minutes before starting if your kitchen is very warm; this prevents the friction from the stand mixer from overheating the yeast.
Technical Specs for Better Baking
Getting the environment right is half the battle when you're working with live cultures like yeast. Since we are focusing on a budget friendly but high-quality result, we need to ensure our timing and temperatures are spot on. This ensures the 400g of flour we use reaches its full potential.
| Thickness | Internal Temp | Rest Time | Visual Cue |
|---|---|---|---|
| Standard Loaf (approx. 4 inches) | 190°F - 200°F | 20 minutes | Crust sounds hollow when tapped on bottom |
| Dinner Rolls (approx. 2 inches) | 190°F | 10 minutes | Even golden brown across the entire top |
| Thick Cut Slices | N/A | 30 minutes | Crumb is set and no longer feels gummy |
Choosing between baking this in the oven or using a stovetop method (like a Dutch oven on a burner, though rare for this specific dough) usually comes down to the crust texture you want. For this specific recipe, the oven is your best friend for that uniform, golden finish.
| Method | Time | Texture | Best For |
|---|---|---|---|
| Conventional Oven | 30 minutes | Thin, golden, buttery crust | Soft sandwich bread and classic loaves |
| Stovetop Dutch Oven | 40 minutes | Thick, rustic, chewy crust | Hearth style loaves with deep browning |
Choosing Ingredients for Fluffy Results
When you're working on a budget, you don't need expensive specialty grains to get a great result. We are using 3.25 cups of bread flour (about 400g) because the higher protein content is the secret to that chewy, elastic structure.
If you only have all purpose flour, it works, but the bread will be slightly tighter and less airy.
Component Analysis
| Ingredient | Science Role | Pro Secret |
|---|---|---|
| Bread Flour (400g) | Provides the protein (gluten) needed for structure. | Use a kitchen scale for 400g rather than a cup to avoid over packing the flour. |
| Active Dry Yeast (7g) | Ferments sugars to create CO2 gas for the rise. | Bloom in 105°F water; too hot kills it, too cold keeps it dormant. |
| Unsalted Butter (28g) | Tenderizes the crumb by coating gluten strands. | Use softened, room temperature butter so it emulsifies into the dough instantly. |
Ingredients and Substitutes
- Warm Water (240ml): Essential for hydrating the flour. Why this? Warmth activates yeast immediately without a long wait.
- Substitute: Whole milk (240ml). Note: This makes the loaf richer but slightly denser.
- Honey (15g): Feeds the yeast and adds a hint of sweetness. Why this? Honey retains moisture better than white sugar over time.
- Substitute: Raw sugar (15g). Note: Gives a slightly crisper crust but less interior moisture.
- Active Dry Yeast (7g): The engine of the recipe. Why this? Reliable and easy to find in bulk for budget baking.
- Substitute: Instant yeast (5g). Note: You can skip the blooming step and mix directly with flour.
- Bread Flour (400g): The structural foundation. Why this? High protein ensures the bread doesn't collapse under its own weight.
- Substitute: All purpose flour (400g). Note: Loaf will be softer but less "tall."
- Fine Sea Salt (9g): Controls yeast and flavors the dough. Why this? Dissolves faster than coarse salt in the mixer.
- Substitute: Table salt (7g). Note: Use slightly less as table salt is saltier by volume.
- Unsalted Butter (28g): Softens the texture. Why this? Adds a creamy mouthfeel that oil can't replicate.
- Substitute: Neutral oil or lard (28g). Note: Lard creates a very flaky, traditional crust.
Tools Needed for Better Dough
You don't need a kitchen full of gadgets, but a few specific items make this a no fuss experience. The star of the show is the stand mixer, such as a KitchenAid, equipped with the dough hook attachment. This tool mimics the folding and stretching of hand kneading but with much more power and consistency.
You will also need a standard 9x5 inch loaf pan. If you're looking to feed a large family at a crowded table, having two pans ready for doubling the recipe is a smart move. A plastic dough scraper is also a life saver for getting every bit of that 400g of flour out of the bowl without a sticky mess.
If you find yourself making bread often, consider a digital thermometer. It takes the guesswork out of the yeast bloom and the final bake. This ensures you never serve an underbaked, gummy center to your guests. For a perfect accompaniment to your finished loaf, you might want to prepare a batch of my Garlic Spread For Bread recipe to slather on while it's still warm.
Easy Steps for Consistent Loaves

- Bloom the yeast. Combine 240ml warm water, 15g honey, and 7g yeast in the mixer bowl. Note: Wait 5-10 mins until the surface is foamy and bubbly.
- Add dry components. Pour in 200g (about half) of the bread flour and 9g sea salt.
- Start the mixer. Use the paddle attachment on low speed until a thick slurry forms.
- Incorporate the fats. Add 28g softened butter. Note: Pieces should be small to mix evenly.
- Switch to hook. Add the remaining 200g of flour and swap to the dough hook.
- Develop the gluten. Knead on medium low for 7 minutes until the dough cleans the sides of the bowl.
- Primary proofing stage. Cover the bowl with a damp cloth and let rise in a warm spot for 1 hour 15 mins until doubled in size.
- Shape the loaf. Gently deflate the dough and roll it into a tight cylinder.
- Secondary proofing stage. Place in a greased pan and let rise for 1 hour until the dough peeks over the pan rim.
- Bake the bread. Bake at 375°F (190°C) for 30 minutes until the top is deep mahogany brown.
Chef Tip: Brush the top of the loaf with melted butter the second it comes out of the oven. This softens the crust and gives it a professional looking sheen.
Fixing Issues and Common Failures
Sometimes the kitchen doesn't cooperate. Maybe your house is too cold, or your flour was a bit more humid than usual. Don't panic; most bread issues are easily fixed if you know what to look for. If your dough feels like a sticky swamp, don't just keep dumping flour in. Add it one tablespoon at a time.
Too much flour leads to a dry, crumbly mess that nobody wants at dinner.
Why Your Loaf Didn't Rise
If you've waited an hour and nothing has happened, the culprit is usually the temperature. Yeast is a living thing; it needs a cozy environment. If your kitchen is drafty, try putting the bowl inside a turned off oven with the light turned on. That little bulb provides just enough warmth to get things moving.
| Problem | Root Cause | Solution |
|---|---|---|
| Dough is too sticky | High humidity or excess water | Add 1 tbsp flour at a time until it clears the bowl sides. |
| Bread is very dense | Under proofing or killed yeast | Ensure water is 105°F and let rise until truly doubled. |
| Crust is too hard | Oven temperature too high | Tent with foil halfway through or lower temp by 10 degrees. |
Common Mistakes Checklist
- ✓ Never use hot water over 120°F (it will instantly kill your yeast).
- ✓ Don't skip the second rise in the pan; this creates the airy sandwich texture.
- ✓ Always grease your loaf pan thoroughly, even if it's non stick.
- ✓ Avoid adding salt directly onto the dry yeast grains; salt can inhibit yeast activity if they touch before hydrating.
- ✓ Let the bread cool for at least 20 minutes before slicing to prevent the interior from collapsing.
Scaling This Bread Recipe
If you are cooking for a small household, you can easily cut this recipe in half. Use a smaller loaf pan or shape the dough into small rolls. For the yeast, since 3.5g (half a packet) is hard to measure, just use a level teaspoon.
You'll want to check for doneness about 5-10 minutes earlier than the full recipe suggests.
Scaling up is just as simple for big family gatherings. If you double the recipe to make two loaves, keep the yeast at 1.5x (around 10g or 3.5 tsp) rather than a full double. This prevents a "yeasty" or alcoholic aftertaste in the bread.
You can knead both loaves at once if your stand mixer is 5 quarts or larger, but keep an eye on the motor to make sure it isn't straining.
If you have leftovers from a large batch, they are great for other uses. In fact, this bread makes an incredible base for a Homemade Banana Nut recipe style french toast if you let the slices sit out for a few hours to dry.
Decision Shortcut
- If you want a softer crust, brush the dough with milk before baking.
- If you want a sweeter loaf, increase the honey to 30g and use milk instead of water.
- If you want a rustic finish, dust the top of the loaf with extra flour before it goes in the oven.
Myths About Stand Mixer Bread
One big misconception is that you can't over knead dough in a stand mixer. While it's much harder to do than by hand, it is possible. If the dough starts to feel tight, shiny, and almost "tough," you've gone too far. Stop the mixer and let it rest.
Usually, 7 to 10 minutes on a medium speed is the sweet spot for the 400g of flour used here.
Another myth is that you must sift your flour. In real life home cooking, sifting is rarely necessary for a hearty white bread. Modern milling is very consistent. Just fluff the flour with a fork before measuring or, better yet, use a scale to hit that 400g mark exactly. It saves time and results in a better loaf.
Finally, people often think sugar is strictly for flavor. While it does taste good, the 15g of honey or sugar is primarily there to provide a quick energy source for the yeast. This helps the dough rise faster and more vigorously, which is key for a no fuss weeknight bake.
Storing and Warming Your Loaf
Fresh bread doesn't have the preservatives of store-bought bags, so it needs a little care. Keep it in a paper bag for the first 24 hours to maintain the crust. After that, move it to a sealed plastic bag or a bread box to keep the crumb soft. It will stay fresh for about 3 to 4 days on the counter.
For long term storage, this bread freezes beautifully. Slice it first, then wrap the whole loaf in foil and place it in a freezer bag. This way, you can pull out exactly what you need for school lunches or morning toast. It stays good for up to 3 months.
To reheat, just pop a slice in the toaster or wrap the loaf in foil and warm it in a 350°F oven for 10 minutes.
Zero Waste Tips
- Stale Ends: Don't toss them! Cut them into cubes, toss with olive oil and herbs, and bake until crispy for the best croutons you've ever had.
- Breadcrumbs: Pulse dried out slices in a food processor and store them in the freezer for breading chicken or topping casseroles.
- Bread Pudding: Use a whole stale loaf for a hearty, family style dessert.
Optimal Serving and Pairing Ideas
This bread is a workhorse. For a simple breakfast, a thick slice with salted butter and a bit of jam is unbeatable. If you're looking for a low carb alternative for a different meal, you might consider my Whiting Fish Recipe which pairs surprisingly well with a side of fresh bread for mopping up juices.
For a crowded table, I love serving this alongside a big pot of chili or a creamy potato soup. The soft texture is perfect for dipping. If you're feeling adventurous, use the dough to make a "braided" loaf and brush it with an egg wash for a glossy, impressive center piece.
It's a no fuss way to make a basic meal feel like a special occasion.
Finally,, think about the sandwiches. Because we used bread flour, the slices won't fall apart even if you load them up with heavy fillings like roast beef or thick layers of garden tomatoes. It's a hearty, reliable loaf that brings a bit of handmade warmth to every bite.
Enjoy the process, and don't be afraid to get your hands a little floury even with the mixer doing the hard work!

Recipe FAQs
Can a stand mixer mix bread dough?
Yes, absolutely. The dough hook attachment is specifically designed to mimic the stretching and folding motion of hand kneading, developing gluten structure efficiently.
Which stand mixer attachment is best for bread dough?
The dough hook is the only correct attachment. It handles the thick, heavy consistency of bread dough much better than the paddle or whisk attachments.
How long to use a stand mixer for bread dough?
Knead for 7 to 10 minutes on medium low speed. You know it is done when the dough gathers cleanly around the hook and clears the sides of the bowl.
What recipes can I make with a stand mixer?
You can make almost anything, but the mixer excels at tasks requiring intensive mixing, like cookies, frostings, and various enriched doughs. If you master the high hydration dough structure here, you can apply the same gluten alignment principle to recipes like our Frozen Shrimp: Air Fryer Method Ready in 20 Minutes for perfectly textured coatings.
Is it necessary to bloom yeast before adding it to the mixer?
No, it is not strictly necessary if you use instant yeast. However, if using active dry yeast, blooming it first in warm water (105°F) for 5 minutes confirms the yeast is alive and active.
What temperature water should I use to activate the yeast?
Use water between 100°F and 110°F. Water warmer than 120°F will kill the yeast organisms, resulting in a flat loaf because the fermentation cannot start.
What is the purpose of adding butter late in the mixing cycle?
Adding fat later ensures strong gluten development. If butter is added too early, it coats the flour proteins, inhibiting the formation of the strong elastic network needed for a high rise.
Stand Mixer White Bread
Ingredients:
Instructions:
Nutrition Facts:
| Calories | 143 kcal |
|---|---|
| Protein | 4.3 g |
| Fat | 1.9 g |
| Carbs | 25.3 g |
| Fiber | 0.9 g |
| Sugar | 1.4 g |
| Sodium | 291 mg |
