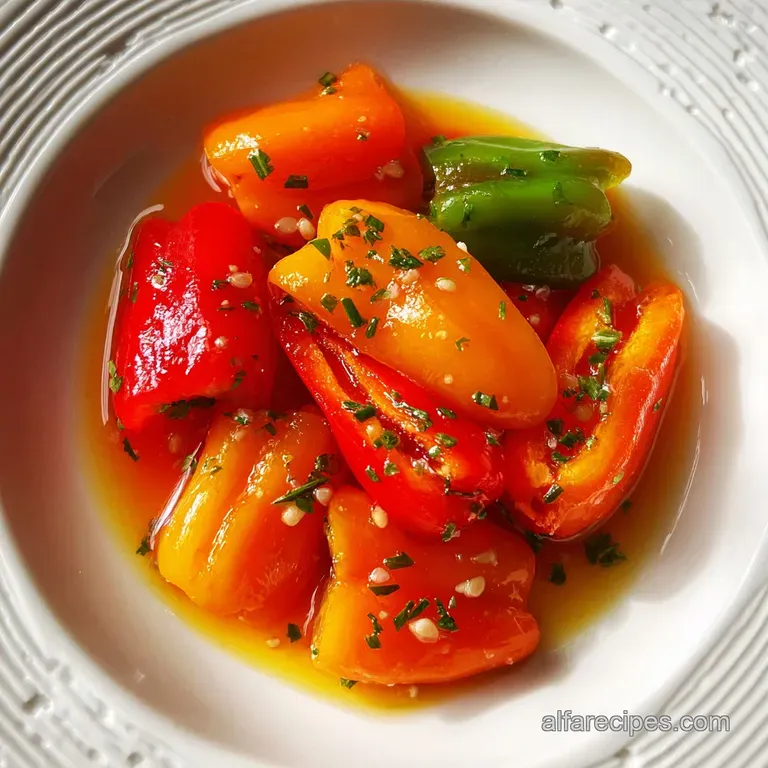
Crunchy Pickled Bell Peppers
- Time: Active 10 minutes, Passive 5 minutes, Total 15 minutes
- Flavor/Texture Hook: Crunchy and tangy with a subtle honey sweetness
- Perfect for: Topping tacos, sandwiches, or serving as a hearty side snack
- Quick and Easy Pickled Bell Peppers
- The Simple Magic of Vibrant Brined Summer Veggies
- Component Analysis for Refrigerator Brining
- Gathering the Elements for the Perfect Brine
- Essential Tools for No Fuss Kitchen Success
- Mastering the Art of the Five Minute Sizzle
- Avoiding Common Blunders for Crisp Results Everytime
- Clever Swaps to Suit Every Family Pantry
- Best Practices for Storing Your Colorful Harvest
- Debunking Pickling Methods and Myths
- Hearty Pairings for Your Crowded Family Table
- Recipe FAQs
- 📝 Recipe Card
Quick and Easy Pickled Bell Peppers
The first time I really understood the power of a good pickle was during a chaotic family barbecue. The burgers were a bit dry, the sun was beating down, and everyone was getting restless around the crowded table.
I pulled a jar of these bright, multicolored strips from the fridge, and the moment that lid popped, the sharp, tangy aroma of apple cider vinegar cut right through the heavy humid air.
As soon as my brother in-law tucked a few into his bun, I heard that unmistakable "shatter" of a perfectly crisp pepper. It changed the whole mood. Since then, I’ve realized that having a jar of Pickled Bell Peppers on hand is like having a secret weapon for real life.
It turns a boring Tuesday night sandwich into something everyone actually wants to eat. We don't do tiny portions here, just big, bold flavors that bring people together.
The Simple Magic of Vibrant Brined Summer Veggies
What makes this recipe stand out is the balance between the natural sweetness of the peppers and the sharp bite of the brine. We are using a 1:1 ratio of vinegar to water, which provides enough acidity to keep things safe and tangy without being so overwhelming that you lose the vegetable’s soul.
It's a no fuss approach that relies on the quality of the produce rather than fancy techniques.
Unlike traditional fermented pickles that take weeks, these quick Pickled Bell Peppers are ready to enjoy almost as soon as they hit the fridge. The addition of honey instead of refined sugar gives the liquid a velvety mouthfeel that coats the pepper strips beautifully.
It's the kind of reliable staple that makes you feel like a pro even when you've only got fifteen minutes to spare.
The Physics of the Snap
High acidity from the apple cider vinegar prevents the pectin in the cell walls of the peppers from breaking down. This chemical stability ensures that the vegetables maintain their structural integrity and "shatter" when bitten rather than becoming mushy.
Mechanism: Acidic environments strengthen the pectin chains in vegetables, locking in that satisfying crunch even after the heat of the brine is applied.
| Method | Time | Texture | Best For |
|---|---|---|---|
| Quick Refrigerator | 15 minutes | Maximum Crunch | Daily toppings and salads |
| Classic Water Bath | 45 minutes | Softer Bite | long term pantry storage |
| Blanched Quick Pickle | 20 minutes | Medium Soft | Quick stir fry additions |
The choice of method depends entirely on how soon you want to eat and how much space you have in your fridge. For most of my hearty family meals, the quick refrigerator method is the winner because it preserves that fresh picked snap we all love.
It’s also much easier for busy cooks who don't want to deal with boiling large pots of water for canning.
Component Analysis for Refrigerator Brining
Choosing the right ingredients is half the battle when you want a result that doesn't just taste okay but actually tastes incredible. The apple cider vinegar provides a fruity depth that white vinegar just can't match, while the honey adds a soft floral note that rounds out the spices.
| Ingredient | Science Role | Pro Secret |
|---|---|---|
| Apple Cider Vinegar | Preservative & Flavor | Use 5% acidity for the safest, most consistent tang |
| Sea Salt | Texture & Osmosis | Draws out moisture to let the brine penetrate deep |
| Honey | Sweetness & Viscosity | Creates a velvety liquid that clings to the peppers |
| Mustard Seeds | Flavor & Antioxidant | Adds a tiny "pop" and prevents the brine from spoiling |
Every component has a job to do. The mustard seeds aren't just for show; they contain compounds that help keep the vegetables firm. Similarly, the red pepper flakes provide a gentle warmth that builds over time without making the dish uncomfortably spicy for the kids.
Gathering the Elements for the Perfect Brine
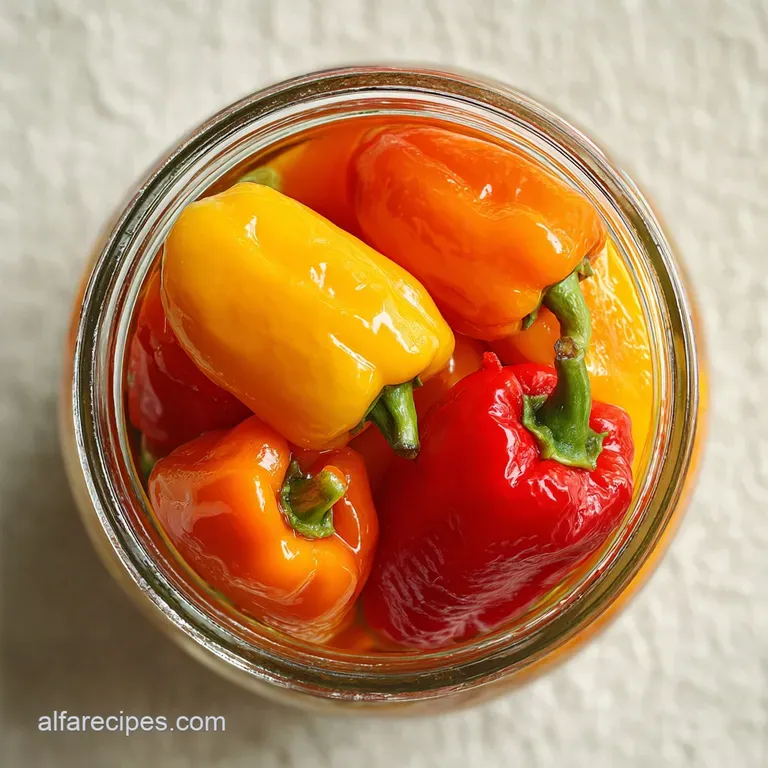
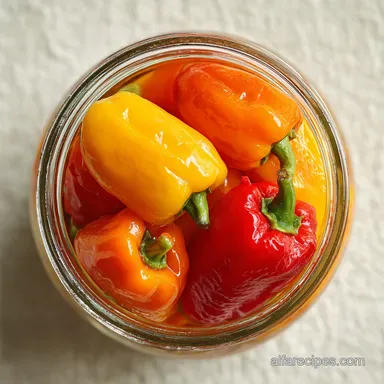
To get started, you'll need to gather these specific items from your pantry and fridge. I've found that using a mix of red, yellow, and orange peppers doesn't just look pretty it offers a slightly different sugar profile in every bite.
- 3 large bell peppers: Use a mix of red, yellow, and orange for the best visual appeal. Why this? They are sweeter and more tender than green varieties. (Substitute: Mini sweet peppers)
- 1/2 small red onion: Thinly sliced to add a sharp, savory contrast. Why this? It provides a beautiful purple hue to the brine. (Substitute: Shallots)
- 1 cup apple cider vinegar: Look for 5% acidity on the label. Why this? It offers a mellow, fruity acidity. (Substitute: Rice vinegar)
- 1 cup filtered water: To balance the intensity of the vinegar. Why this? Filtered water prevents "off" flavors from tap chemicals. (Substitute: Distilled water)
- 2 tablespoons honey: A natural sweetener that pairs perfectly with peppers. Why this? It dissolves easily and adds a rich mouthfeel. (Substitute: Maple syrup)
- 1 tablespoon sea salt: Essential for the pickling process. Why this? It lacks the additives found in table salt. (Substitute: Kosher salt)
- 4 cloves garlic: Smashed to release their oils. Why this? Smashing provides a subtle, earthy undertone. (Substitute: Garlic flakes)
- 1 teaspoon mustard seeds: For a classic pickling flavor. Why this? They provide a gentle spicy crunch. (Substitute: Celery seeds)
- 1/2 teaspoon whole black peppercorns: To add a light, woody heat. Why this? Whole peppercorns won't cloud the brine. (Substitute: White peppercorns)
- 1/4 teaspoon red pepper flakes: For just a hint of zing. Why this? It balances the sweetness of the honey. (Substitute: Sliced fresh jalapeño)
Essential Tools for No Fuss Kitchen Success
You really don't need a lot of gadgets to make this happen. In fact, keeping it simple is the whole point of this recipe. I usually just pull out my favorite sharp knife and a sturdy glass jar.
- A Sharp Chef's Knife: Essential for getting those clean, uniform 1/4 inch strips.
- Small Stainless Steel Saucepan: To heat the brine components until they are fully integrated.
- Glass Mason Jars: I prefer wide mouth quart jars because they are easier to pack tightly.
- Measuring Cups and Spoons: For ensuring the salt and vinegar ratios are exact.
Chef's Tip: If you want to get really uniform slices without the knife work, a mandoline is great, but honestly, for a hearty, home cooked feel, hand cut strips are just as good. Just watch your fingers!
Mastering the Art of the Five Minute Sizzle
Now we get to the fun part. The process is fast, so make sure your jars are clean and ready to go before you turn on the stove. This recipe is designed to be efficient, perfect for squeezing into a busy afternoon.
- Prep the peppers: Slice the bell peppers into 1/4 inch strips until you have a pile of vibrant ribbons. Note: Uniformity ensures even pickling.
- Slice the onion: Cut the red onion into very thin half moons so they soften quickly in the jar.
- Pack the jars: Stuff the pepper and onion strips into your clean glass jars, alternating colors.
- Add aromatics: Drop the smashed garlic, mustard seeds, peppercorns, and red pepper flakes directly into the jars.
- Mix the brine: Combine the apple cider vinegar, water, honey, and sea salt in your saucepan.
- Heat the liquid: Bring the mixture to a simmer over medium heat until the honey and salt have completely dissolved.
- Pour the brine: Carefully ladle the hot liquid over the peppers until they are fully submerged.
- Remove air bubbles: Gently tap the jar on the counter or use a butter knife to release any trapped air.
- Seal and cool: Tighten the lids and let the jars sit at room temperature for about 30 minutes.
- Chill and set: Place the jars in the fridge for at least 1 hour until the liquid is cold and the flavors have melded.
Avoiding Common Blunders for Crisp Results Everytime
Even though this is a "no fuss" recipe, there are a few little tricks I've learned from making these for years. The biggest mistake people make is using old peppers. If the vegetable is already soft, the vinegar won't miraculously make it crunchy again.
Soggy Pepper Texture Issues
If your peppers turn out limp instead of crisp, it’s usually because the brine was boiling for too long or the peppers were too old. You want the brine to just reach a simmer, not a rolling boil. If you pour boiling hot liquid over thin peppers, it essentially "cooks" them, destroying that snap.
| Problem | Root Cause | Solution |
|---|---|---|
| Soft Peppers | Brine was too hot | Let brine cool for 2 minutes before pouring |
| Bitter Aftertaste | Over toasted seeds | Only simmer aromatics; never fry them in the pan |
| Dull Colors | Too much light exposure | Store jars in the back of the fridge away from light |
Another thing to watch for is the salt. If you use iodized table salt, your brine might turn cloudy or even take on a slightly metallic taste. Stick to sea salt or kosher salt for the cleanest flavor profile. This is similar to the care taken when balancing flavors in my Crockpot Chicken Enchiladas recipe.
Common Mistakes Checklist:
- ✓ Use only firm, glossy peppers with no soft spots.
- ✓ Ensure the honey is fully dissolved before pouring the brine.
- ✓ Don't skip the "tapping" step to remove air bubbles, which can cause spoilage.
- ✓ Always use a clean, non reactive glass jar for storage.
- ✓ Let the jars cool on the counter before putting them in the fridge to avoid cracking the glass.
Clever Swaps to Suit Every Family Pantry
One of the reasons I love making Pickled Bell Peppers is how adaptable they are. If your family doesn't like honey, or if you ran out of apple cider vinegar, you can still make a delicious batch with what you have on hand.
| Original Ingredient | Substitute | Why It Works |
|---|---|---|
| Honey | Agave Nectar | Dissolves instantly and has a neutral sweetness |
| Apple Cider Vinegar | White Wine Vinegar | Maintains a light color and offers a sharp, clean acidity |
| Sea Salt | Kosher Salt | Provides the same clean saltiness without additives. Note: Use slightly more by volume |
If you are looking for a completely different flavor profile, you can swap the mustard seeds for cumin seeds and add a few sprigs of fresh cilantro. This version pairs incredibly well with Mexican inspired dishes. For another way to use fresh produce in a crowd pleasing way, you might enjoy The Fresh Healthy recipe for 7 layer dip.
Scaling the Recipe for Large Crowds
When you're hosting a big family gathering, you'll definitely want to double or triple this. Scaling Up: If you double the recipe, use a larger pot for the brine but don't feel the need to double the spices exactly. Start with 1.5x the mustard seeds and peppercorns, then taste.
Scaling Down: If you only have one pepper left in the fridge, you can easily halve the brine. Just use a small 8oz jar and reduce the simmer time to just a minute.
Best Practices for Storing Your Colorful Harvest
Because these are refrigerator pickles and not heat processed in a canner, they must stay in the fridge. They aren't shelf stable, but they will last quite a while if you treat them right.
- Fridge
- These will stay fresh and crunchy for up to 3 weeks. After that, they may start to soften, though they are still safe to eat as long as the brine remains clear.
- Freezer
- I don't recommend freezing pickled peppers. The freezing process breaks down the cell walls, and when they thaw, they'll be mushy.
- Zero Waste Tip
- Don't throw away that leftover brine! Once you've eaten all the peppers, use the liquid as a base for a tangy salad dressing or use it to quick pickle some thinly sliced cucumbers. You can also toss the garlic cloves into a stir fry for an extra punch of flavor.
Debunking Pickling Methods and Myths
There is a lot of misinformation out there about what it takes to make a safe and tasty pickle. Let's clear up a few things so you can cook with confidence.
Myth: You must boil the jars to make them safe. While true for long term shelf storage, it's not necessary for refrigerator pickles. As long as your jars are clean and you keep the peppers in the fridge, the high acidity of the vinegar does the work of keeping bacteria at bay.
Myth: Pickling takes all the nutrients out of the vegetables. Actually, pickling can help preserve many vitamins. While some heat sensitive vitamins like Vitamin C might decrease slightly during the brine pour, the acidity helps keep the vegetables from oxidizing and losing their nutritional value as quickly as raw veggies might.
Hearty Pairings for Your Crowded Family Table
These peppers are so versatile that I find myself putting them on almost everything. They offer a much needed acidic "lift" to heavy, rich foods.
- The Ultimate Sandwich Topping: Layer these onto a classic Italian sub or a grilled cheese. The crunch cuts right through the fat of the cheese and meat.
- The Taco Game Changer: Forget plain salsa; top your carnitas or grilled fish tacos with a heap of these peppers and onions. They add a brightness that makes the flavors sing.
- Salad Stir In: Chop them up and toss them into a grain salad or a potato salad. They provide a much better texture than standard relish.
If you are looking for more slow cooked comfort to serve alongside these, check out this Classic Slow Cooker recipe for beef chili. The cool, crisp peppers are the perfect foil to a warm, spicy bowl of chili. Whether you're feeding a house full of kids or just looking to meal prep for the week, these Pickled Bell Peppers are a reliable, hearty addition to your kitchen repertoire. Trust me, once you start keeping a jar in the fridge, you'll wonder how you ever ate a meal without them.

Recipe FAQs
What is the 3/2:1 rule for pickling?
No standard rule applies to quick refrigerator pickles. The 3:2:1 ratio typically refers to canning (3 parts water, 2 parts vinegar, 1 part sugar), but this quick recipe uses a simpler 1:1 vinegar-to-water ratio for maximum tang and simplicity.
Are pickled bell peppers good for you?
Yes, they are a healthy, low-calorie addition. Pickling preserves many of the vitamins found in fresh peppers, and the fermentation process (if you were using that method) introduces beneficial probiotics, though this quick brine primarily relies on vinegar preservation.
How long to soak bell peppers in vinegar before they are ready to eat?
Chill for at least 1 hour before eating. For optimal flavor infusion where the brine has fully penetrated the peppers, wait 24 hours, but they are safe and tasty once the liquid is completely cold.
Why do you soak peppers in salt water before pickling?
This recipe does not require a pre-soak in salt water. Soaking in salt water is often used for cucumbers to draw out excess moisture and ensure a crispier result, but bell peppers are sturdy enough that direct brining works perfectly well.
How do I ensure my refrigerator pickles stay crunchy?
Keep the brine temperature low when pouring. Let the hot brine rest for two minutes off the heat before pouring it over the peppers; pouring boiling liquid essentially cooks the peppers, which destroys the cell structure responsible for the snap.
What is the best vinegar substitute if I don't have apple cider vinegar?
Use white wine vinegar as the primary replacement. White wine vinegar maintains a light color and offers a sharp, clean acidity similar to apple cider vinegar, though it lacks the slight fruity undertone.
How long can I safely store these refrigerator pickles?
Keep them refrigerated for up to 3 weeks. Since these are quick pickles and not fully processed for shelf stability, they must remain cold to maintain safety and maximum crunch.
Quick Pickled Bell Peppers
Ingredients:
Instructions:
Nutrition Facts:
| Calories | 24 kcal |
|---|---|
| Protein | 0.4 g |
| Fat | 0.2 g |
| Carbs | 4.6 g |
| Fiber | 0.5 g |
| Sugar | 3.8 g |
| Sodium | 443 mg |
