Pumpkin Bars: Dense and Moist with Cream Cheese Frosting
- Time: Active 15 minutes, Passive 25 minutes, Total 40 minutes
- Flavor/Texture Hook: Spiced, tender crumb with velvety frosting
- Perfect for: Autumn potlucks, family gatherings, or easy meal prep treats
- Why You'll Love These Pumpkin Bars
- Essential Recipe Specs for Success
- Smart Grocery Shopping List Breakdown
- Kitchen Equipment for Easy Baking
- Step By Step Baking Guide
- Troubleshooting and Common Baking Mistakes
- Creative Flavor Variations to Try
- Storage Guide and Zero Waste
- Best Ways to Serve Squares
- Recipe FAQs
- 📝 Recipe Card
Why You'll Love These Pumpkin Bars
Every year, when the air finally turns crisp and the leaves start their slow descent onto my porch, there is one scent that signals "home" more than any other. It isn't the fireplace or the pine needles; it's the warm, spicy aroma of these bars wafting from the kitchen.
I remember the first time I brought a batch of these to my grandmother's house for Thanksgiving. The table was already overflowing with pies and tarts, but these little squares were the first to disappear. My uncle actually hid two in a napkin just to make sure he had a snack for the ride home!
It’s that kind of recipe the one that turns a crowded table into a huddle of happy people reaching for seconds.
We’ve all had those pumpkin desserts that look beautiful but end up tasting like dry cardboard or, even worse, a soggy mess. I spent years trying to find the right balance, and I’ve realized that the secret isn’t in fancy spices or expensive ingredients.
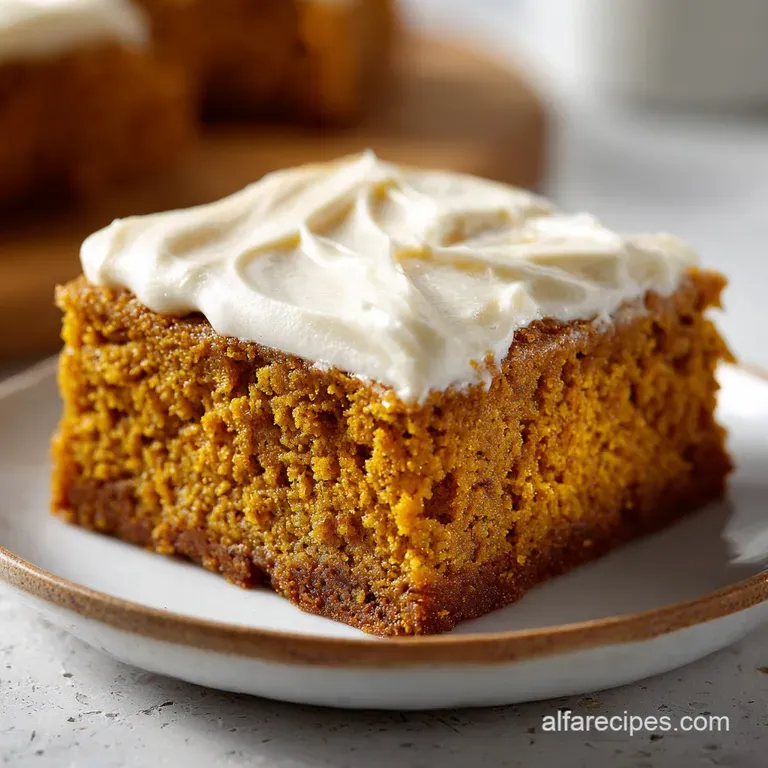
It’s about how you treat the moisture in the pumpkin. These bars are thick, soft, and have a crumb that feels almost like a cross between a moist cake and a rich brownie. They aren't fussy, they don't require a stand mixer for the base, and they are incredibly forgiving if you happen to be a "measure by-eye" kind of cook.
When you take that first bite, you get the cooling tang of the cream cheese, followed immediately by the warmth of the cinnamon and the earthy depth of the pumpkin. It’s a comforting hug in dessert form.
Whether you’re feeding a house full of energetic kids or hosting a quiet Sunday dinner with friends, these squares fit the moment perfectly. They’re sturdy enough to be eaten with your hands but decadent enough to serve on a nice plate with a fork.
Honestly, I’ve been known to have a leftover square with my coffee on Monday morning, and I highly recommend you do the same.
Essential Recipe Specs for Success
Understanding the mechanics behind your bake is what turns a good cook into a great one. We aren't just tossing things in a bowl; we're building a structure that can hold onto moisture without collapsing.
In this recipe, we rely on the interaction between the eggs and the oil to create a stable base that keeps the bars from drying out in the oven's heat.
- Fat Emulsion: The oil and eggs are whisked until glossy, which ensures the fat is evenly distributed so every bite is equally tender.
- Leavening Balance: Using both baking powder and baking soda provides an initial lift and then a steady rise, preventing a dense, "leaden" texture.
- Starch Hydration: Allowing the dry ingredients to meet the wet pumpkin mixture slowly prevents the flour from forming too much gluten, which would make the bars tough.
- Thermal Stability: The pumpkin puree acts as a heat buffer, keeping the internal temperature stable so the edges don't burn before the center sets.
| Servings | Ingredient Adjustments | Pan Size | Cook Time |
|---|---|---|---|
| 12 people | Half the ingredients | 8x8 inch square | 22-25 minutes |
| 24 people | Full recipe (as written) | 13x9 inch rectangle | 25 minutes |
| 48 people | Double all ingredients | Two 13x9 inch pans | 25-28 minutes |
This serving size calculator is your best friend when planning for the holidays. If you're hosting a massive bash, doubling the recipe is as simple as using two pans. Just remember to rotate them halfway through the baking time to ensure the heat hits every corner evenly.
Smart Grocery Shopping List Breakdown
When you head to the store for these ingredients, quality matters, but so does choosing the right "type" of product. For example, when buying pumpkin, you must grab the can that says "100% Pure Pumpkin" and not the "Pumpkin Pie Mix." The mix already has spices and sugar added, which will completely throw off the balance we've built here.
I once made that mistake and ended up with bars so sweet they were actually crunchy not the velvety vibe we're going for!
| Ingredient | Science Role | Pro Secret |
|---|---|---|
| Pumpkin Purée | Provides structure and hygroscopic moisture | Blot with a paper towel if it looks watery to concentrate flavor. |
| Vegetable Oil | Keeps the crumb tender even when cold | Use a neutral oil like canola to let the spices shine through. |
| Large Eggs | Acts as the primary binder and adds richness | Use room temperature eggs so they incorporate without curdling the oil. |
| Cream Cheese | Provides the acidic tang to balance the sugar | Always use full fat blocks; the "spreadable" tubs have too much air and water. |
Beyond the basics, think about your vanilla. Using pure vanilla extract rather than the imitation stuff makes a world of difference in the frosting. The imitation version often has a chemical aftertaste that becomes very obvious when mixed with powdered sugar. If you're looking to simplify your week, you might even consider doing some roasted vegetable meal prep on the same day you bake these, since your oven will already be hot and ready to go.
Shopping List for the Spiced Base
- 4 large eggs Why this? They provide the structural protein needed to lift the heavy pumpkin.
- Substitute: 1 cup unsweetened applesauce (yields a denser, flatter bar).
- 1 ⅔ cups (335g) granulated sugar Why this? Sugar tenderizes the crumb by slowing gluten development.
- Substitute: Light brown sugar for a deeper, molasses like flavor.
- 1 cup (240ml) vegetable oil Why this? Oil stays liquid at room temp, keeping the bars soft.
- Substitute: Melted coconut oil (adds a very slight tropical hint).
- 15 oz (425g) pumpkin purée Why this? The backbone of the flavor and moisture.
- Substitute: Roasted and mashed butternut squash.
- 2 cups (250g) all purpose flour Why this? Provides enough protein for structure without being "bread like".
- Substitute: 1:1 gluten-free baking blend.
- 2 tsp ground cinnamon
- 2 tsp baking powder
- 1 tsp baking soda
- 1 tsp salt
- 2 tsp pure vanilla extract
For the Signature Cream Cheese Frosting
- 8 oz (225g) cream cheese, softened Why this? The fat content ensures a thick, pipeable consistency.
- Substitute: Mascarpone for a richer, less tangy finish.
- ½ cup (115g) unsalted butter, softened
- 2 cups (240g) powdered sugar
- 1 tsp vanilla extract
Kitchen Equipment for Easy Baking
You don't need a professional pastry kitchen to make world class Pumpkin Bars, but having the right basics makes the process much smoother. I personally prefer a glass 13x9 inch pan because it allows me to see the browning on the bottom, but a light colored metal pan works just as well.
Avoid dark colored pans if possible, as they absorb heat too quickly and can result in burnt edges before the middle is done.
A good whisk is essential for the wet ingredients. You want to see that mixture become "glossy" that’s your sign that the oil and eggs have successfully bonded. For the dry ingredients, a simple mesh strainer or a whisk in a separate bowl will do the trick to get rid of any stubborn flour clumps.
When it comes to the frosting, a hand mixer is your best friend. Trying to beat cold cream cheese by hand is a workout nobody needs on a relaxing Sunday afternoon!
Finally,, make sure you have a toothpick or a thin skewer handy. Testing for doneness is the most critical part of this recipe. Because the batter is quite wet, the "press to test" method doesn't always work. You need to see that toothpick come out clean or with just a few moist crumbs attached.
If it’s still coated in wet batter, give it another three minutes.
step-by-step Baking Guide
- Preheat your oven to 350°F (175°C). Grease a 13x9 inch baking pan thoroughly with butter or non stick spray. Note: This ensures the bars release easily without tearing the bottom.
- In a large mixing bowl, combine the 4 eggs, 1 ⅔ cups granulated sugar, 1 cup vegetable oil, and 15 oz pumpkin purée. Whisk vigorously for about 2 minutes until the mixture is glossy and fully emulsified.
- In a separate medium bowl, whisk together the 2 cups flour, 2 tsp cinnamon, 2 tsp baking powder, 1 tsp baking soda, and 1 tsp salt. Note: Mixing dry ingredients separately prevents "clumps" of baking soda in your finished bars.
- Gradually fold the dry ingredient mixture into the wet pumpkin mixture using a spatula. Mix only until no flour streaks remain to avoid overworking the gluten.
- Pour the batter into your prepared pan and use the spatula to spread it evenly into the corners. Bake for 25 minutes until a toothpick inserted into the center comes out clean.
- While the bars are in the oven, take your cream cheese and butter out of the fridge to soften. Note: Cold butter will result in a lumpy, "broken" frosting.
- Remove the pan from the oven and let it sit on a wire rack. You must wait until the bars are entirely cool to the touch before frosting. If the pan is even slightly warm, the frosting will melt into a puddle.
- Prepare the frosting by beating the softened 8 oz cream cheese and ½ cup butter with an electric hand mixer until smooth. Gradually add the 2 cups powdered sugar and 1 tsp vanilla, beating until the texture is light and fluffy.
- Spread the frosting over the cooled bars in a thick, even layer. Use the back of a spoon to create little "swoops" for a professional look.
- Cut into 24 even squares and serve. Note: For the cleanest cuts, wipe your knife with a damp cloth between every slice.
Troubleshooting and Common Baking Mistakes
Even the best of us have bad days in the kitchen. If your bars don't come out quite like the picture, don't panic! Most issues are caused by small variances in temperature or measurement. The most common pitfall I see with deens pumpkin bars is over mixing.
Once that flour hits the wet ingredients, you need to be gentle. If you stir it like you're trying to win a race, you'll end up with a rubbery texture instead of a soft crumb.
The "Sunken Center" Syndrome
If your bars look like they’ve developed a crater in the middle, it’s usually because the oven door was opened too early. That rush of cool air can cause the delicate structure to collapse before it’s set. Another culprit is using expired baking powder. Check the date on your tin!
To fix a sunken center, don't toss it simply fill the "valley" with a little extra cream cheese frosting. No one will ever know.
| Problem | Root Cause | Solution |
|---|---|---|
| Dense/Heavy Bars | Over mixing the batter | Fold gently with a spatula until just combined. |
| Lumpy Frosting | Cold butter or cream cheese | Microwave in 5 second bursts or let sit at room temp longer. |
| Wet/Soggy Bottom | Pumpkin was too watery | Blot the purée with paper towels before mixing next time. |
Common Mistakes Checklist
- ✓ Check that your baking soda isn't more than six months old for the best lift.
- ✓ Ensure the pumpkin purée is plain and not the pre spiced pie filling.
- ✓ Let the bars cool for at least 1 hour before attempting to frost them.
- ✓ Measure your flour by spooning it into the cup rather than dipping the cup into the bag (prevents packing).
- ✓ Use full fat cream cheese for a frosting that holds its shape.
Creative Flavor Variations to Try
While the classic recipe is a masterpiece on its own, there is plenty of room to get creative. If you’re a fan of Paula Deens pumpkin bars, you know that sometimes adding a little extra "oomph" can make a dish signature to your family.
I love adding a handful of toasted pecans or walnuts to the batter for a bit of "shatter" and crunch. The saltiness of the nuts cuts through the sweetness of the sugar beautifully.
If you’re looking for a lighter option for a cold evening, these bars are a fantastic follow up to a bowl of spiced vegetable soup. The spices in the soup echo the cinnamon in the dessert, creating a cohesive theme for your dinner. You can even experiment with the frosting by adding a teaspoon of maple syrup or a pinch of freshly grated nutmeg to change the flavor profile slightly.
- The Cinnamon Roll Twist: Swirl a mixture of brown sugar and extra cinnamon into the batter before baking for a marbled look.
- The Chocolate Chip Upgrade: Fold in ½ cup of semi sweet chocolate chips. The bitterness of the chocolate is velvety against the sweet pumpkin.
- The gluten-free Swap: Use a high-quality 1:1 gluten-free flour blend. Because these bars are moisture heavy, the texture remains excellent.
Storage Guide and Zero Waste
These bars are actually better the second day! The flavors have time to meld, and the moisture redistributes throughout the crumb. To keep them fresh, store them in the refrigerator in an airtight container.
Because of the dairy in the cream cheese frosting, they shouldn't sit out at room temperature for more than two hours. They will stay delicious in the fridge for up to 5 days.
If you find yourself with leftovers that you can't finish, you can actually freeze them. Wrap individual squares tightly in plastic wrap and then place them in a freezer bag. They’ll stay good for up to 3 months. When you're ready for a treat, just let a square thaw in the fridge overnight.
For a zero waste tip, if you have a little bit of pumpkin purée left in the can, don't throw it out! Stir it into your morning oatmeal or mix it with a bit of yogurt for a seasonal snack. You can even use the leftover frosting as a dip for apple slices.
Best Ways to Serve Squares
When it comes to serving, presentation is everything. I like to dust the top of the frosted bars with a tiny bit of extra cinnamon or pumpkin pie spice right before cutting. It makes them look like they came straight from a high end bakery.
If you're serving these at a party, try cutting them into smaller, bite sized "tapas" squares. It makes it easier for people to grab a piece while they're mingling.
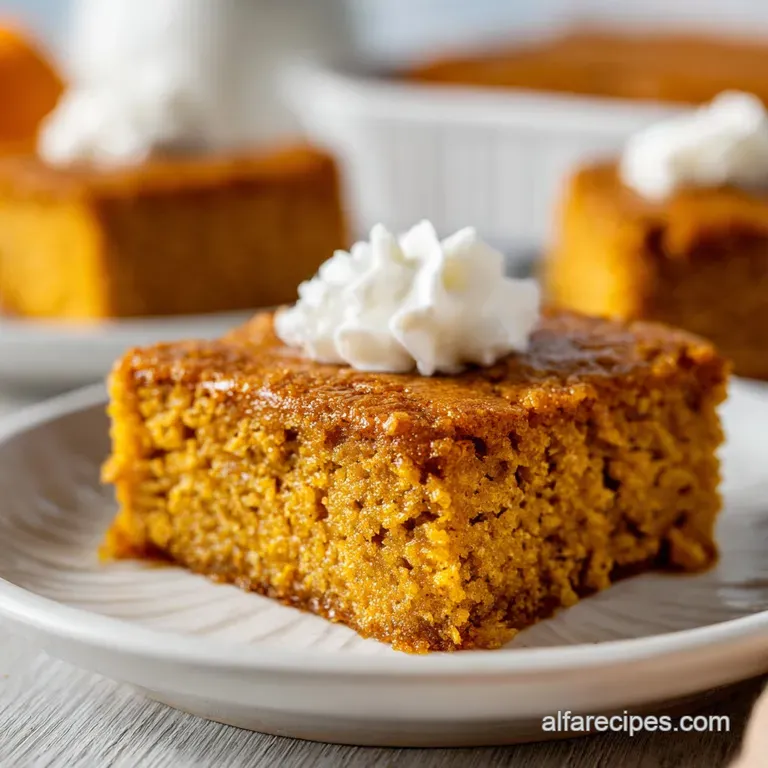
For a more formal dessert, serve a square with a small dollop of whipped cream on the side and a drizzle of caramel sauce. The way the caramel hits the tangy frosting is absolutely brilliant. No matter how you serve them, the most important thing is the company.
These bars are meant to be shared, passed around a table, and enjoyed while catching up on life. That’s the real magic of a recipe like this it brings people together over something simple, sweet, and made with love. It's the ultimate easy fall pumpkin dessert that never goes out of style.
One final trick I've learned over the years: if you want that frosting to look extra white and bright, add the powdered sugar in small increments. This allows you to control the thickness and prevents the butter from yellowing the mixture too much. Your deens pumpkin bars will look as good as they taste!
Now, go preheat that oven and get baking your kitchen is about to smell incredible.

Recipe FAQs
Is it true that I should bake these at 400°F for a faster result?
No, this is a common misconception. You must use the recommended 350°F (175°C) to ensure the center bakes evenly without the edges drying out or burning.
How to ensure the pumpkin bars have a soft, tender crumb?
Fold the dry ingredients into the wet mixture gently with a spatula. Stop mixing immediately once no flour streaks remain, as overworking the batter will result in a tough, rubbery texture instead of a soft crumb.
Can I store these bars at room temperature?
No, they should not stay out for more than two hours. Because the cream cheese frosting contains dairy, you must store them in an airtight container in the refrigerator to keep them safe and fresh.
How to achieve a perfectly glossy batter before adding the dry ingredients?
Whisk the eggs, sugar, vegetable oil, and pumpkin purée vigorously for exactly 2 minutes. This process emulsifies the wet ingredients, creating the smooth, glossy base needed for the perfect final texture.
Is it necessary to wait until the bars are completely cool before frosting?
Yes, applying frosting to warm bars will cause it to melt and slide off. Ensure the bars are entirely cool so the cream cheese and butter topping sets into a smooth, stable layer.
How to store leftovers for long term use?
Wrap individual squares tightly in plastic wrap and place them in a freezer bag. This method prevents freezer burn and allows you to enjoy the 24 servings over a longer period.
Should I worry if the toothpick comes out clean before the 25-minute mark?
Yes, check the center of your bars as soon as they reach the 25-minute bake time. If the toothpick comes out clean, they are finished; pulling them out at the right time ensures they stay moist rather than drying out in the oven.
Classic Pumpkin Bars

Ingredients:
Instructions:
Nutrition Facts:
| Calories | 299 kcal |
|---|---|
| Protein | 2.8 g |
| Fat | 17.1 g |
| Carbs | 33.8 g |
| Fiber | 0.8 g |
| Sugar | 24.5 g |
| Sodium | 185 mg |
